
Tools
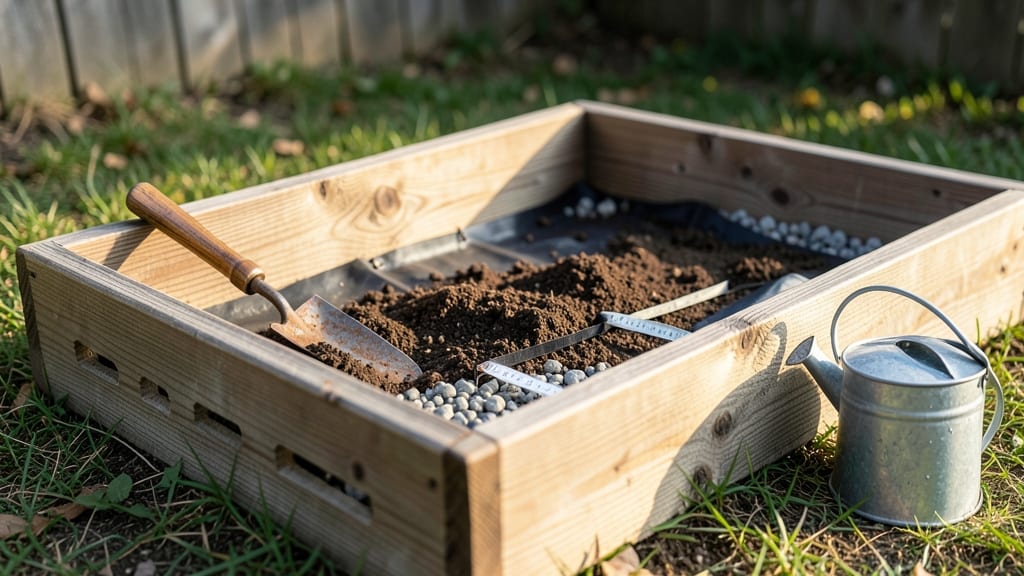
Raised garden bed drainage holes are the secret weapon against soggy roots and wasted water—I’ve seen plants drown in perfectly built beds just because of this one oversight. 🌱 The right spacing (about ¼-inch holes every 6–12 inches) keeps roots oxygenated while preventing erosion, and it’s easier than you think to get right during construction.
Most people grab a drill and go wild, but the real trick is balancing airflow and soil retention. Start with untreated lumber or cedar (it resists rot), then drill holes before lining the bed—this prevents fabric from clogging them later.
For extra insurance, add 2–3 inches of gravel at the bottom to create a drainage layer that won’t compact over time. You’ll notice the difference immediately: no more water pooling, fewer fungal diseases, and roots that grow deep instead of rotting.
Even my first attempt (which had holes too close together) showed better drainage after adding landscape fabric to filter out fine soil. Troubleshooting clogs is simple: snake out debris with a wire or re-drill if holes shrink over time.
Just avoid over-draining—keep a thin layer of soil over the gravel to hold moisture for thirsty plants like tomatoes or peppers.
📚 In This Guide
- What you need
- Instructions
- Tips and common mistakes
- Wrapping up and next steps
What you need
- ● Raised garden bed frame: Untreated wood (cedar, redwood, or composite lumber) – 2x6s or 2x8s, cut to your bed dimensions (e.g., 4x8 ft or custom size).
- ● Quantity: 4–8 pieces (depending on bed size and corner brackets vs. notched joints).
- ● Drill with hole saw or spade bit: 1/2" to 3/4" diameter (for drainage holes).
- ● Screws or decking screws: 2.5"–3" galvanized or stainless steel (resistant to rot). Quantity: ~20–50 screws (based on frame size).
- ○ Landscape fabric or hardware cloth: Optional but recommended to block weeds/rodents (cut to fit bed base).
- ○ Filling materials: Cardboard or newspaper (to smother weeds, optional).
- ● Drainage layer: 2–4 inches of gravel, pebbles, or crushed stone (1/4"–3/8" size).
- ● Soil mix: High-quality garden soil + compost (avoid clay-heavy soil). Quantity: ~12–18 cubic feet per 4x8 ft bed (adjust for depth).
- ● Corner brackets (for extra stability, especially for taller beds).
- ● Wood glue (for notched joints—adds strength!).
- ● Leveling feet or cinder blocks (to ensure even drainage and stability).
- ● Drip irrigation kit (for efficient watering and consistent moisture).
- ● Mulch (straw, wood chips) (to retain moisture and suppress weeds).
How to design proper drainage in raised garden beds
Good drainage isn't optional—it's the foundation of healthy roots and thriving plants.
🪴 Step 1: Plan Hole Placement Based on Bed Size
For a 4-foot by 8-foot raised bed, space drainage holes every 2-3 feet along the bottom edges. This creates an effective water evacuation system without compromising structural integrity. I like to place them in a staggered pattern—never directly opposite each other—so water flows outward rather than pooling in the center.
Use a 1-inch diameter hole as your standard. Larger holes (like 1½ inches) speed drainage but can let soil wash out during heavy rains. Mark hole locations with a pencil before drilling to avoid uneven spacing. A 4x8 bed should have 8-12 holes total—just enough to prevent waterlogging without turning your bed into a sieve.
✂️ Step 2: Drill Holes at the Right Height
Position holes 2-3 inches above the bed's base—this prevents soil from falling out while still allowing excess water to escape. I measure from the bottom edge of the wood (not the interior soil line) to ensure consistency. If your bed has landscape fabric as a barrier, cut small X-shaped slits at each hole location to let water through without clogging.
For cedar or redwood beds, I use a ½-inch drill bit first to make a pilot hole, then switch to a 1-inch bit to avoid splintering. For metal or composite beds, a step bit prevents chipping. Never drill through corner joints—water pooling there creates weak points that rot over time.
💧 Step 3: Test Drainage Before Planting
Fill the bed with water and watch how it drains. You're aiming for complete emptying within 30-60 minutes—any longer means insufficient holes or poor flow paths. If water pools in corners, add 1-2 extra holes near those spots. I also check for soggy soil after heavy rain; if it stays damp for more than a day, your drainage needs improvement.
For clay-heavy soils, add a 1-inch layer of gravel at the bottom before drilling. This creates a secondary drainage layer that prevents fine soil from clogging holes over time. Skip this step for sandy soils—they drain naturally without extra help.
🌱 Step 4: Maintain Holes Seasonally
Clean holes twice a year—once in early spring and again after fall planting. Use a wire brush to remove built-up soil or debris. I also check for splintered wood around edges and sand rough spots to prevent moisture traps. If a hole becomes too large, cover it with hardware cloth to keep soil in while still allowing water out.
Watch for moss or algae growth near holes—this signals poor airflow or excess moisture. Trim back any encroaching weeds that block drainage paths. A well-maintained system ensures roots stay oxygenated, even during heavy downpours.
Tips & tricks for perfect raised garden bed drainage
These simple strategies will help you create a drainage system that keeps your plants thriving for years.
Material Matters: Cedar and redwood naturally resist rot, making them ideal for raised beds with drainage holes. If you're using treated lumber, opt for PTFE-treated wood to avoid chemical leaching into your soil. For metal beds, stainless steel or galvanized steel won't corrode over time like aluminum might. The right material ensures your drainage system lasts through multiple growing seasons.
The 2-3 Feet Rule: When spacing holes every 2-3 feet along the bottom edges, think of it like a network of rivers. The staggered pattern prevents water from pooling in the center where roots need oxygen most. I've seen beds with holes directly opposite each other turn into soggy messes—water just circulates in circles instead of draining out. Trust me, that 30-minute test fill-up will reveal any weak spots in your flow pattern.
Height is Everything: Those 2-3 inches above the base aren't arbitrary—they're the Goldilocks zone. Too low and soil falls out; too high and water pools before draining. I measure from the outside bottom edge of the wood to keep this consistent. Pro tip: For beds with landscape fabric, cut those X-shaped slits at each hole location before drilling—it makes a huge difference in water flow without compromising soil retention.
Seasonal Checkup: Your twice-a-year maintenance isn't just about cleaning—it's about prevention. That wire brush isn't just for aesthetics; it removes built-up soil that can clog holes over time. I also check for any splintered wood around edges, which can trap moisture and encourage rot. Think of it like your car's oil change—regular maintenance prevents major repairs down the road.
Pro Tips for Raised Garden Bed Drainage Holes
- These simple strategies will help you create a drainage system that keeps your plants thriving for years.
- Material Matters: Cedar and redwood naturally resist rot, making them ideal for raised beds with drainage holes. If y...
- The 2-3 Feet Rule: When spacing holes every 2-3 feet along the bottom edges, think of it like a network of rivers. Th...
Frequently asked questions
Got questions about raised garden bed drainage holes?
You’re not alone! Here are answers to the most common concerns—from spacing to troubleshooting—so you can keep your plants thriving and your soil happy.
How many drainage holes should a raised garden bed have?
For optimal drainage, aim for 1–2 drainage holes per square foot of bed surface. If your bed is 4x8 feet, that’s roughly 32–64 holes total. Smaller holes (½–¾ inch in diameter) work well, but larger holes (1–1.5 inches) speed up drainage in heavy clay soil.
When is the best time to add drainage holes to an existing raised bed?
Add drainage holes before filling the bed with soil, ideally during construction. If your bed is already built, dig holes after the first planting season to avoid disturbing established roots. Spring or early fall is ideal—just avoid freezing temperatures or extreme heat.
What if my raised bed doesn’t have drainage holes? Can I fix it later?
Yes! Use a drill with a spade bit (for wood/plastic) or a hole saw (for metal/cedar). For temporary fixes, add a 1–2 inch layer of gravel or landscape fabric at the bottom before soil. Just avoid overfilling—leave 6–12 inches of space between soil and bed rim for water escape.
Do drainage holes work in cold climates with freezing soil?
Drainage holes are essential in cold climates to prevent waterlogging, which can freeze and damage roots. Use insulated beds (like cedar or thick wood) and add mulch (straw or leaves) to protect soil. Avoid holes near bed edges in extreme cold—they can let heat escape faster.
Will drainage holes let in weeds or pests?
Holes alone won’t invite weeds, but landscape fabric (with holes) or hardware cloth over the drainage layer can block pests like rodents. For weeds, add a 2–3 inch layer of cardboard under soil—it decomposes slowly and smothers grass while allowing water through.
Wrapping up and next steps
Perfect drainage isn’t just a nice-to-have—it’s the secret weapon for thriving plants in your raised garden beds! 🌱 By spacing drainage holes correctly (think every 12-18 inches for optimal airflow and root health), you’ll prevent waterlogging, boost nutrient absorption, and keep your garden flourishing season after season.
Now that you’re armed with the know-how, roll up your sleeves—it’s time to grab those tools and give your plants the foundation they deserve!
Next step: Sketch a quick layout of your bed’s drainage holes before digging in. Pro tip: Use a stencil or template for precision—your future self (and plants!) will thank you. Happy gardening! ✨