
Tools
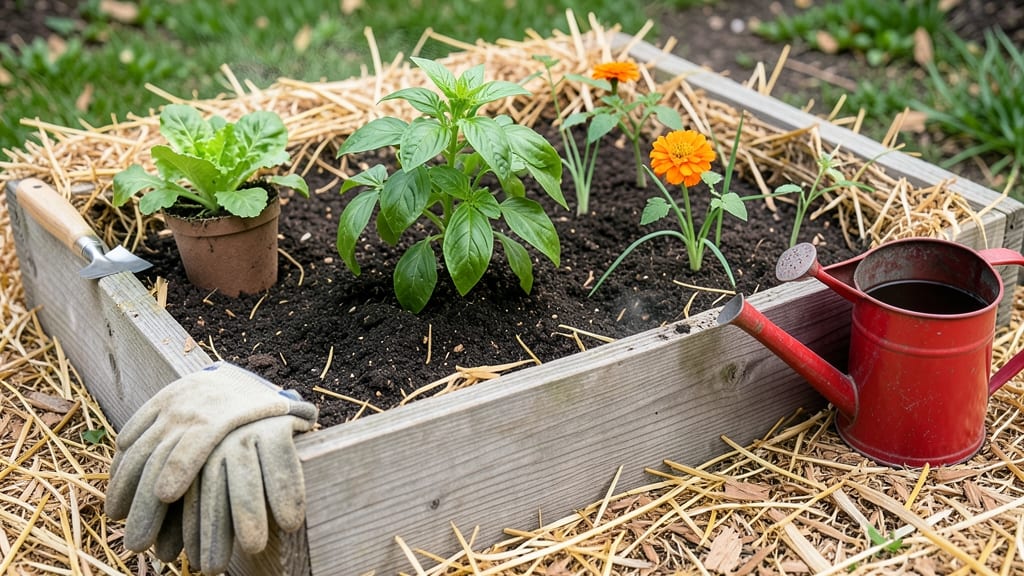
Building a raised garden bed off the ground changes everything—no more backbreaking weeding, no more soggy soil, and plants that thrive like they're in a five-star greenhouse. 🌱 I remember my first attempt after years of struggling with compacted clay; within weeks, my tomatoes were producing twice as much, and the carrots grew straight and sweet instead of gnarled.
The secret isn't just the soil—it's the control over drainage, warmth, and even where the sun hits your plants.
You don't need fancy materials to start: cedar planks resist rot, galvanized metal lasts forever, or even stacked stones work if you're going for a rustic look.
The key is keeping the bed at least 12 inches deep for root crops and 8 inches for greens—enough room for soil to breathe and roots to stretch without hitting hardpan.
My first bed was just 4x8 feet, but I've since expanded to a 10x12-foot L-shape that fits my backyard perfectly while keeping everything accessible.
What you get is a garden that works with you: no more fighting the soil, no more mystery diseases from last year's leftovers, and a space that stays weed-free for months once established.
The bed warms up faster in spring, stays drier in summer, and you can even grow cool-season crops like spinach in fall when the ground below is still too warm. Plus, the elevated height means less strain on your back—something my aging knees appreciate every harvest day.
Here's the best part: you can customize it for your climate. In hot zones, add a shade cloth; in wet areas, build a slight slope for runoff. And if you're short on space, go vertical with trellises or stackable beds.
The only rule? Start small, learn what works, and let your plants tell you what they need—because once you go elevated, you'll never go back to the ground again.
📚 In This Guide
- What you need
- Instructions
- Tips and common mistakes
- Wrapping up and next steps
What you need
- ● Lumber or cedar planks: 4–6 pieces (2x6 or 2x8, 8–12 ft long) – cedar resists rot best!
- ● Corner brackets or screws: Galvanized or deck screws (2.5–3 inches long, ~16–20 per bed)
- ● Garden fabric or hardware cloth: 1 piece (to block weeds/rodents, ~12" wider than bed base)
- ● Soil mix: 1–2 cubic yards (high-quality garden soil + compost, ~60% soil/40% organic matter)
- ● Level & measuring tape: For precision (a 4-ft level works great)
- ● Drill & drill bits: For pre-drilling screw holes (avoid splitting wood!)
- ○ Staple gun (optional but helpful):** For securing garden fabric
- ● Pre-cut bed frames: Save time with DIY kits (check local hardware stores!)
- ● Wood preservative: Extends lumber life (especially for pine)
- ● Drainage rocks: 1–2 inches of gravel at the bottom for extra airflow
- ● Raised bed kit with legs: Elevates beds further (12–24" off ground for mobility)
- ● Paint or stain: For a polished look (use non-toxic, plant-safe options!)
Step-by-step guide to building a raised garden bed off the ground
Here's how to create a weed-free, productive garden that protects plants and your back.
🪴 Step 1: Choose and Prepare the Location
Pick a flat, level spot that gets at least 6 hours of sunlight daily. Avoid low-lying areas where water pools after rain. I like to place my beds where they won't block foot traffic or shade nearby plants. Clear the chosen area of grass, weeds, and debris—this prevents future competition and makes assembly easier.
Measure your space carefully. A 4-foot by 8-foot bed gives enough room for most plants to thrive without overcrowding. Use a string line and stakes to mark the exact dimensions before digging. This ensures your bed stays perfectly rectangular and saves you from adjusting later.
🌱 Step 2: Build the Frame for Elevation
Construct a frame using untreated lumber (cedar or redwood lasts longest) or sturdy garden bed kits. For a 4-foot by 8-foot bed, cut 2-by-6-inch boards to your dimensions—four 4-foot lengths for the sides and two 8-foot lengths for the ends. Assemble the frame with 3-inch exterior screws or galvanized nails, leaving a 1-inch gap between corners for drainage.
Elevate the frame 6 to 12 inches off the ground using cinder blocks, bricks, or landscape pavers underneath. This keeps roots dry, prevents soil compaction, and makes tending to plants easier on your knees. I like to place the blocks at 2-foot intervals along the frame's perimeter for stability.
💧 Step 3: Layer the Soil for Optimal Plant Growth
Start with a 4-inch layer of coarse material—I use gravel or broken bricks—to improve drainage and prevent root rot. This is especially important if your area gets heavy rainfall. Next, add a 2-inch layer of organic matter like compost or well-rotted manure to feed the soil.
Fill the remaining space with a mix of topsoil and compost in a 60-40 ratio. This blend gives plants the nutrients they need while allowing excess water to drain away. Avoid garden soil from your yard—it often compacts and suffocates roots. Fluff the soil with a garden fork to aerate it before planting.
☀️ Step 4: Plant and Mulch for Long-Term Success
Arrange plants according to their sunlight and water needs, placing taller varieties like tomatoes or peppers in the north end of the bed (if it runs east-west) to avoid shading shorter plants. Space seedlings 12 to 18 inches apart, depending on the plant type. Water them deeply right after planting to settle the soil around the roots.
Top the bed with a 2-inch layer of mulch—I prefer straw or wood chips—to retain moisture, suppress weeds, and regulate soil temperature. Keep the mulch 2 inches away from plant stems to prevent rot. Water the bed once a week (or more in hot climates) until the soil is 6 inches deep and evenly moist.
✂️ Step 5: Maintain and Expand Your Elevated Garden
Check the bed weekly for weeds—they’ll still pop up occasionally, but elevated beds make pulling them a breeze. Add a 1-inch layer of compost every spring and fall to replenish nutrients. Rotate crops yearly to prevent soil depletion and disease buildup.
Extend the growing season by covering young plants with frost cloth in early spring or late fall. This keeps roots warm and protects tender foliage. If your bed starts to sag after a few years, reinforce the frame with additional screws or corner braces—it’s a sign the wood is holding up well, not failing.
Tips & tricks for perfect elevated garden beds
Building a raised garden bed isn't just about stacking materials—it's about creating a thriving ecosystem. These practical tips will help you avoid common pitfalls and maximize your garden's potential.
Location is Everything: That 6 hours of sunlight requirement is non-negotiable for most vegetables. I've learned the hard way that even a few hours less can stunt growth. If your yard has partial shade, consider building narrower beds (2-3 feet wide) to maximize light exposure for all plants. Also, avoid placing beds near large trees—their roots compete for nutrients and their shade alters soil temperature.
Frame Stability Matters: When elevating your frame 6 to 12 inches off the ground, don't skimp on support. I recommend placing cinder blocks every 2 feet along the perimeter, not just at the corners. This prevents sagging over time, especially when soil gets wet. For extra stability, use galvanized screws instead of nails—they won't rust and won't loosen when you water the bed.
Soil Layering Secrets: The 60-40 topsoil-to-compost ratio is perfect, but don't just dump it in. After adding your 4-inch drainage layer and 2-inch organic matter, give the soil a thorough fluffing with a garden fork. This creates air pockets that roots will love. For heavy clay soils, consider adding perlite to the mix—it improves drainage without changing the nutrient balance.
Plant Placement Strategy: That north-end placement for taller plants is brilliant, but here's what nobody tells you: rotate your bed's orientation based on sun exposure. If your yard gets afternoon sun, place the north end facing west instead. And when spacing seedlings 12 to 18 inches apart, consider their mature size—tomatoes need more room than lettuce, even if they start small.
Pro Tips for Raised Garden Bed Off The Ground
- Building a raised garden bed isn't just about stacking materials—it's about creating a thriving ecosystem. These prac...
- Location is Everything: That 6 hours of sunlight requirement is non-negotiable for most vegetables. I've learned the ...
- Frame Stability Matters: When elevating your frame 6 to 12 inches off the ground, don't skimp on support. I recommend...
Frequently asked questions
Got questions about raised garden beds off the ground? You’re not alone!
Here are answers to the most common concerns—so you can dive in with confidence and grow like a pro.
Why should I elevate my garden bed instead of planting in the ground?
Elevated beds improve drainage, soil quality, and root health by preventing compaction and reducing weeds. They also warm up faster in spring, give better access for people with mobility issues, and let you control soil mix perfectly. Plus, no more backbreaking kneeling!
When is the best time to build a raised bed off the ground?
Start in early spring or late fall to let the soil settle before planting. If building mid-season, prep the bed 4–6 weeks ahead to avoid disturbing roots. Just avoid freezing temps—soil needs time to warm and decompose organic matter. Pro tip: Test soil pH before filling!
Are there cheaper alternatives to wooden raised beds?
Try:
- Cinder blocks or bricks (stack with landscape fabric for stability).
- Galvanized steel troughs (durable and reusable).
- Straw bales (temporary, biodegradable option).
- Recycled materials like pallets or old fencing (sand edges to prevent splinters).
How do I keep pests out of an elevated garden bed?
Prevent pests with:
- Physical barriers: Copper tape around edges deters slugs; row covers shield veggies.
- Companion planting: Marigolds repel nematodes; basil deters mosquitoes.
- Neem oil or diatomaceous earth (sprinkle lightly on soil).
- Healthy soil: Earthworms and beneficial microbes crowd out pests naturally. →
Will a raised bed stay in place during heavy rain or wind?
Yes, if built correctly! Secure corners with stakes or screws (for wood) and fill with heavy, moist soil (not lightweight mulch). For extra stability:
- Use corner braces or L-brackets on wooden frames.
- Place beds on gravel or landscape fabric to prevent shifting.
- Avoid overwatering—soil erosion weakens structure.
Wrapping up and next steps
Building a raised garden bed off the ground is a game-changer for your gardening game! 🌱 Not only does it boost plant health and slash weeds, but it also makes tending to your garden a breeze—no more backaches or soil struggles.
With the right materials and a little elbow grease, you’ll create a thriving, low-maintenance oasis that’s easy on your wallet and the environment.
Ready to roll up your sleeves? Start small—pick a sunny spot, gather your supplies, and let your green thumb shine! Whether you’re a beginner or a seasoned pro, this project is totally doable. Happy planting! 🌿