
Tools
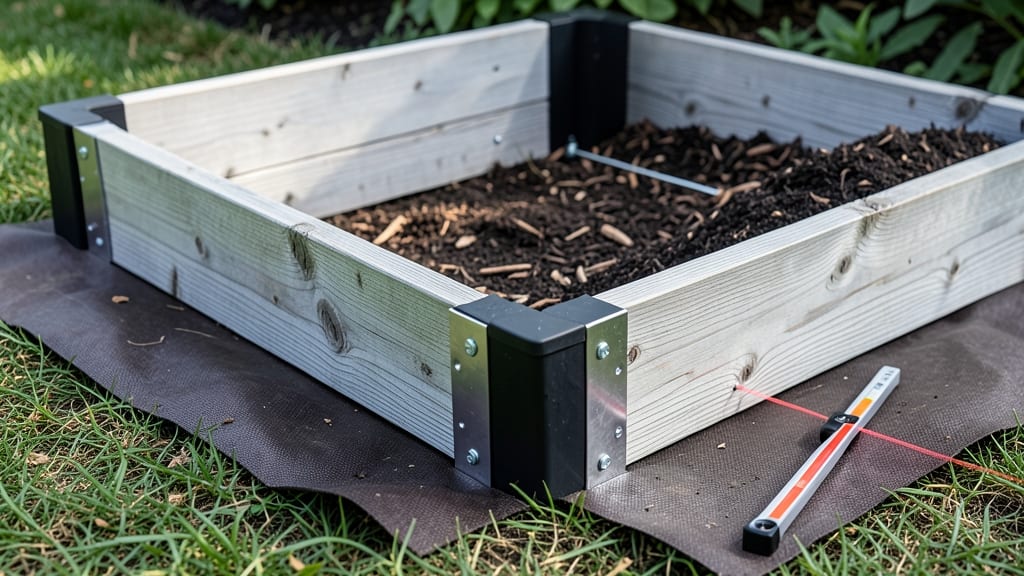
Heavy raised garden bed corner brackets need corner-to-corner strength that screws alone can't provide. 🌱 I’ve built enough raised beds to know that without proper corner brackets, your perfectly assembled frame will sag, warp, or even split over time—especially when filled with wet soil and plants.
The right brackets transform a wobbly DIY project into a lasting, sturdy garden feature that holds up for years.
Most gardeners think brackets are optional, but they’re the secret to square, stable beds that won’t shift when you step on them. Metal brackets (like galvanized steel or powder-coated aluminum) handle moisture and weight better than plastic, but plastic ones work for lightweight cedar or smaller beds.
I’ve used both—metal for my 6-foot cedar beds and plastic for my daughter’s tiny 3-foot herb planter—and the difference in longevity is night and day.
Installation takes 10 minutes per corner: just pre-drill holes, align the brackets flush with the frame, and secure with 2-3 screws per bracket. The payoff? A bed that stays perfectly level, resists rot, and looks intentional—not like a last-minute hack.
Plus, you’ll avoid the heartbreak of watching your hard work collapse under the weight of a single watering.
For larger beds or windy climates, add extra brackets mid-frame (every 2 feet) to prevent bowing. And if you’re worried about aesthetics, choose brackets that match your wood finish—no one will ever guess they’re there. Trust me, your future self (and your plants) will thank you.
📚 In This Guide
- What you need
- Instructions
- Tips and common mistakes
- Wrapping up and next steps
What you need
- ● Raised garden bed corner brackets: 4–8 brackets (depending on bed size; opt for heavy-duty galvanized steel for longevity).
- ● Wood: 2x6, 2x8, or 2x10 boards (cedar or redwood recommended for rot resistance). Calculate length based on your bed dimensions (e.g., 8 ft long boards for a 4’x8’ bed).
- ● Exterior screws: 2.5”–3” galvanized deck screws (100–200 screws, depending on bed size and bracket type).
- ● Landscape fabric: 1 roll (to suppress weeds and retain moisture).
- ● Mulch or soil: 6–12 cubic feet (depends on bed depth and size).
- ● Circular saw or miter saw (for precise cuts).
- ● Drill/driver (with screw attachment).
- ● Measuring tape and pencil.
- ● Speed square (for accurate angles).
- ● Level (to ensure your bed is even).
- ● Work gloves and safety glasses.
- ● Wood glue (for extra reinforcement at joints).
- ● Staple gun (for securing landscape fabric).
- ● Post hole digger (if elevating the bed with stakes).
- ● Stain or sealant (to protect wood from weather).
Step-by-Step guide to installing raised garden bed corner brackets
Here's how to reinforce your heavy wood frames for a sturdy, long-lasting raised bed.
🪴 Step 1: Measure and Mark Bracket Positions
Start by measuring the exact height of your bed frame at each corner—most brackets accommodate 6-12 inches of vertical support. Use a pencil to mark the center of each corner post at the desired bracket height, ensuring all marks align perfectly. I like to snap a chalk line between opposite corners to verify diagonal symmetry before committing to cuts or drilling.
If your frame has 2x12 boards, mark the center of the 3.5-inch wide face for proper bracket alignment. Uneven marks here will throw off the entire assembly. Double-check that all four marks are at the same height—even a ¼-inch difference can cause wobble over time.
✂️ Step 2: Pre-Drill Pilot Holes for Screws
Place your corner bracket against the marked position and trace its mounting holes onto the wood with a pencil. This prevents wood splitting when you drive screws later. For 2x6 or 2x8 framing, use a ⅛-inch drill bit to create pilot holes ½-inch deep—just enough to guide screws without stripping the wood.
I always pre-drill both the vertical and horizontal frame pieces where the bracket will attach. This ensures the screws go in straight and prevents the wood from cracking under pressure. For extra-heavy frames (like 8-foot long beds), consider using ½-inch exterior-grade deck screws instead of the standard 3-inch screws that come with many brackets.
💧 Step 3: Secure Brackets with Stainless Steel Screws
Position the bracket so its mounting holes align with your pilot holes. Drive in screws diagonally first to lock the bracket in place, then finish with the remaining screws. Use a cordless drill with torque control to avoid over-tightening—you want the bracket snug but not warping the wood. Stainless steel screws resist rust better than standard deck screws in damp soil conditions.
For maximum stability, I install brackets on both the inside and outside of the frame corners. This creates a double-reinforced joint that handles heavy soil loads and seasonal shifting. If your bed is wider than 4 feet, add a center support bracket along the long sides to prevent sagging over time.
☀️ Step 4: Test Stability Before Adding Soil
Once all brackets are installed, give the frame a firm shake to check for wobble. The corners should feel rigid, with no visible movement when you press down on the edges. If you notice any play, tighten the screws incrementally until the frame holds steady. This is your chance to catch mistakes before filling the bed—once soil is added, adjustments become much harder.
For extra peace of mind, I like to temporarily stake the corners to the ground using 4-foot rebar stakes driven into the soil at a 45-degree angle. This prevents the bed from shifting during filling or when heavy with plants. Remove the stakes after the bed is fully assembled and soil is in place.
🌱 Step 5: Reinforce with Landscape Fabric (Optional)
Before adding soil, line the inside of the frame with landscape fabric to prevent weeds from creeping up through the corners. Secure it with staple guns along the edges, tucking it neatly into the bracket joints. This step isn’t mandatory but saves hours of weeding later—especially in beds with 3-foot high walls where weeds grow aggressively.
Now your bed is ready for soil. The reinforced corners will handle years of heavy mulch, root systems, and seasonal weight shifts without collapsing. Just remember: the key to long-term stability is checking the brackets annually for loose screws and re-tightening as needed.
Tips & tricks for perfect raised garden bed reinforcement
These practical tips will help you avoid common mistakes and build a frame that lasts for years.
Precision Marking is Key: When marking bracket positions in Step 1, use a level to verify all marks are perfectly horizontal. I've seen frames wobble because one corner was marked just ¼-inch higher than the others—this tiny difference becomes a big problem when filled with soil. For extra accuracy, clamp a straightedge across opposite corners and mark both sides simultaneously to ensure symmetry.
Pilot Hole Technique: In Step 2, don't rush the pilot holes—start with a smaller bit (like ⅛-inch) and gradually widen to match your screw size. I learned this the hard way when a split board ruined a perfectly good bracket. For thick boards (like 2x12s), consider using a countersink bit to create a slight depression that hides the screw heads neatly. This makes future maintenance easier when checking for loose screws annually.
Screw Selection Matters: The instructions mention stainless steel screws, but I can't stress enough how important this is. Regular deck screws will corrode within a year in damp soil conditions. For beds over 4 feet wide, I recommend using ½-inch exterior-grade deck screws—they're longer and provide better grip. Always pre-drill holes slightly smaller than the screw shank to prevent wood splitting, especially with pressure-treated lumber which can be brittle.
Double-Check Stability: After Step 4's stability test, I go one step further: I place a 5-gallon bucket of water (about 40 pounds) in each corner of the empty frame. This simulates the weight of filled soil and helps identify any weak spots before you commit to filling. If the frame holds steady, you're good to go—if not, tighten those screws immediately before adding soil.
Pro Tips for Raised Garden Bed Corner Brackets
- These practical tips will help you avoid common mistakes and build a frame that lasts for years.
- Precision Marking is Key: When marking bracket positions in Step 1, use a level to verify all marks are perfectly hor...
- Pilot Hole Technique: In Step 2, don't rush the pilot holes—start with a smaller bit (like ⅛-inch) and gradually wide...
Frequently asked questions
Got questions about raised garden bed corner brackets?
You’re not alone! Here are answers to the most common queries to help you build with confidence.
What’s the best material for heavy-duty corner brackets?
For raised beds with thick wood (like cedar or redwood), opt for galvanized steel or heavy-duty aluminum brackets. These resist rust, handle moisture, and support frames up to 12” deep. Avoid plastic—they warp over time!
When should I install corner brackets during assembly?
Attach brackets after securing the bottom frame but before adding side panels. This ensures the corners align perfectly. Pre-drill holes to prevent wood splitting, especially with hardwoods like oak.
Are there cost-effective alternatives to corner brackets?
Yes! For lighter frames (<8” deep), use L-brackets with screws or corner notches (cut 45° angles on wood ends). For extra stability, add rebar stakes at each corner. DIY notches save money but require precise cuts.
How do I prevent brackets from rusting in wet climates?
Choose stainless steel or galvanized brackets and apply a waterproof sealant (like silicone) to screw holes. Elevate beds off the ground with gravel or pavers to reduce moisture exposure. Avoid painted brackets—they trap rust.
What if my brackets loosen over time?
Tighten screws immediately if you notice wobble, but if they keep loosening, replace with longer screws or add wood glue to the joints before reassembling. For extreme cases, use construction adhesive + brackets for extra grip.
Still unsure? Check the manufacturer’s weight limits—some brackets max out at 6” deep frames!
Wrapping up and next steps
Building a sturdy raised garden bed just got easier with the right corner-to-corner brackets! These simple yet powerful tools ensure your heavy wood frames stay secure, saving you time and frustration.
Whether you're a seasoned gardener or just starting out, strong corners mean happy plants and a long-lasting bed. 🌱
Ready to take the next step? Grab your brackets, gather your materials, and start building a garden bed that will stand the test of time—your green thumb will thank you!