
How To
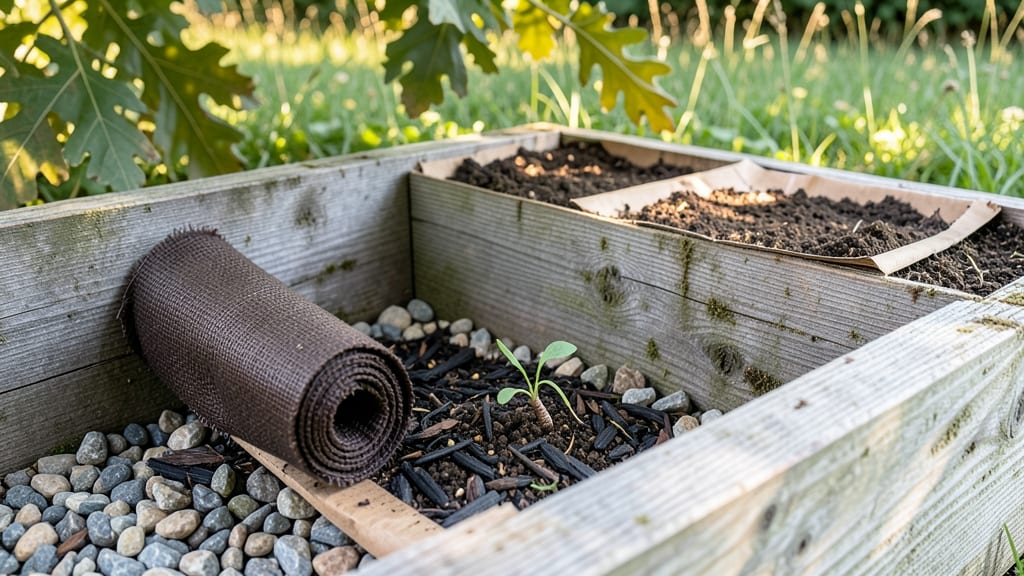
A modular grid system at the bottom of your raised bed can transform how your plants grow—better drainage, stronger roots, and soil that stays healthy for years. 🌱 I learned the hard way that skipping this step leads to soggy soil and stunted growth, but once I built my first grid, my tomatoes and peppers thrived like never before.
The right base isn’t just about keeping water out—it’s about creating space for roots to breathe and expand.
You’ll need landscape fabric or hardware cloth (¼-inch mesh works best) to block weeds and burrowing pests, plus gravel or pavers for drainage. Skip the wood slats—unless they’re pressure-treated and elevated—because they rot over time and turn into a soggy mess.
My go-to setup uses a 3-inch layer of gravel on top of the fabric, which keeps water flowing while preventing soil from washing through.
With the right bottom in place, your plants will grow stronger and faster—no more wilting from waterlogged roots or stunted growth from poor aeration. The grid system also makes it easier to swap out soil later if needed, so you’re not stuck with compacted dirt after a few seasons.
Plus, your back will thank you for not having to dig through heavy, wet soil every time you want to check on your plants.
This method works for any size raised bed, whether you’re growing veggies, flowers, or herbs. The key is balancing drainage with soil retention—too much airflow means nutrients wash away, but too little leads to rot.
Start with a solid, elevated base, and your garden will repay you with healthier plants and fewer headaches down the road.
📚 In This Guide
- What you need
- Instructions
- Tips and common mistakes
- Wrapping up and next steps
What you need
- ● Modular grid panels: 2–4 panels (depending on bed size; typically 2’x4’ or 4’x8’). Look for corrugated plastic, composite wood, or heavy-duty PVC with built-in drainage holes (✅ ¼"–½" spacing).
- ● Support beams: 2x4 or 2x6 lumber (cedar or pressure-treated; 8–12 ft lengths). Calculate based on bed dimensions (e.g., 4 beams for a 4’x8’ bed).
- ● Screws/nails: Deck screws (2.5"–3") or galvanized nails (100–200 pieces, depending on size).
- ● Landscape fabric: Non-woven, 3–4 ft wide (to block weeds and improve drainage).
- ● Gravel or coarse sand: ½"–¾" crushed stone (5–10 bags; ~1–2" layer for drainage).
- ● Drill/driver (with L-bracket or countersink bit for screws).
- ● Circular saw or miter saw (for cutting lumber to size).
- ● Tape measure, speed square, and pencil.
- ● Level (to ensure even support).
- ● Work gloves and safety glasses.
- ● Perforated drain pipes: 4" corrugated pipe (for advanced drainage; cut to fit bed length).
- ● Hardware cloth: ¼" mesh (to deter burrowing pests like voles).
- ● Adhesive or silicone sealant: For securing grid seams (if using plastic panels).
- ● Pre-made grid kits: Some brands sell pre-assembled drainage grids (e.g., blank">GrowVeggie or blank">True Grid).
How to build a modular raised bed grid for better drainage and root growth
Here's my go-to method for creating a sturdy, drainage-friendly raised bed foundation that keeps roots healthy and soil structure perfect.
🪴 Step 1: Choose and Prepare Your Base Materials
Start with a 4-foot by 8-foot frame made from untreated lumber or cedar planks (I use 2x6s for the sides and 1x6s for the bottom grid). The grid system requires 12-inch spacing between slats to allow water and air circulation. Cut your bottom slats to fit snugly between the frame's inner edges, leaving a 1-inch gap at the corners for expansion.
If you're working with an existing frame, remove any solid bottom boards first. You'll need 4-6 slats depending on your bed's width—just enough to create a grid pattern. Sand any rough edges to prevent splinters and ensure the wood is dry before assembly. I like to stain the bottom slats with a non-toxic wood preservative to extend their life, especially if they'll be exposed to moisture.
💧 Step 2: Assemble the Modular Grid System
Lay the frame flat on a level surface (a tarp helps contain sawdust). Begin by attaching the first slat 2 inches from the bottom edge of the frame, using deck screws or galvanized nails. Space the screws 12 inches apart to prevent warping. Repeat this process, adding slats every 12 inches vertically until you've created a grid pattern—think of it like a window screen but with wider gaps.
Here's the thing—don't make the gaps uniform all the way to the edges. Leave the outer 4 inches of the frame's bottom open to create a "moat" effect. This prevents soil from washing out while still allowing excess water to drain freely. Once assembled, flip the frame upright and check for level—adjust the legs if needed before adding soil.
☀️ Step 3: Add a Drainage Layer for Optimal Root Health
Before filling with soil, line the bottom of the grid with landscape fabric to block weeds and debris from clogging the drainage gaps. Cut it to fit snugly, tucking the edges under the slats. Next, add a 2-inch layer of coarse gravel or crushed stone (I use 3/4-inch river rock) over the fabric. This layer ensures water drains quickly without compacting.
Don't skip this step—it's the secret to preventing soggy roots. The gravel should fill the entire grid area, including the open moat sections. If you're in a climate with heavy rainfall, consider adding a 4-inch drainage layer instead. Once the gravel is in place, cover it with another layer of landscape fabric to keep it from mixing with your soil.
🌱 Step 4: Fill With Soil and Plant
Now for the fun part—filling your bed! Use a mix of topsoil, compost, and perlite (I blend 60% topsoil, 30% compost, and 10% perlite for perfect aeration). Fill the bed to within 2 inches of the top edge, leaving room for mulch. Tap the frame gently on all sides to settle the soil evenly—this prevents air pockets that can suffocate roots.
Here's where the grid really shines: the gaps allow roots to grow downward while still benefiting from the loose, well-draining soil above. Plant your vegetables or flowers as usual, but avoid placing them directly over the gaps—space them evenly to distribute root growth. Water deeply after planting to help the soil settle around the roots, and you'll see stronger, healthier plants within weeks.
⏰ Step 5: Maintain Drainage and Soil Structure
Check your drainage system after the first few heavy rains. If water pools on top of the gravel layer, it means the fabric is blocking flow—cut small slits in the fabric to create drainage paths. Over time, the soil will naturally settle, so add a 1-inch layer of compost annually to maintain depth and fertility.
This system works year after year with minimal upkeep. Just keep an eye on the wood—if the bottom slats start to rot, replace them before they compromise the frame. The modular grid also lets you customize your bed's drainage as needed, whether you're growing moisture-loving herbs or drought-tolerant perennials.
Tips & tricks for perfect raised bed drainage systems
Building a raised bed grid isn't just about following steps—it's about creating a foundation that actually works for your plants. Here's what I've learned after years of testing different designs.
Material Selection Matters: While cedar is my top pick for its natural rot resistance, untreated pine works too if you're on a budget. The key is avoiding pressure-treated lumber—those chemicals can leach into your soil over time. For the 12-inch spacing between slats, use a speed square to mark your cuts precisely. I've found that pre-drilling screw holes prevents wood from splitting when you attach the slats to the frame.
Grid Assembly Precision: When attaching those bottom slats in Step 2, use a level to ensure they're perfectly straight before securing them. The 2-inch spacing from the bottom edge is critical—this creates the proper airflow while maintaining structural integrity. Pro tip: Use a rubber mallet to gently tap slats into place after screwing, which helps them seat evenly without warping. And remember, those 4-inch open moat sections at the edges are non-negotiable for proper drainage.
Drainage Layer Optimization: The 2-inch gravel layer in Step 3 is your secret weapon against soggy roots, but here's the thing about the landscape fabric: don't just slap it in there. Fold the edges up the sides of the frame about 2 inches before tucking them under the slats. This creates a little reservoir that catches any fine soil particles that might try to slip through the gaps. For heavy clay soils, I've had great success doubling the gravel layer to 4 inches—it's worth the extra effort for plants like tomatoes that hate wet feet.
Soil Mixing Science: That 60-30-10 ratio of topsoil, compost, and perlite in Step 4 might seem arbitrary, but there's method to the madness. The perlite isn't just filler—it creates those tiny air pockets that roots absolutely love. When mixing, I like to add a handful of worm castings to the blend for that extra nutrient boost. And here's a little-known trick: after filling your bed, give it a good shake from side to side to help the heavier soil settle into the lower gaps while the lighter perlite stays on top.
Pro Tips for Raised Bed Bottom
- Building a raised bed grid isn't just about following steps—it's about creating a foundation that actually works for ...
- Material Selection Matters: While cedar is my top pick for its natural rot resistance, untreated pine works too if yo...
- Grid Assembly Precision: When attaching those bottom slats in Step 2, use a level to ensure they're perfectly straigh...
Frequently asked questions
Got questions about raised bed bottoms? You’re not alone! Here are some of the most common concerns—and straightforward answers—to help you get started with confidence.
What’s the best material for a raised bed bottom?
A modular grid system (like plastic, composite, or metal) is ideal for drainage and root health. Avoid solid bottoms—roots need airflow! If using landscape fabric, ensure it’s breathable (like agricultural-grade) to prevent waterlogging. For DIYers, hardware cloth or slatted wood works too.
Do I need a bottom at all if my soil drains well?
Even with "good" soil, a raised bed bottom helps prevent compaction and erosion over time. Plus, it keeps critters (like gophers) from tunneling in. For sandy or rocky soil, a grid system is a game-changer—it mimics natural aeration while protecting your plants’ roots.
How long does it take to install a modular grid bottom?
Most grid systems snap together in 15–30 minutes for a standard 4’x8’ bed. Pro tip: Lay out the grid before filling the bed to avoid awkward cuts. If using heavy materials (like metal), grab a helper—teamwork speeds up the process!
Will a grid bottom keep out weeds and pests?
A grid bottom reduces weeds by blocking sunlight to seeds, but it won’t eliminate them entirely. For pests, pair it with hardware cloth (1/4" mesh) at the base. Mulch on top also deters weeds while retaining moisture—double win!
Can I use a grid system in a cold climate?
Modular grids work year-round. In freezing temps, they prevent soil from heaving (expanding/contracting). For extra insulation, add straw or leaves in winter. Just ensure the material is UV-resistant if exposed to harsh sun.
What if my bed already has a solid bottom?
No worries! Drill 1/2" holes every 6–12 inches to improve drainage. For a grid retrofit, remove the old bottom, lay the grid, then refill. This upgrade boosts root health without starting from scratch.
Still unsure? Drop your question in the comments—we’re happy to help!
Wrapping up and next steps
Choosing the right raised bed bottom is a game-changer for your garden’s success—it boosts drainage, supports root health, and even extends your growing season!
Whether you opt for a modular grid system, hardware cloth, or landscape fabric, the key is balancing airflow, stability, and soil retention. Don’t let uncertainty hold you back—your plants (and future harvests) will thank you!
Ready to take the next step? Sketch your bed design, gather your materials, and start building! 🌱 And if you’re feeling adventurous, experiment with different setups to see what works best for your space. Happy gardening!