
Tools
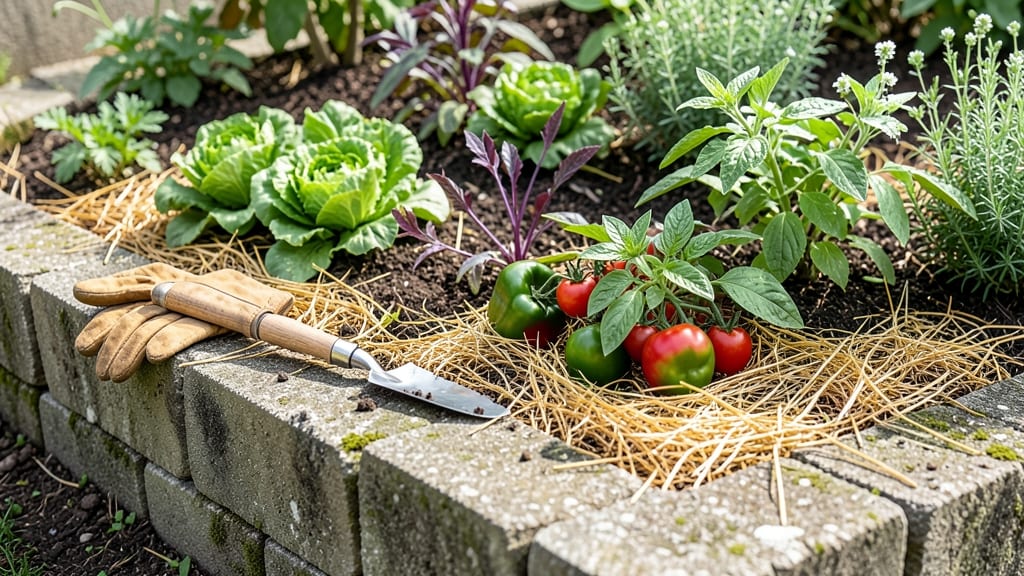
A cement block raised bed garden transforms your yard into a sturdy, long-lasting growing space that outlasts wood or metal frames. 🌱 I built mine last spring after struggling with uneven ground and poor drainage—now it’s the backbone of my vegetable patch, holding up perfectly even after heavy rains.
The blocks stack like LEGOs, creating a customizable planter that’s both functional and visually appealing, with no rot or warping to worry about over time.
The beauty of this system is how it adapts to any space—whether you’re working with a small balcony or a sprawling backyard.
You’ll need basic tools, a level, and a few hours on a weekend, but the results are worth it: raised beds that stay in place for decades, with built-in drainage that keeps roots happy.
The blocks also double as seating or planter walls, blending seamlessly into your landscape while giving you full control over soil quality and plant placement.
By the time you’re done, you’ll have a durable, customizable garden that produces year after year with minimal maintenance. The first season, my tomatoes thrived in the well-draining soil, and the next spring, I expanded it to include herbs and peppers—all without worrying about the frame collapsing.
It’s the kind of project that pays off in both beauty and harvests.
Works for beginners or experienced gardeners alike, and the modular design means you can start small or go big. Here’s how to build yours—step by step—without breaking the bank or your back.
📚 In This Guide
- What you need
- Instructions
- Tips and common mistakes
- Wrapping up and next steps
What you need
- ● Cement blocks (concrete masonry units, CMUs): Standard size: 16" (L) x 8" (W) x 8" (H) (or similar)
- ● Quantity: 24–40 blocks (depends on bed size; ~24 for a 4’x4’ bed, ~40 for a 4’x8’ bed)
- ● Landscape fabric: 1 roll (to block weeds and retain moisture)
- ● Garden soil: 1–2 cubic yards (high-quality, well-draining mix; consider adding compost)
- ● Gravel or crushed stone: 1–2 bags (for drainage at the base, ~½" layer)
- ○ Concrete adhesive or mortar: 1 tube (for securing blocks; optional for dry-stacking)
- ● Leveling tool: (to ensure your bed stays even)
- ● Wheelbarrow or shovel: (for moving soil and gravel)
- ● Measuring tape: (to plan and mark dimensions)
- ● Safety gear: Gloves, goggles, and a dust mask (for handling cement and gravel)
- ● Waterproof membrane (to protect blocks from moisture)
- ● Drainage pipe (if building in a low-lying area)
- ● Corner braces (for added stability in windy areas)
- ● Decorative edging (stone, metal, or wood trim for a polished look)
- ● Post caps or concrete sealer (to extend block lifespan)
Step-by-step instructions for building a cement block raised bed garden
Here's how to create a sturdy, long-lasting raised bed that keeps soil warm, improves drainage, and makes harvesting easier.
🪴 Step 1: Choose and Prepare the Site
Pick a level spot with 6+ hours of sunlight daily for vegetables. Avoid low areas where water pools after rain. I like to lay out the blocks first to visualize the shape—most people go for rectangular beds about 4 feet wide (so you can reach the center without stepping in) and 8 feet long.
Clear the area of grass, weeds, and rocks. Use a shovel to dig out any remaining sod—this prevents roots from competing with your plants later. For extra stability, I lay down a 2-inch layer of landscape fabric to block weeds while allowing water to drain through.
🌱 Step 2: Assemble the Block Frame
Start with one corner block and use a level to ensure it's perfectly even. Stack blocks vertically (not horizontally) to create the bed's walls—this gives you more height for soil depth. Most standard cement blocks are 8 inches tall, so I build mine 2 blocks high (16 inches total) to accommodate deep-rooted veggies like tomatoes and carrots.
Leave a 4-inch gap between the top of the blocks and your desired soil level. This accounts for the soil settling slightly over time. I like to use a rubber mallet to gently tap blocks into place—this ensures they're snug without cracking. For extra strength, fill the hollow centers of the blocks with gravel or broken concrete before adding soil.
💧 Step 3: Add Drainage and Filler Layers
Line the bottom of the bed with 2 inches of coarse gravel or crushed stone to improve drainage. This prevents waterlogging, which can rot roots. Next, add a 4-inch layer of cardboard (shredded or whole) to suppress weeds naturally. Wet the cardboard down so it breaks down slowly and doesn't blow away.
Fill the remaining space with a mix of topsoil and compost (I use equal parts). Avoid garden soil from your yard—it's often too dense and compacted. Fluff the soil with a rake to create air pockets for roots. If your bed is wider than 4 feet, add a 1-inch layer of straw mulch on top to retain moisture and keep weeds at bay.
✂️ Step 4: Plant and Maintain
Plant your vegetables according to their spacing needs—most leafy greens like 6 inches apart, while root crops need 3-4 inches. Water deeply after planting to settle the soil around roots. I like to use a soaker hose placed along the inside edge of the bed to water evenly without disturbing plants.
Check the soil moisture daily during hot weather—cement blocks dry out faster than ground soil. Add a 2-inch layer of mulch around plants to lock in moisture and regulate temperature. This bed will stay warmer in spring and cooler in summer, giving you a longer growing season for cool-season crops like lettuce and spinach.
Tips & tricks for building a cement block raised bed garden
A few smart strategies that'll make your raised bed project stronger, more productive, and easier to maintain.
Site Selection Secret: For that perfect 6+ hours of sunlight, check your yard's sun exposure throughout the day. Morning sun is ideal for leafy greens, while afternoon sun works better for tomatoes. I always test my spot for a full day first—you'll be surprised how much shade trees and buildings can cast at different times.
Block Assembly Technique: When stacking your 2 blocks high (16 inches total), use a level on every third block to catch any unevenness early. I've learned the hard way that even a slight tilt can cause drainage issues later. For extra stability, especially in windy areas, consider using galvanized screws through the block holes to connect them horizontally between layers—this creates a frame-like structure.
Drainage Upgrade: That 2-inch gravel layer is crucial, but don't stop there. I add a perforated drainage pipe along one side of the bed if my yard has heavy clay soil. This hidden pipe collects excess water and directs it away from the roots. For the cardboard layer, use thick, corrugated boxes—it breaks down slower and provides better weed suppression than thin grocery bags.
Soil Mix Mastery: When combining equal parts topsoil and compost, sift the topsoil through a 1/2-inch mesh screen first to remove rocks and clumps. This creates a lighter, fluffier soil that roots can penetrate easily. For the 1-inch straw mulch on wider beds, I like to mix in wood chips instead—they last longer and add organic matter as they decompose.
Pro Tips for Cement Block Raised Bed Garden
- A few smart strategies that'll make your raised bed project stronger, more productive, and easier to maintain.
- Site Selection Secret: For that perfect 6+ hours of sunlight, check your yard's sun exposure throughout the day. Morn...
- Block Assembly Technique: When stacking your 2 blocks high (16 inches total), use a level on every third block to cat...
Frequently asked questions
Got questions about building and maintaining a cement block raised bed garden? You’re not alone! Here are answers to the most common concerns—so you can grow with confidence.
What’s the best soil mix for a cement block raised bed?
A lightweight, well-draining mix is key! Use a blend of 60% topsoil, 30% compost, and 10% perlite or vermiculite to prevent compaction. Avoid heavy clay—it can waterlog the bed and stunt root growth. For extra fertility, add a handful of worm castings or aged manure at planting time.
How long does it take to build a cement block raised bed?
Most DIYers finish in 4–6 hours, depending on size and teamwork. Break it down:
- 1–2 hours: Lay the base (gravel or landscape fabric + pavers).
- 1–2 hours: Stack and secure the blocks (use rebar or corner braces for stability).
- 1 hour: Fill with soil and level.
Can I reuse old cement blocks from a demolished wall?
Yes! Salvaged blocks are eco-friendly and sturdy, but inspect them first:
- Check for cracks or crumbling edges (replace damaged blocks).
- Clean off mortar debris with a wire brush.
- Avoid blocks with stains or efflorescence (white powder)—they may leach chemicals.
Do cement block gardens overheat in summer?
They can! Blocks absorb heat, which may stress plants. Mitigate heat with these tricks:
- Paint the underside of the blocks white (reflects heat).
- Plant heat-tolerant veggies (okra, Swiss chard, malabar spinach).
- Add a 2–3" mulch layer (straw or wood chips) to insulate soil.
What if my cement blocks start shifting or leaning?
Shifting is usually fixable! Reinforce stability with these steps:
- Dig a 1–2" trench around the perimeter and backfill with gravel.
- Use galvanized rebar (pounded into the ground at corners) for extra support.
- Check for uneven ground—level the base with a rubber mallet or compacted gravel.
Wrapping up and next steps
Building a cement block raised bed garden is a game-changer for year-round growing—whether you're a seasoned gardener or just starting out! 🌱 These durable, low-maintenance planters protect your soil, extend your growing season, and make harvesting a breeze.
With the right materials and a little effort, you’ll enjoy fresh veggies, herbs, and flowers for seasons to come.
Ready to get started? Sketch your design, gather your supplies, and begin assembling your first block! Your future self (and hungry family) will thank you! 🙌