
Tools
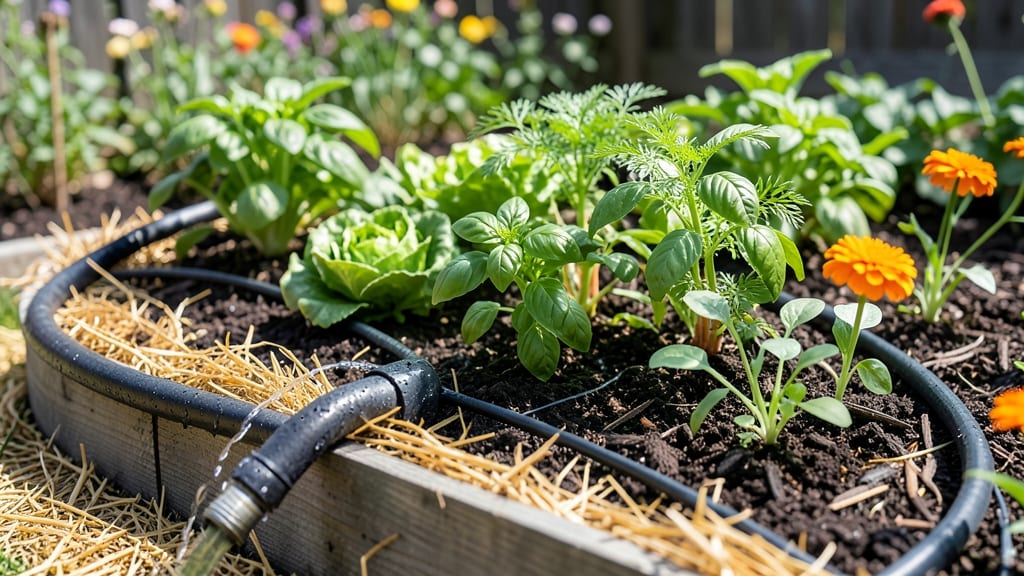
A soaker hose in your raised bed cuts water waste by 50% while keeping roots perfectly moist. 🌱 I used to battle dry soil patches and wilting herbs—until this simple setup transformed my garden into a self-watering oasis. The key? Strategic hose placement that mimics nature’s slow, deep watering.
You’ll need a 1/2-inch soaker hose, a timer (optional but game-changing), and 1-2 inches of mulch to lock in moisture. No more guessing—just consistent hydration that plants crave. The hose weaves between rows or spirals around the bed’s perimeter, delivering water directly to roots where it matters most.
By week 3, you’ll notice lush, even growth—no more leaf scorch or stunted veggies. The system even reduces weeds by keeping soil moist but not soggy. Plus, it’s a stealthy upgrade: no ugly sprinklers or tangled hoses cluttering your garden’s clean lines.
For best results, run the hose 20-30 minutes daily (adjust for heatwaves) and elevate it slightly to prevent root rot. Pro tip: pair with a drip irrigation controller for hands-off watering. Your plants—and your water bill—will thank you.
📚 In This Guide
- What you need
- Instructions
- Tips and common mistakes
- Wrapping up and next steps
What you need
- ● Soaker hose: ¼-inch to ½-inch diameter, 25–50 feet long (depending on bed size). Opt for porous, non-perforated tubing (e.g., blank">DripWorks or blank">Ortho brands).
- ● End caps: 1–2 (to seal unused hose ends).
- ● Hose connectors: 1–2 (¼-inch or ½-inch slip or threaded couplers for attaching to a regular hose).
- ● Hose clamp or zip ties: 2–4 (to secure connections).
- ● Timer or smart sprinkler controller: 1 (e.g., blank">Orbit B-Hyve or blank">Rain Bird for automated watering).
- ● Staples or landscape staples: 20–50 (to attach hose to bed edges; galvanized or plastic-coated).
- ● Drill or staple gun: 1 (for securing the hose).
- ● Measuring tape: 1 (to plan hose layout).
- ● Scissors or hose cutter: 1 (for trimming hose to size).
- ● Hose filter: 1 (to prevent clogs from debris).
- ● Pressure regulator: 1 (if your water pressure exceeds 40 PSI).
- ● Hose reel: 1 (for easy storage if using a long hose).
- ● Moisture meter: 1 (to monitor soil hydration levels).
- ● Mulch: 2–3 bags (retains moisture and reduces evaporation).
Step-by-Step guide to installing a soaker hose in raised beds
Here’s how to transform your raised beds into a self-watering oasis—no more wasted water or uneven moisture.
🪴 Step 1: Plan Your Soaker Hose Layout
Measure your raised bed dimensions and sketch a rough layout. I like to place the soaker hose along the center of the bed, running lengthwise, to ensure even water distribution. For 4-foot-wide beds, a single hose down the middle works perfectly—just coil it loosely so water can flow freely to the edges. If your bed is wider, add a second hose parallel to the first, about 18 inches apart.
Mark the hose path with a pencil or stick to visualize coverage. Avoid placing the hose directly against bed edges, as this can create dry spots near the perimeter. Instead, leave 6 inches of clearance from the sides to let water spread naturally. This simple adjustment prevents the outer plants from drying out while the hose is running.
💧 Step 2: Bury the Hose at the Right Depth
Dig a shallow trench along your marked path, about 1-2 inches deep. This depth ensures the hose stays hidden but still delivers water directly to the root zone. Use a trowel to create a clean, straight groove—uneven trenches can cause water to pool in low spots or leave high spots dry.
Lay the soaker hose in the trench, coiling it gently to match your bed’s shape. Connect the ends with hose connectors if needed, and attach a timer or manual valve at one end for control. I always test the flow before burying it: turn on the water and watch for even bubbles along the hose’s length. If some sections gurgle weakly, straighten them out or adjust the trench depth.
☀️ Step 3: Secure and Cover the Hose
Anchor the hose in place with landscape staples or U-shaped clips, spacing them every 12-18 inches. This prevents shifting when you water and keeps the hose from floating to the surface. I use plastic clips because they’re reusable and won’t rust over time—metal staples can corrode and damage the hose.
Cover the trench with 1-2 inches of soil, pressing lightly to settle it. Avoid compacting the soil too much, as this can restrict water flow to the roots. Leave the valve end accessible at the bed’s edge for easy adjustments. For extra protection, top the trench with a thin layer of mulch to help retain moisture and keep the hose hidden.
⏰ Step 4: Test and Adjust Your Watering Schedule
Run the soaker hose for 10-15 minutes and observe how water spreads. Look for even saturation along the hose’s length—if some areas stay dry, reposition the hose or increase runtime. I aim for 1 inch of water per week, delivered slowly to encourage deep root growth. For sandy soil, you may need 20-30 minutes; clay soil might only need 10 minutes.
Install a rain sensor or smart timer to automate watering. I set mine for early morning to reduce evaporation and fungal risks. Check the soil moisture weekly: stick your finger 1-2 inches deep—if it’s dry, extend the runtime by 5 minutes. Over time, you’ll learn your bed’s perfect watering rhythm, and your plants will thrive with minimal effort.
Tips & tricks for perfect raised bed watering systems
Transforming your raised beds into a self-watering system saves time and ensures your plants thrive—here’s how to get it right from the start.
Layout Precision: In Step 1, when planning your hose path, consider adding a slight upward slope toward the bed’s edges. This subtle gradient helps water naturally flow outward during the 10-15 minute test run, ensuring even saturation without dry spots. For beds wider than 4 feet, I’ve found that adding a second hose at 18 inches creates a more uniform water distribution pattern than relying on a single hose alone.
Trench Consistency: The 1-2 inch depth in Step 2 is critical—any deeper and you risk burying the hose too far for optimal water delivery, while shallower trenches can expose it to sunlight damage. Use a level to ensure your trench stays perfectly straight, especially in longer beds. I’ve learned the hard way that uneven trenches cause water pooling in low spots, which can lead to root rot in sensitive plants.
Flow Testing: Before burying your hose, test the flow with the 10-15 minute runtime specified in Step 4. Look for consistent bubbles along the entire length—any sections with weak flow likely need straightening or repositioning. Pro tip: If you notice certain areas consistently dry, consider adding a small elbow connector to create a secondary path for water redirection.
Soil Cover Strategy: When covering your trench with 1-2 inches of soil in Step 3, avoid pressing down too firmly. Compacted soil can create a barrier that prevents water from reaching the roots. Instead, gently pat the soil into place and top with a thin layer of mulch—this helps maintain moisture while keeping the hose hidden. For clay-heavy soils, you might need to adjust your 10-15 minute runtime to 10 minutes to prevent waterlogging.
Pro Tips for Raised Garden Bed Soaker Hose
- Transforming your raised beds into a self-watering system saves time and ensures your plants thrive—here’s how to get...
- Layout Precision: In Step 1, when planning your hose path, consider adding a slight upward slope toward the bed’s edg...
- Trench Consistency: The 1-2 inch depth in Step 2 is critical—any deeper and you risk burying the hose too far for opt...
Frequently asked questions
How deep should I bury the soaker hose in a raised garden bed?
Aim to bury the hose 2–4 inches deep in the soil. This ensures even water distribution while keeping roots hydrated without over-saturating the surface. For deeper-rooted plants (like tomatoes or peppers), consider a second layer or a drip irrigation setup for better coverage.
How long should I run the soaker hose for each watering session?
Run the hose for 15–30 minutes per zone, depending on soil type and plant needs. Sandy soil drains faster—start with 15 minutes and adjust. Clay or compacted soil may need longer (up to 45 minutes). Pro tip: Check moisture 2–3 inches down; if dry, extend the time.
Can I use a soaker hose with a raised bed on a timer?
A smart timer or mechanical controller is ideal for consistency. Set it for early morning (5–8 AM) to reduce evaporation and fungal risks. Avoid evening watering—wet foliage overnight can invite pests or disease.
What’s the best alternative if my soaker hose leaks or clogs?
Leaks? Patch with hose repair tape or replace the damaged section. Clogs? Flush with vinegar or a hose cleaner (like CLR). For stubborn issues, try a drip irrigation system with adjustable emitters—it’s more precise for raised beds.
Will a soaker hose work in freezing temperatures?
Most soaker hoses are flexible and burst-resistant down to 28°F. However, drain and coil the hose before winter to prevent ice damage. For extreme cold (<15°F), disconnect and store it indoors or use insulated tubing.
Can I use a soaker hose for seedlings or just mature plants?
Soaker hoses work for all stages, but seedlings need gentler, frequent watering. Use a low-flow setting or lay the hose lightly on the soil surface (not buried) to avoid disturbing roots. Once plants are 3–4 inches tall, bury it as usual.
Wrapping up and next steps
Transforming your raised garden bed with a soaker hose is a game-changer for plant health and water efficiency! 🌱 This method ensures deep, even hydration while saving time and resources—perfect for busy gardeners or those aiming for a lush, thriving space.
Whether you're a seasoned pro or just starting, the key is consistency and proper setup.
Ready to dive in? Start small—test your setup with a single bed, then expand as you gain confidence. Your plants (and future harvests) will thank you! 🌿 Grab your supplies and get growing today!