
Tools
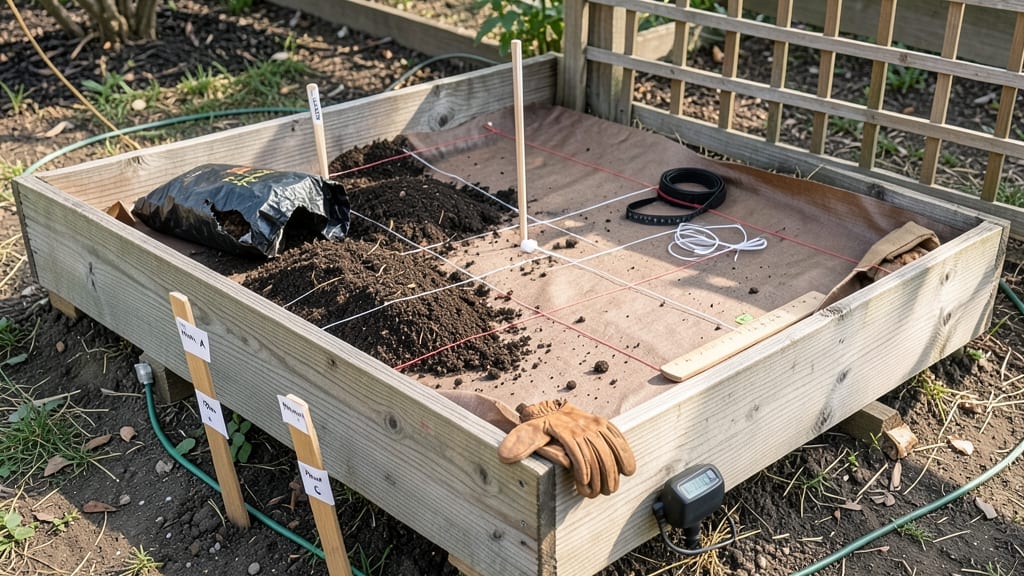
My first raised garden bed layout designs transformed my backyard from a patchy mess into a sunlight-optimized harvest machine. 🌱 The key? Modular paths that control root depth while maximizing every inch of space—no more wasted corners or crowded plants competing for light.
Start with your sunniest spot and sketch a grid: 4-foot-wide beds with 2-foot walkways work perfectly for accessibility. Use cedar or composite lumber for durability, and elevate beds 6-12 inches to improve drainage and reduce bending. I added removable dividers to adjust sections as plants grow.
By summer, you’ll see vibrant green rows of heirloom tomatoes, bush beans, and lettuce thriving where they get exactly what they need—no more bolting greens or stunted veggies. The layout even lets you rotate crops yearly for soil health.
Works for small patios or sprawling yards—just scale the grid. Here’s how to map it out without overcomplicating things!
📚 In This Guide
- What you need
- Instructions
- Tips and common mistakes
- Wrapping up and next steps
What you need
- ● Lumber: Cedar, redwood, or pressure-treated pine (avoid chemically treated wood for edible gardens). 2x6 boards (6–8 ft long) – 12–16 pieces (depends on bed size and height).
- ● 2x4 boards (for corner braces or framing) – 4–8 pieces.
- ● Hardware: Galvanized or stainless steel screws (2.5–3 inches) – 50–100+ screws.
- ○ Corner braces or L-brackets (optional but recommended for stability) – 4–8 pieces.
- ● Landscape Fabric: Weed barrier (12–18 inches wider than bed dimensions).
- ● Soil: Topsoil (screened) – 1–2 cubic yards (varies by bed depth).
- ● Compost or aged manure – 1–2 bags (for nutrient boost).
- ○ Perlite or vermiculite (optional, for drainage) – 1–2 bags.
- ● Tools: Circular saw or handsaw.
- ● Drill/driver.
- ● Measuring tape.
- ● Level.
- ● Staple gun (for landscape fabric).
- ● Wheelbarrow (for soil transport).
- ● Gloves and safety glasses.
- ● Drip Irrigation Kit: For automated watering (saves time and water!).
- ● Timber Screws with Washers: Extra reinforcement for windy areas.
- ● Wood Stain or Sealant: (Non-toxic, food-safe option if using treated wood).
- ● Modular Panels: Pre-cut lumber kits for quick assembly.
- ● Pathway Materials: Gravel, pavers, or mulch for walkways between beds.
Step-by-step guide to designing functional raised garden bed layouts
Great layouts start with sunlight mapping and modular spacing—here’s how to plan yours.
🌱 Step 1: Map Your Sunlight and Wind Patterns
First, observe your yard’s sunlight for at least a week. Note where full sun (6+ hours) hits and where partial shade lingers. I sketch my space with a pencil and grid paper, marking sun paths at different times of day. This helps me position taller plants like tomatoes and peppers where they’ll get morning sun, while shade-tolerant greens go in afternoon-filtered spots.
Next, factor in wind. Raised beds should face prevailing winds with their long sides—this prevents soil erosion and makes harvesting easier. If your yard gets strong afternoon breezes, consider adding a low windbreak like a row of dwarf shrubs along the bed’s windward edge.
📏 Step 2: Plan Modular Bed Dimensions for Accessibility
Standard raised beds should be 4 feet wide—this lets you reach the center without stepping inside, which compacts soil. For height, I recommend 10-12 inches for root crops like carrots and 18-24 inches for heavy feeders like tomatoes. Use lumber like cedar or redwood (rot-resistant) for framing, cutting lengths based on your yard’s usable space.
Modular layouts work best when beds align with walkways. Plan for 2-3 feet of path space between beds to accommodate wheelbarrows and prevent soil-borne diseases from spreading. If space is tight, stagger beds in a herringbone pattern to maximize sunlight exposure on all sides.
☀️ Step 3: Arrange Plants by Height and Sunlight Needs
Start by placing your tallest plants—like sunflowers or trellised cucumbers—along the north or shady side of the bed. This prevents them from casting shadows over shorter crops. In the center, add mid-height plants like basil or beans, and along the south or sunny edge, tuck in low growers like lettuce or radishes.
I always group plants with similar water needs together. For example, drought-tolerant herbs (thyme, rosemary) go in one section, while moisture-loving greens (spinach, kale) get their own. This ensures even irrigation and reduces waste. Use a simple sketch to map out your layout before digging.
🪴 Step 4: Test Soil Depth and Drainage Before Building
Before assembling your beds, check the native soil’s drainage. Dig a 12-inch hole in your planned location and fill it with water. If it drains in under an hour, your site is good to go. If not, raise the bed higher or amend the soil with 2-3 inches of coarse sand mixed into the bottom layer.
For root crops like potatoes or carrots, ensure the bed’s depth is at least 12 inches—this gives roots room to grow without hitting compacted soil. If you’re growing heavy feeders like squash, aim for 18 inches to support their sprawling roots. Label your beds with stakes to track what you’ve planted and rotate crops next season.
✂️ Step 5: Install Pathways and Mulch for Long-Term Health
Use gravel, wood chips, or stepping stones for pathways to prevent soil compaction. I prefer 3-4 inches of gravel because it drains well and won’t harbor pests. Avoid mulching directly on paths—this can attract weeds and make them slippery. Instead, keep mulch confined to the bed’s edges.
Once your beds are planted, apply 2-3 inches of mulch (straw or shredded leaves) to retain moisture and suppress weeds. Replenish it every few weeks, especially in hot climates. This step saves time and keeps your garden looking neat—plus, it reduces watering by up to 30%.
Tips & tricks for perfect raised garden bed layouts
A few strategic adjustments can transform your garden from functional to extraordinary. Here's how to elevate your design beyond the basics.
Sunlight Strategy: Use a simple smartphone app to track your yard's sun paths throughout the day. I've found that marking sun exposure times on your sketch with colored pencils (yellow for morning, red for afternoon) makes it instantly clear where to place sun-loving vs. shade-tolerant plants. This visual approach eliminates guesswork when positioning your 4-foot wide beds for optimal exposure.
Modular Flexibility: When planning your 2-3 feet pathways between beds, consider adding removable wooden planks that can serve as stepping stones during planting and harvesting. This creates a flexible system that prevents soil compaction while allowing you to adjust your layout as plants mature. The key is using 3-4 inches of gravel for the base path to ensure proper drainage and pest resistance.
Root Depth Precision: For beds containing root crops like carrots, I recommend adding a 12-inch depth marker made from PVC pipes cut to size and placed at each corner during construction. This visual guide ensures you maintain the minimum 12 inches of soil depth required for proper root development, especially when working with heavy feeders like squash that need 18 inches of depth.
Windbreak Hack: Instead of using dwarf shrubs for wind protection, consider installing a simple chicken wire mesh (3 feet tall) along the windward edge of your beds. This creates an instant windbreak that won't compete with your plants for sunlight, and you can easily remove or reposition it as needed. The mesh also provides support for climbing plants like peas or beans.
Pro Tips for Raised Garden Bed Layout Designs
- A few strategic adjustments can transform your garden from functional to extraordinary. Here's how to elevate your de...
- Sunlight Strategy: Use a simple smartphone app to track your yard's sun paths throughout the day. I've found that mar...
- Modular Flexibility: When planning your 2-3 feet pathways between beds, consider adding removable wooden planks that ...
Frequently asked questions
Got questions about designing your raised garden bed layout? Here are answers to some of the most common concerns—so you can plan with confidence!
What’s the best depth for a raised garden bed?
Aim for 6–12 inches deep for most vegetables (like lettuce, herbs, and radishes) and 12–18 inches for deeper-rooted plants (tomatoes, carrots, or potatoes). Deeper beds improve drainage and root space, but avoid exceeding 2–3 feet to prevent overheating soil.
How wide should my raised bed be to avoid stepping on soil?
Keep beds 3–4 feet wide max—this way, you can reach the center from either side without compacting the soil. For wider spaces, add pathways (gravel, mulch, or stepping stones) or create modular sections. Pro tip: 4 feet is ideal for most gardeners!
Can I place a raised bed in partial shade?
Yes! Just match plants to light conditions. Leafy greens (spinach, kale) thrive in partial shade, while tomatoes and peppers need full sun (6+ hours/day). North-facing beds in temperate climates may need shade-tolerant crops. Rotate crops annually to balance sunlight exposure.
What’s a budget-friendly alternative to cedar or redwood?
Try untreated pine (cheaper but needs sealing) or recycled plastic lumber (low-maintenance). For liners, use cardboard or landscape fabric to block weeds—just ensure it’s breathable. DIY with cinder blocks or bricks if wood isn’t an option!
Why are my plants wilting even with consistent watering?
Check for poor drainage (add compost or perlite) or root-bound conditions (expand bed depth). Overwatering can also suffocate roots—aim for 1–1.5 inches of water weekly. Mulch the surface to retain moisture and regulate temperature.
How do I design for small spaces like balconies or patios?
Opt for vertical layouts (stacked beds, trellises) or narrow, long beds (2’x6’). Use container-style beds with built-in drainage holes. Herbs, microgreens, and dwarf varieties work perfectly—maximize sunlight with reflective surfaces (mirrors or light colors).
Wrapping up and next steps
Designing your raised garden bed layout is all about balancing sunlight, root depth, and your unique gardening goals—whether it’s maximizing yields, saving space, or creating a stunning visual flow. 🌱 With the right modular approach, you’ll enjoy healthier plants, easier maintenance, and a space that feels tailored just for you.
Now that you’re armed with ideas and practical tips, it’s time to roll up your sleeves and get planting!
Start small with a single bed or sketch your dream layout—then gather your materials and let your creativity grow. Happy gardening!