
Container Gardens
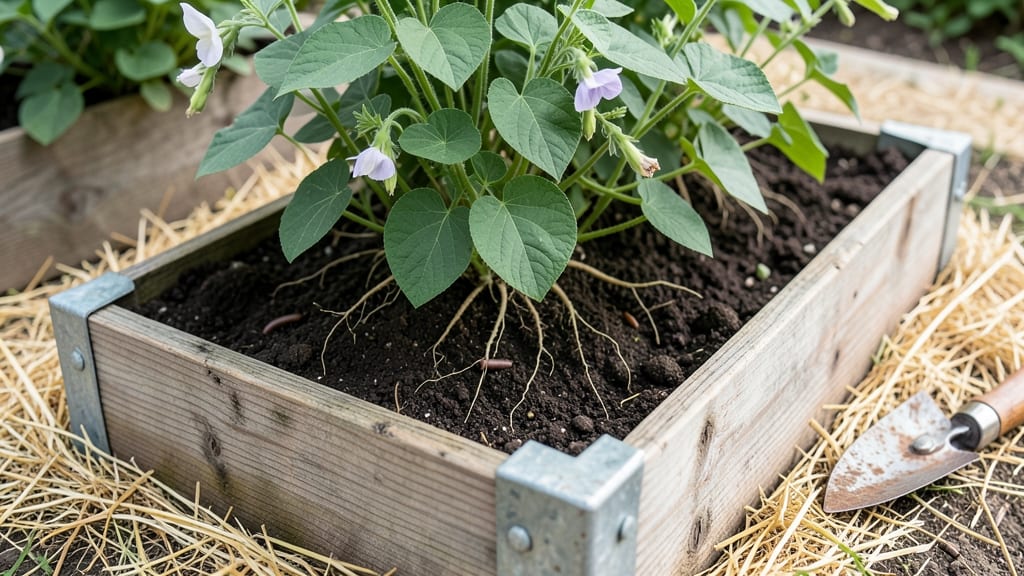
A raised garden bed for green beans transforms your yard into a pole bean paradise. 🌱 I've grown beans in rows and containers, but nothing beats the vertical harvest of a well-built raised bed with trellis—especially for pole varieties that climb like crazy.
The secret? Combining the right soil mix with a sturdy trellis that keeps beans off the ground, where they stay cleaner and more productive.
The setup is simpler than you'd think: start with a 4-foot-wide bed (to reach across without stepping in) filled with loose, well-draining soil mixed with compost. Plant seeds 1-2 inches deep, 4-6 inches apart, and install a 5-6 foot tall trellis at one end.
Pole beans will twine up in weeks, saving space and making harvests effortless. Just watch for even moisture—raised beds dry out faster than ground soil.
By midsummer, you'll be snapping fresh beans straight from the vine, their crisp pods glistening in the sunlight. The vertical growth keeps foliage disease-free, and companion plants like radishes or lettuce thrive in the shaded soil below. Even my black thumb can't kill these when the setup is right.
Works in any climate (just adjust trellis height for windy areas) and scales from small city plots to backyard gardens. Here's how to keep them thriving all season—no more tangled vines or wasted space.
📚 In This Guide
- What you need
- Instructions
- Tips and common mistakes
- Wrapping up and next steps
What you need
- ● Raised garden bed: Dimensions: At least 4’ x 8’ (or larger) and 10–12” deep (pole beans need vertical space!)
- ● Material: Untreated wood (cedar or redwood), composite lumber, or galvanized metal
- ● Soil mix: 60% high-quality garden soil + 30% compost + 10% perlite or vermiculite (sterile, well-draining blend)
- ● Vertical trellis system: Tall bamboo stakes (6–8’), sturdy wooden posts, or a pre-made A-frame trellis
- ● Twine, jute twine, or garden netting (for weaving beans upward)
- ● Pole green bean seeds: 4–6 plants per 4’ of bed length (e.g., ‘Kentucky Wonder’ or ‘Blue Lake’)
- ● Garden trowel or shovel
- ● Measuring tape & level
- ● Drill (for assembling trellis supports)
- ● Gloves & knee pads (trust us, they’re a game-changer!)
- ● Mulch: Straw or shredded leaves to retain moisture
- ● Drip irrigation kit: For consistent watering
- ● Plant markers: To track varieties (if mixing seeds)
- ● Fertilizer: Balanced organic (e.g., 10-10-10) or compost tea
Step-by-Step guide to building a raised garden bed for pole green beans
Here's how I build a sturdy, space-saving raised bed that keeps pole beans climbing and productive all season.
🪴 Step 1: Choose and Assemble the Raised Bed Frame
For a 4-foot by 8-foot bed (perfect for 4 plants), I use untreated cedar boards cut to 10-inch height—tall enough to contain roots while keeping weeds out. The cedar resists rot naturally, which is critical since green beans need 2-3 years of bed life to pay off. Assemble the frame with 2.5-inch deck screws into a rectangular box, leaving the top edges flush for clean planting.
I reinforce corners with 3-inch corner braces to prevent warping under soil weight. If you're building on uneven ground, level the base with landscape fabric before adding the frame—this prevents water pooling and keeps critters from tunneling underneath. The 10-inch height gives roots plenty of room to spread without compacting, which is especially important for pole beans that grow 6-8 feet tall.
🌱 Step 2: Fill With the Right Soil Mix for Pole Beans
Start with a 4-inch layer of coarse gravel at the bottom for drainage—green beans hate soggy roots. Then add 2 inches of compost to feed the soil long-term. For the remaining 4 inches, mix equal parts garden soil and compost (about 1 cubic yard total for a full bed). I stir in 1 cup of 5-10-10 fertilizer per 4-foot section to give beans a phosphorus boost for strong roots.
Moisten the soil until it feels like a wrung-out sponge—damp but not dripping. If you compact the mix as you fill, tap the sides gently with a board to settle it without crushing the structure. Avoid garden soil from your yard; it’s often too dense and may contain weeds or pests. The loose, airy mix encourages roots to explore downward while supporting the heavy vines.
☀️ Step 3: Install a Sturdy Vertical Trellis System
For pole beans, I install T-posts at each corner (driven 18 inches deep) and stretch 12-gauge galvanized wire horizontally every 12 inches up to 8 feet. This creates a grid trellis that supports vines without tangling. Alternatively, use pre-made tomato cages (cut in half lengthwise) spaced 2 feet apart—they’re cheaper and still work well for shorter varieties like 'Kentucky Wonder'.
Here’s the trick: Weave the wire in a zigzag pattern rather than straight lines. This prevents vines from slipping through gaps as they grow. If you’re short on time, bamboo stakes (placed every 18 inches) with twine spirals work too—just be ready to adjust as vines thicken. The goal is even support so plants don’t flop mid-season.
🌿 Step 4: Plant Seeds and Train Vines Early
Sow 4-5 seeds per plant spot (about 18 inches apart) at 1-inch depth in late spring after soil warms to 60°F. Thin to the strongest seedling when they’re 2 inches tall. I plant near the trellis so vines can climb immediately—no waiting for them to flop over. Water gently after planting to settle soil around seeds, but avoid soaking the area.
Once seedlings hit 4 inches tall, gently weave the main stem around the trellis wire or stake. Pole beans twine naturally, but they need a guide to start. If you skip this, vines will sprawl and break under their own weight. Mulch with 2 inches of straw to retain moisture and suppress weeds—green beans need consistent soil moisture but hate competition.
✂️ Step 5: Prune and Harvest for Continuous Production
Start harvesting when pods reach 4-6 inches long—this encourages more flowers to set. I pick every 2-3 days in the morning when pods are crispest. To keep plants productive, prune back any leggy growth that isn’t climbing the trellis. Snip just above a leaf node to redirect energy to fruiting rather than foliage.
Watch for yellowing leaves—this often means overwatering or nitrogen deficiency. If it’s the latter, side-dress with compost tea or a low-nitrogen fertilizer. By mid-summer, vines may need additional support if they outgrow the trellis. Just add more wire or stakes as needed; pole beans are forgiving if you stay on top of it.
Tips & tricks for building a pole bean raised garden bed
Building a raised bed for pole beans takes planning—but these tricks will help you avoid common mistakes and maximize your harvest.
Frame Stability: When assembling the 4-foot by 8-foot frame with 10-inch untreated cedar boards, pre-drill screw holes to prevent splitting. I learned this the hard way after ruining two boards! Use 2.5-inch deck screws and countersink them slightly below the surface to avoid snagging your hands later. For extra security, add a horizontal brace halfway up the sides—this prevents the frame from bowing under the weight of soil and plants.
Soil Mix Secrets: The equal parts garden soil and compost mix is key, but don't skimp on the 4-inch gravel layer at the bottom. If your yard soil is heavy clay, mix in 1 part perlite to improve drainage. I also recommend adding 1 cup of bone meal (optional) to the soil mix for an extra phosphorus boost—it encourages stronger root development without overfeeding. Just stir it in gently so it doesn't clump together.
Trellis Training: In Step 3, when installing the 12-gauge galvanized wire every 12 inches, leave a 2-inch gap between the top wire and the bed's edge. This gives vines room to grow upward without getting trapped. For the zigzag pattern, imagine a ladder—each horizontal wire should cross the vertical supports at an angle to create diagonal paths for the beans to climb. If using bamboo stakes, bury them 6 inches deep for stability.
Planting Precision: When sowing 4-5 seeds per spot at 1-inch depth, use a small stick or pencil to make a hole—it creates a consistent depth every time. After thinning to the strongest seedling, mark the location with a small stake or pebble so you remember where each plant is. This helps with future pruning and harvesting. And here's a pro move: plant a few extra seeds in case of poor germination—it happens more often than we'd like!
Pro Tips for Raised Garden Bed For Green Beans
- Building a raised bed for pole beans takes planning—but these tricks will help you avoid common mistakes and maximize...
- Frame Stability: When assembling the 4-foot by 8-foot frame with 10-inch untreated cedar boards, pre-drill screw hole...
- Soil Mix Secrets: The equal parts garden soil and compost mix is key, but don't skimp on the 4-inch gravel layer at t...
Frequently asked questions
Got questions about growing green beans in raised garden beds? You’re not alone! Here are answers to the most common queries to help you grow a thriving vertical pole bean patch.
How deep should a raised bed be for growing pole green beans?
For pole beans, aim for a 12-18 inches deep raised bed. This depth ensures strong root development and stability for the trellis. If your bed is shallower, mix in compost or aged manure to boost nutrients and soil aeration.
When is the best time to plant pole beans in a raised bed?
Plant pole beans after the last frost when soil temps reach 60°F+. In most regions, this falls between late April and early June. For cooler climates, opt for faster-maturing varieties (50-60 days) to avoid fall frost.
Can I grow bush beans instead of pole beans in a raised bed?
Bush beans thrive in raised beds too—they just don’t need a trellis. Plant them 1-2 inches deep, spacing seeds <4-6 inches apart. Bush beans mature faster (50-60 days) and are great for small spaces or container gardens.
How do I prevent pests like bean beetles or aphids in my raised bed?
Use these tricks:
- Row covers early in the season to block beetles.
- Spray neem oil or insecticidal soap on aphids (apply in the evening).
- Plant marigolds or nasturtiums nearby as pest repellents.
- Encourage ladybugs—they devour aphids!
Why are my pole beans wilting even with plenty of water?
Wilting can signal overheating, root rot, or poor drainage. Check:
- Are roots crowded? Thin seedlings if needed.
- Is the soil too wet? Ensure your bed has drainage holes.
- Are beans struggling in heat? Provide afternoon shade or mulch heavily.
Pro Tip:
For continuous harvests, stagger plantings every 2 weeks (if your growing season allows). This keeps your raised bed productive from summer to fall!
Wrapping up and next steps
Growing raised garden bed green beans—especially pole varieties—is a rewarding way to maximize space and yield while keeping pests at bay. With the right trellis setup, you’ll enjoy bountiful, easy-to-harvest beans all season long.
Now that you’re armed with tips on soil prep, trellising, and care, it’s time to roll up your sleeves and plant! 🌱
Start small if you’re new to gardening, then expand next year. Share your harvest with neighbors or preserve the excess—either way, you’re growing flavor, sustainability, and joy one bean at a time.