
Landscaping
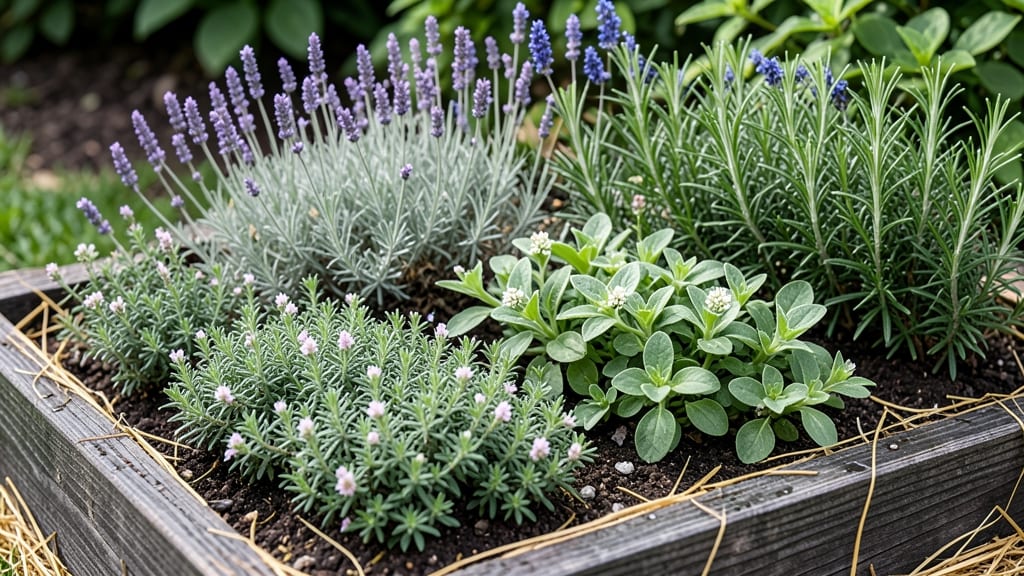
A raised garden bed along your fence line turns wasted space into a privacy shield that grows food. 🌿 I learned this trick after my neighbor's fence blocked sunlight from my yard—and now it's my most productive growing area.
The key is matching the bed height to your fence while ensuring proper drainage and sunlight access.
Start with cedar or composite lumber for durability against weather and pests. A 4-foot-wide bed fits most fence lengths, leaving room to walk behind it. Use landscape fabric under the bed to prevent weeds and improve drainage—critical if your yard holds water after rain.
You'll end up with a lush, living screen that produces vegetables, herbs, or flowers all season. Tall plants like tomatoes or sunflowers hide the fence while shorter crops thrive in the front. The bed stays warm longer in spring, giving you a jumpstart on planting.
Works for any fence height—just adjust the bed depth. For extra privacy, add trellises with climbing roses or morning glories. The best part? No more fighting for space in your yard while growing more than ever before.
📚 In This Guide
- What you need
- Instructions
- Tips and common mistakes
- Wrapping up and next steps
What you need
- ● Lumber or cedar planks: 2x6 or 2x8 boards (untreated cedar lasts longest; 8–10 ft long, quantity depends on bed size—e.g., 4 boards for a 4’x8’ bed).
- ● Corner brackets or screws: Galvanized screws (2.5–3”) or heavy-duty corner braces (4–6 per corner).
- ● Landscape fabric: 1 roll (to block weeds and retain moisture).
- ● Garden soil: 2–3 cubic feet per square foot of bed (mix topsoil with compost or aged manure).
- ○ Mulch (optional): Straw, wood chips, or shredded leaves (for moisture retention).
- ○ Hardware cloth (optional): ¼” mesh (to deter burrowing pests like gophers).
- ● Circular saw or handsaw (for cutting lumber).
- ● Drill/driver (with screw attachment).
- ● Measuring tape and pencil.
- ● Level (to ensure your bed is even).
- ● Staple gun (for securing landscape fabric).
- ● Wheelbarrow (for hauling soil).
- ● Gloves and safety glasses (because safety first!).
- ● Fence inspection: Ensure the fence is stable and won’t be damaged by screws or weight (avoid nails or sharp objects).
- ● Sunlight assessment: Check how much sun the area gets (6+ hours for veggies, 4–6 for herbs/flowers).
- ● Drainage plan: If your yard slopes, add a slight tilt (1–2°) away from the fence to prevent water pooling.
- ● Local regulations (check!):
Step-by-Step instructions for building a raised garden bed along a fence line
Here's how to create a functional, attractive raised bed that maximizes your narrow space while adding privacy and beauty.
🪴 Step 1: Measure and Mark Your Fence Line Layout
Start by measuring the length of your fence line where you want the bed. I like to keep mine between 4-6 feet wide for easy access from both sides. Use a string line (or garden hose) to mark the length, then measure 4 feet deep at each end to create a rectangular shape. Use stakes and string to outline the perimeter—this prevents uneven edges later.
Check for fence irregularities first. If your fence isn't perfectly straight, adjust the bed shape slightly to follow its natural line. I always add 6 inches extra at both ends to account for any fence attachments or uneven ground. Mark the corners with stakes and connect them with string for a clean, straight guide.
🌱 Step 2: Prepare the Base and Install Edging Materials
Remove any grass, weeds, or debris from the marked area. The key here is to create a stable base—lay down cardboard (flattened) or landscape fabric to suppress weeds. I use untreated lumber (like cedar or redwood) for the bed frame because it resists rot and lasts years. Cut 2x6 boards to your measured dimensions—you'll need two 4-foot lengths for the sides and two lengthwise pieces matching your fence line.
Assemble the frame on the ground first to check fit, then lift it into place. Secure corners with galvanized screws (not nails—they loosen over time). For extra stability, add corner braces inside the frame. If your fence line is uneven, adjust the bed height by adding gravel or pavers underneath before locking the frame in place.
☀️ Step 3: Layer the Bed for Optimal Drainage and Soil Quality
Fill the bottom 6 inches with coarse gravel or crushed stone to improve drainage—this prevents waterlogging, especially in rainy climates. Next, add 4 inches of compost or well-rotted manure to enrich the soil. Now comes the soil mix: blend equal parts garden soil, compost, and peat moss (or coconut coir) for a lightweight, fertile medium. Fill the bed to 2 inches below the rim—this gives you room to add more soil later.
I like to mix in a slow-release fertilizer (like 10-10-10) at this stage for a nutrient boost. Water the soil lightly after filling to settle it, then wait 24 hours before planting. This ensures the layers compact naturally and you don’t disturb the bed when you start adding plants.
🌿 Step 4: Plant Strategically for Privacy and Productivity
For a privacy screen, plant fast-growing shrubs like bamboo, arborvitae, or tall ornamental grasses along the fence side. These create an instant barrier while adding texture. In the remaining space, plant deep-rooted crops (like tomatoes or peppers) on the outer edge and shallow-rooted plants (like lettuce or herbs) toward the center. I space plants 12-18 inches apart to allow airflow and prevent disease.
Add mulch (like shredded bark or straw) on top to retain moisture and suppress weeds. For a year-round look, include perennial plants (like lavender or thyme) alongside annuals. Water deeply after planting to help roots establish—1 inch per week is ideal, but adjust for your climate.
✂️ Step 5: Maintain and Expand Your Fence-Line Oasis
Check the bed’s drainage after the first heavy rain—if water pools, add more gravel to the base. Prune plants regularly to encourage bushier growth and maintain privacy. I like to rotate crops every season to prevent soil depletion. For example, plant heavy feeders (like squash) in spring, then switch to light feeders (like beans) in summer.
Extend the bed’s lifespan by renewing mulch every spring and top-dressing with compost annually. If you notice the wood frame deteriorating, replace individual boards instead of the whole bed—this saves money and extends the project’s life. With proper care, your fence-line garden will thrive for 5+ years while keeping your space both productive and private.
Tips & tricks for perfect raised garden beds along fence lines
Here's what nobody tells you about building a raised bed that actually works—and lasts.
Precision in Step 1: When measuring your fence line, use a 4-foot tape measure for depth and a string line for length. If your fence has uneven sections, draw the bed outline freehand first—don't force a perfect rectangle. I've seen too many beds fail because they didn't follow the natural contour. For extra stability, add 6-inch stakes at each corner before connecting with string.
Material Matters in Step 2: Untreated lumber like cedar or redwood is worth the investment—it resists rot and lasts 5+ years without replacement. If using 2x6 boards, pre-drill screw holes to prevent splitting when securing corners. For uneven ground, use gravel-filled pavers under the frame instead of just gravel—they won't compact over time like loose stones.
Soil Science in Step 3: The 24-hour waiting period before planting is non-negotiable. This lets the layers settle naturally and prevents soil compaction when you plant. For the soil mix, I recommend equal parts garden soil, compost, and coconut coir—it drains better than peat moss and holds moisture longer. If your climate is very wet, add an extra 2 inches of coarse gravel at the bottom.
Plant Placement Hack in Step 4: For maximum privacy, plant your tallest shrubs (like arborvitae) in the outer 12 inches along the fence. This creates an instant screen while leaving room for vegetables in the center. I like to use bamboo stakes to mark planting spots before digging—it keeps me organized and prevents overcrowding.
Pro Tips for Raised Garden Bed Along Fence Line
- Here's what nobody tells you about building a raised bed that actually works—and lasts.
- Precision in Step 1: When measuring your fence line, use a 4-foot tape measure for depth and a string line for length...
- Material Matters in Step 2: Untreated lumber like cedar or redwood is worth the investment—it resists rot and lasts 5...
Frequently asked questions
Got questions?
Here are answers to the most common concerns about building a raised garden bed along your fence line—so you can grow with confidence!
How close can a raised garden bed be to a fence without causing issues?
Aim to place your bed at least 12–18 inches away from the fence to avoid root conflicts with neighboring plants or structures. Check local setback laws (some areas require 3+ feet for permanent structures). If the fence is wooden, ensure airflow to prevent rot—use gravel or landscape fabric beneath the bed for drainage.
When is the best time to build a raised garden bed along a fence?
Spring or early fall is ideal—soil is workable, and you can plant immediately after construction. Avoid winter (frost heave risks) or peak summer (heat stress). If building in winter, use straw mulch to protect soil until planting season. Pro tip: Prep the fence line first—remove weeds and level the ground to prevent water pooling.
Can I use cheaper materials (like untreated wood) for a fence-line raised bed?
Untreated wood (e.g., pine) can work short-term (1–2 years), but it may warp, leach chemicals, or attract pests. For longevity, opt for cedar, redwood, or composite lumber—they resist rot and pests. If budget is tight, line the bed with landscape fabric or use cinder blocks (painted to match) for a low-cost, durable alternative.
How do I prevent my raised bed from shading the fence (or vice versa)?
Position the bed north-south to maximize sunlight exposure. If the fence casts shade, plant tall crops (sunflowers, corn) on the sunny side and shade-tolerant veggies (lettuce, spinach) on the shaded side. For privacy, add fast-growing climbers like Morning Glory to the fence—just ensure they don’t smother your bed!
What if my fence-line bed attracts pests (slugs, rabbits, or rodents)?
Start with physical barriers: Copper tape (slugs), chicken wire (rabbits), or hardware cloth (rodents). Use diatomaceous earth for soil pests and companion planting (e.g., marigolds to deter rabbits). Avoid mulching directly against the fence—leave a 2-inch gap to reduce hiding spots. Bonus: Plant pest-repelling herbs (basil, mint) along the bed’s edge!
Wrapping up and next steps
A raised garden bed along a fence line is a brilliant way to maximize small spaces while adding privacy and beauty to your yard. Whether you're a beginner or a seasoned gardener, this setup offers year-round growing potential with minimal effort. 🌱
Now that you’re inspired, take the next step—sketch your design, gather supplies, and start transforming that empty fence line into a thriving garden oasis! Your future self (and your neighbors) will thank you.