
Tools
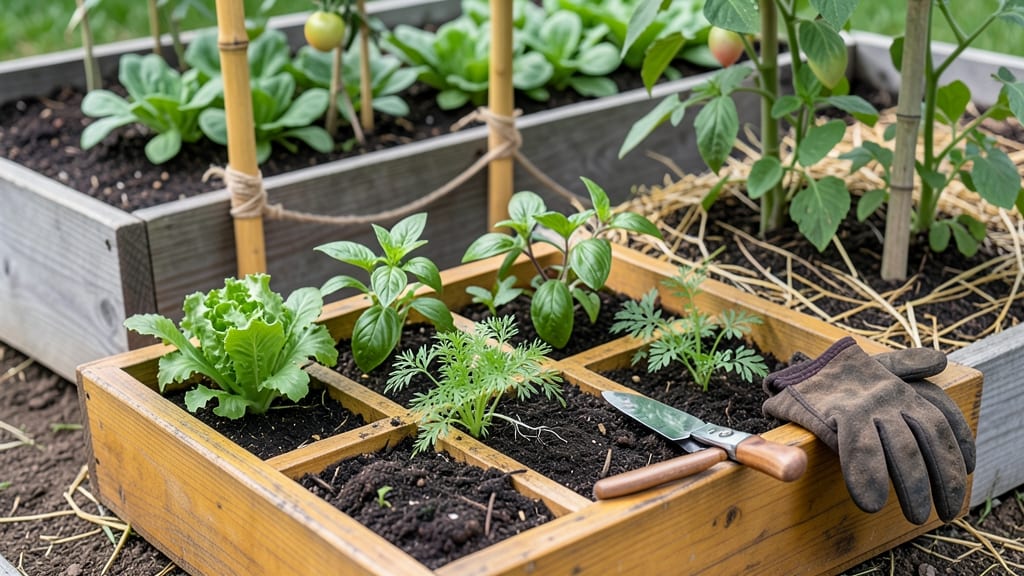
Customizable raised bed garden plans let you grow anything—from dwarf tomatoes to towering sunflowers—without bending over all season. 🌱 I designed my first modular beds after realizing my back couldn't handle traditional rows, and now I grow more in 100 square feet than my neighbors do in their entire yard.
The key is matching plant heights to bed levels, so everything gets sunlight and airflow without crowding.
Start with simple 4x8-foot cedar frames (they resist rot and cost about $150 for untreated wood) or repurpose old pallets for a budget-friendly option.
Most vegetables thrive in 12-18 inches of soil depth, but taller plants like pole beans or trellised cucumbers need 24-inch beds to show off their full potential. The modular approach means you can expand or swap sections as your garden evolves—no digging required.
By summer, you'll have a thriving vertical garden where every inch works: bush beans at the front, salad greens in the middle, and sunflowers or corn at the back. The soil stays warmer and drains better than ground beds, so seedlings establish faster and produce 30-50% more than in-row planting.
Plus, weeds? Almost nonexistent when you contain the soil.
Perfect for small spaces, slopes, or anyone tired of battling compacted soil. Whether you're growing herbs in a 2x2-foot box or tomatoes in a 4x4-foot tower, the modular system adapts to your space—and your ambition. Let's build something that actually fits your life.
📚 In This Guide
- What you need
- Instructions
- Tips and common mistakes
- Wrapping up and next steps
What you need
- ● Lumber: Pressure-treated cedar or redwood (rot-resistant!). 2x6 boards (2–4 ft long) – Quantity varies by bed size (e.g., 8 boards for a 4’x4’ bed).
- ● 2x4 boards (for corner braces) – 4–6 pieces per bed.
- ● Hardware: 3” exterior deck screws (stainless steel, ~50–100 screws per bed).
- ● Galvanized corner brackets (4 per bed) or L-brackets for stability.
- ○ Landscape Fabric: 1 roll (10’x50’) (optional but recommended to block weeds).
- ● Soil Mix: High-quality garden soil (~2–3 cubic feet per square foot of bed).
- ○ Optional Extras: Wood stain/sealer (for longevity).
- ● Drainage rocks (small gravel, 1–2 bags).
- ● Edging stones or bricks (for a polished look).
- ● Circular saw or miter saw (for precise cuts).
- ● Drill/driver (with screw attachment).
- ● Tape measure and pencil.
- ● Level (to keep beds even!).
- ● Staple gun (for landscape fabric).
- ● Work gloves and safety goggles (because DIY is safer with protection!).
- ● Flat, level ground (or a sturdy base like pavers if sloped).
- ● Sunlight analysis: 6+ hours of sun daily for most veggies/herbs.
- ● Access to water (or a soaker hose setup).
- ● Plan for drainage: Slight slope or gravel layer if in a wet climate.
Step-by-step guide to designing modular raised bed gardens
Here’s how I create flexible, height-adjustable raised beds that adapt to any plant’s needs.
🪴 Step 1: Plan Your Modular Layout
Start by sketching your garden space on paper. I like to divide it into 4-foot-wide sections (the ideal width for easy reach) and mark permanent features like fences or walkways. For customizable heights, plan 2-3 modular layers—each 6-12 inches tall—so you can stack them as needed. Tall layers (12 inches) work for deep-rooted veggies like tomatoes, while shorter ones (6 inches) suit shallow-rooted herbs.
Use a tape measure to ensure each section is at least 4 feet long (longer for more plants) and no wider than 4 feet—any wider makes middle rows hard to reach. I mark my design with stakes and string for precision before digging.
🌱 Step 2: Build or Assemble Your Frames
For modularity, I use untreated cedar or redwood boards (naturally rot-resistant) cut into 2x6 or 2x8 planks. Assemble frames for each layer—4-foot-wide by 8-foot-long—using 2.5-inch deck screws at the corners. For height flexibility, I build two separate frames per section: one 6 inches high and one 12 inches high. Stack them later as needed.
Leave ½-inch gaps between boards to prevent rot while keeping soil contained. If using pre-made raised bed kits, follow the manufacturer’s instructions for assembly. I always test-fit frames in the garden before filling them—this ensures they’ll stay level and stable.
☀️ Step 3: Layer Soil for Customizable Depths
Fill the shorter frame (6 inches) first with a mix of 2 inches of coarse gravel (for drainage) and 4 inches of high-quality garden soil. For the taller frame (12 inches), add 4 inches of gravel and 8 inches of soil. I use a 50/50 blend of topsoil and compost to ensure fertility. For deeper-rooted plants, I stack both frames and fill the gap with 4 more inches of soil—now you’ve got 18 inches of depth for tomatoes or asparagus.
Moisten the soil lightly before planting—it should feel like a damp sponge, not soggy. This prevents compaction when you add plants. I always label each section with what’s growing there (e.g., "Herbs" or "Tomatoes") to avoid mix-ups later.
🌿 Step 4: Arrange Plants by Height Needs
Place tall plants (tomatoes, peppers, trellised cucumbers) in the deepest sections (stacked frames). For medium-height plants (bush beans, carrots, lettuce), use the 12-inch frame alone. Shallow-rooted herbs (basil, thyme) or greens (spinach, arugula) thrive in the 6-inch frame. This keeps roots happy and makes harvesting easier—no bending over for shallow plants!
Space plants according to their mature size: 18 inches apart for tomatoes, 12 inches for peppers, and 6 inches for herbs. I group plants with similar water needs together to simplify irrigation. For example, basil and lettuce go side by side since they both like consistent moisture.
⏰ Step 5: Maintain and Adjust as Needed
Check soil moisture daily—top inch should feel dry before watering. For modular beds, I use a drip irrigation system with adjustable emitters to deliver water evenly. If a plant outgrows its space (like a sprawling zucchini), I simply add another 6-inch layer on top of the existing frame and extend the soil depth.
Rotate crops yearly to prevent disease. I keep a simple logbook noting what grew where each season. For winter, I remove annuals, add a 4-inch layer of straw mulch, and let the bed rest—ready for spring planting with minimal prep.
Tips & tricks for perfect modular raised bed gardens
These simple strategies will help you build a garden that grows with your needs—and avoids common pitfalls.
Material Matters: Untreated cedar or redwood lasts years without rotting, but if you're on a budget, pressure-treated lumber works too—just line the inside with landscape fabric to protect plants from chemical leaching. I've found that pre-cutting boards to exact dimensions before assembly saves time and frustration, especially when working with multiple layers.
Stacking Secrets: When stacking your 6-inch and 12-inch frames, use corner brackets or additional screws at the joints for extra stability. This prevents shifting over time, which can create uneven soil levels. I like to add a layer of hardware cloth at the bottom of each frame before adding soil—this keeps burrowing critters like voles out of your garden without harming worms.
Soil Science: That 50/50 blend of topsoil and compost isn't just arbitrary—it balances drainage and nutrients perfectly. For the 6-inch frame, I often add a handful of perlite to the soil mix to improve aeration for shallow-rooted plants. And here's what nobody tells you: store your extra soil in black plastic bags in the shade to prevent it from drying out or developing weeds.
Plant Placement Pro: The 18-inch spacing for tomatoes might seem generous, but it's worth it—crowded tomato plants develop more disease and produce smaller fruit. I've learned to group plants by their water needs as a time-saver: all my basil, lettuce, and spinach get watered together, while peppers and tomatoes go on a separate schedule. This simple grouping cuts my watering time in half.
Pro Tips for Raised Bed Garden Plans
- These simple strategies will help you build a garden that grows with your needs—and avoids common pitfalls.
- Material Matters: Untreated cedar or redwood lasts years without rotting, but if you're on a budget, pressure-treated...
- Stacking Secrets: When stacking your 6-inch and 12-inch frames, use corner brackets or additional screws at the joint...
Frequently asked questions
Got questions about raised bed garden plans?
You’re not alone! Here are answers to some of the most common concerns to help you get started with confidence.
What’s the best time of year to build a raised bed?
The ideal time is early spring (before planting season) or late fall (after harvest). This gives soil time to settle and warm up (or cool down) naturally. If you’re in a mild climate, you can build year-round—but avoid freezing temps, which make materials brittle.
How deep should a raised bed be for vegetables vs. flowers?
For vegetables, aim for 10–12 inches deep—enough for root crops like carrots and potatoes. For flowers and shallow-rooted plants, 6–8 inches works fine. Pro tip: 12+ inches lets you grow deeper-rooted veggies like tomatoes or squash with ease!
Can I use cheaper materials like pallets or cinder blocks?
Yes, but with caution! Pallets may contain toxic chemicals (check for HT stamps). Cinder blocks can leach lime into soil—opt for unpainted wood, bricks, or composite lumber instead. If using pallets, line them with landscape fabric to prevent soil loss and chemical leaching.
How do I keep pests out of my raised bed?
Start with hardware cloth at the bottom to block burrowing critters. Use row covers or diatomaceous earth for insects, and plant companion plants like marigolds or basil to deter pests naturally. Keep beds weed-free—pests love hiding in overgrown areas!
What do I do if my raised bed soil gets too compacted?
Fluff it up with compost, coconut coir, or perlite to improve drainage and aeration. Avoid walking on the soil—step on the frame edges instead. For heavy clay soil, mix in sand or peat moss to lighten it. A broadfork can also loosen compacted layers gently.
Still stumped? Drop your question in the comments—we’re happy to help!
Wrapping up and next steps
Creating a raised bed garden with modular designs isn’t just practical—it’s a game-changer for customizing your space and maximizing plant growth! 🌱 Whether you’re a beginner or a seasoned gardener, these flexible plans let you tailor heights, materials, and layouts to fit your unique needs.
Now that you’ve got the know-how, there’s no better time to roll up your sleeves and start building—your future harvests (and green thumb pride) will thank you!
Ready to dive in? Sketch your design, gather supplies, and begin assembling your first bed today! Happy gardening! 🌿