
Tools
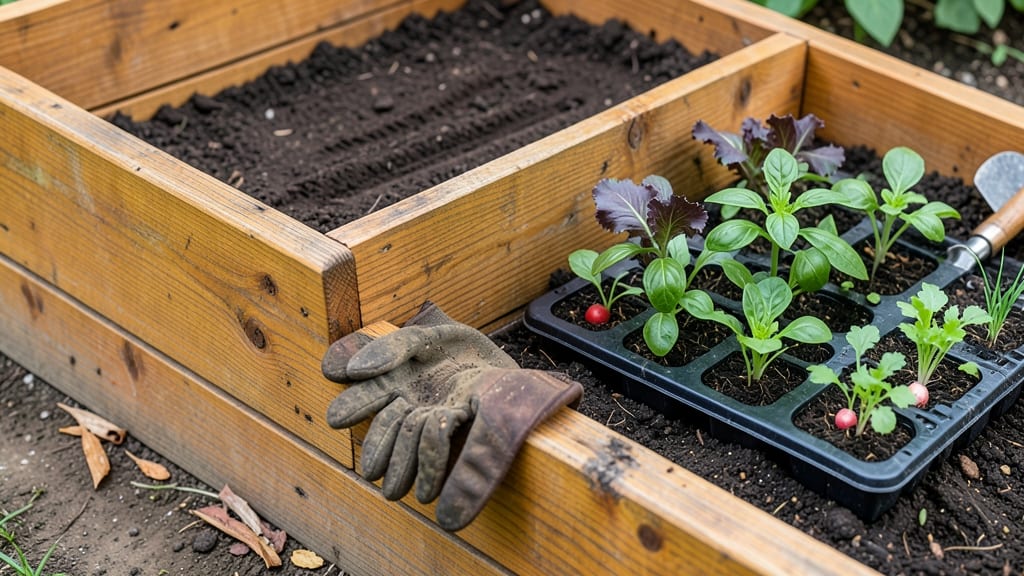
Starting a raised bed garden transforms even the smallest space into a thriving harvest zone—no backbreaking digging required. ✨ I’ve built mine from scrap wood and old pallets, proving you don’t need expensive materials to get growing.
The key lies in smart prep: choosing the right location, filling it with the perfect soil mix, and planning your layout for year-round success.
You’ll need just four essentials: untreated lumber (or repurposed wood), landscape fabric to block weeds, quality soil (or compost + topsoil), and a tape measure for precision. Skip the fancy tools—basic gardening gloves, a shovel, and a wheelbarrow for hauling soil will do.
My first bed cost under $50 and now produces three times the harvest of my in-ground plot.
By the end of the season, you’ll have a low-maintenance garden that stays weed-free, drains well, and lets you plant earlier in spring and later in fall.
The soil stays loose and fertile, roots grow deep, and even heavy feeders like tomatoes thrive without fuss. Plus, no more bending over—everything’s at waist height.
Whether you’re growing veggies, herbs, or flowers, this method adapts to any climate. Cold frames extend the season in chilly zones, while shade cloth keeps plants cool in scorching summers. Let’s get your bed built and planted in one weekend—no experience needed.
📚 In This Guide
- What you need
- Instructions
- Tips and common mistakes
- Wrapping up and next steps
What you need
- ● Raised bed frame: Untreated wood (cedar, redwood, or composite lumber) – 2x6 or 2x8 boards, 4–8 ft long (quantity depends on bed size). OR pre-made raised bed kit (check dimensions for your desired footprint).
- ○ Hardware: Galvanized or stainless steel screws (2.5–3 inches long) – ~20–40 screws (depends on frame design). Corner brackets or L-brackets (optional but recommended for stability).
- ● Landscape fabric: 1 piece (slightly larger than your bed’s base) to block weeds and pests.
- ○ Soil & amendments: High-quality garden soil or compost – ~12–18 cubic feet per 4’x8’ bed (fill to 6–12 inches deep). Optional: Perlite, vermiculite, or coconut coir for drainage and aeration.
- ● Tools: Drill/driver + drill bits. Measuring tape. Level (to ensure your bed is even!). Shovel or spade (for soil prep). Wheelbarrow (for hauling materials).
- ● Drip irrigation kit or soaker hoses for zero-waste watering.
- ● Wood stain or sealant (if using untreated wood—choose non-toxic options!).
- ● Edging stones or metal flashing to define the bed’s perimeter.
- ● Compost bins or worm composters for on-site nutrient recycling.
Step-by-step instructions for building a zero-waste raised bed
Here's how to create a sustainable, long-lasting raised bed that minimizes waste while maximizing growing space.
🪴 Step 1: Choose and Prepare Your Location
Select a 4-foot wide by 8-foot long area for your raised bed—this width ensures easy reach to the center without stepping inside. Avoid low-lying spots where water pools; raised beds should sit on level ground with at least 4 inches of clearance underneath for drainage and root access. I like to lay down cardboard (no tape or glossy ink) as a weed barrier and temporary moisture barrier before adding soil.
Mark the dimensions with stakes and string, then remove any grass or weeds within the marked area. This prevents invasive roots from competing with your plants later. If your soil is particularly compacted, consider adding a 2-inch layer of coarse wood chips as a temporary base to improve drainage before adding soil layers.
🌱 Step 2: Build the Frame Using Sustainable Materials
Construct the frame using untreated wood like cedar or redwood (naturally rot-resistant) or repurposed materials like old pallets or cinder blocks. For a 4x8-foot bed, use 2x6 boards cut to 4-foot and 8-foot lengths—this creates a 12-inch tall frame. Assemble the corners with galvanized screws (not nails) to ensure durability. I always pre-drill holes to prevent wood splitting, which weakens the structure over time.
Leave a 1-inch gap between the boards at the corners for drainage and to accommodate seasonal expansion. If using cinder blocks, stack them in a single layer with the hollow side facing upward to create pockets for soil. This method eliminates the need for wood entirely and allows for easy disassembly if you need to relocate the bed later.
💧 Step 3: Layer the Soil for Optimal Drainage and Fertility
Start with a 4-inch layer of coarse material—this could be branches, twigs, or straw—to improve drainage and encourage microbial activity. Next, add a 2-inch layer of compost (homemade or store-bought) to introduce beneficial organisms and nutrients. This layer breaks down slowly, feeding your plants over time without the risk of burning roots.
Top with a 6-inch layer of high-quality garden soil mixed with 2 inches of aged compost or well-rotted manure. Avoid fresh manure, which can scald plant roots. Water the soil lightly after each layer to help settle it and eliminate air pockets. The final soil surface should be 1-2 inches below the top of the frame to allow for future mulch or topsoil additions.
☀️ Step 4: Add Mulch and Plant Your First Crops
Cover the soil with a 2-inch layer of organic mulch, such as straw, wood chips, or leaves, to retain moisture, suppress weeds, and regulate soil temperature. Avoid plastic mulch—it traps heat and can suffocate soil life. I like to use straw because it breaks down slowly and adds organic matter as it decomposes.
Plant your first crops along the edges of the bed, leaving 12-18 inches between plants to allow for air circulation and growth. Succession planting—like adding fast-growing radishes followed by slower-maturing tomatoes—maximizes your bed’s productivity. Water deeply after planting to encourage root growth, and avoid overhead watering to prevent fungal diseases.
⏰ Step 5: Maintain and Extend the Bed’s Lifespan
Add a 1-inch layer of compost every 3-4 months to replenish nutrients and improve soil structure. This zero-waste approach keeps your bed fertile without the need for synthetic fertilizers. I also rotate crops annually to prevent soil depletion and reduce pest cycles—just keep a simple planting map to track what goes where.
Check the bed’s structure annually for signs of rot or wear, especially if using wood. If corners start to sag, reinforce them with additional screws or stakes. Over time, the soil will settle, so top up with 2-3 inches of compost or fresh soil as needed. With this method, your raised bed will stay productive for 5-10 years without needing a full rebuild.
Tips & tricks for perfect zero-waste raised bed gardens
A few key strategies that'll transform your raised bed from good to exceptional—while keeping it sustainable and productive for years.
Location Intelligence: The 4-foot width isn't arbitrary—it's the perfect reach distance for most adults. If you're taller than average, consider extending to 4.5 feet for comfort. For drainage, test your site by digging a 6-inch hole and filling it with water. If it drains in under 30 minutes, you're good to go. Slow drainage means you'll need to adjust your coarse material layer in Step 3 to 6 inches instead of 4. This simple test prevents waterlogged roots later.
Material Selection: When choosing untreated wood, cedar and redwood are the gold standards, but don't overlook reclaimed barn wood or even old wine barrels. The 1-inch corner gaps aren't just for drainage—they also prevent wood from warping as seasons change. Pro tip: If using cinder blocks, paint the interior with non-toxic sealant to prevent soil from sticking and make future disassembly easier. This small step extends your bed's lifespan significantly.
Soil Layering Strategy: The 6-inch soil layer might seem thick, but it's essential for root development. For the 4-inch coarse material layer, use a mix of 3-inch branches and 1-inch twigs—this creates air pockets that improve drainage while still breaking down over time. When adding compost, sift it first to remove any large chunks that won't decompose quickly. This prevents hot spots that could damage plant roots. The light watering after each layer isn't just about settling—it helps activate microbial activity immediately.
Maintenance Hack: That 1-inch compost top-up every 3-4 months is your secret weapon. To make it easier, set a calendar reminder for the first week of spring, summer, and fall. Keep a small bucket of compost near your bed for quick additions. For the annual structural check, run your hands along the frame corners—you'll feel any weak spots before they become visible. This proactive approach prevents costly repairs down the line and keeps your bed looking pristine.
Pro Tips for Start A Raised Bed Garden
- A few key strategies that'll transform your raised bed from good to exceptional—while keeping it sustainable and prod...
- Location Intelligence: The 4-foot width isn't arbitrary—it's the perfect reach distance for most adults. If you're ta...
- Material Selection: When choosing untreated wood, cedar and redwood are the gold standards, but don't overlook reclai...
Frequently asked questions
Got questions about diving into raised bed gardening? You’re not alone—here’s what beginners ask most often, plus quick answers to get you growing with confidence!
What’s the best time of year to start a raised bed garden?
Spring or early fall are ideal for most climates! Start in early spring (after the last frost) to give plants a head start, or in late summer/fall for cool-season crops like lettuce and spinach. In warm zones, winter planting is possible with cold-hardy veggies. Pro tip: Check your USDA zone for local timing!
Do I need to remove grass before building my raised bed?
Yes—grass can compete for nutrients and harbor weeds. Lay down cardboard or thick newspaper (no glossy ink!) under the bed to smother grass, then cover with 6+ inches of compost or soil. For stubborn roots, dig them out or use a soil solarizer (clear plastic + sunlight) for 4–6 weeks.
How deep should my raised bed be, and what’s the cheapest way to fill it?
Aim for 10–12 inches deep—enough for root crops like carrots. To save money, mix 50% compost (homemade or free from local farms) with 50% topsoil. Avoid pure compost (it compacts) or cheap fill dirt (often clay-heavy). Zero-waste hack: Use free yard waste (shredded leaves, wood chips) for mulch!
Will raised beds attract pests like slugs or rabbits?
Raised beds can deter some pests (fewer ground-dwelling critters), but slugs and rabbits might still visit. Prevent them:
- Use copper tape around edges (slugs hate it!)
- Plant slug-repellent herbs (mint, thyme) nearby.
- Install a chicken wire barrier for rabbits.
- Handpick pests at dusk (wear gloves!).
Can I use raised beds in small spaces, like a balcony or patio?
Window-box-style beds (8–12" wide) work for herbs and greens, while vertical planters (hanging pockets or trellises) maximize space. Just ensure they get 6+ hours of sunlight and use lightweight, moisture-retentive soil. Microgreen tip: Grow fast crops (radishes, arugula) in shallow containers for quick harvests!
Wrapping up and next steps
Starting a raised bed garden is an exciting, eco-friendly way to grow fresh produce year-round—without the waste! By following these steps, you’ve learned how to choose the right materials, plan your layout, and prep soil sustainably.
The key takeaway? With a little planning and zero-waste practices, anyone can turn a small space into a thriving garden.
Now that you’re ready to dig in (literally!), your next step is to pick your first plants—whether it’s leafy greens, herbs, or veggies. Start small, celebrate your progress, and watch your garden (and confidence!) grow. Happy planting! 🌱✨