
Flowers
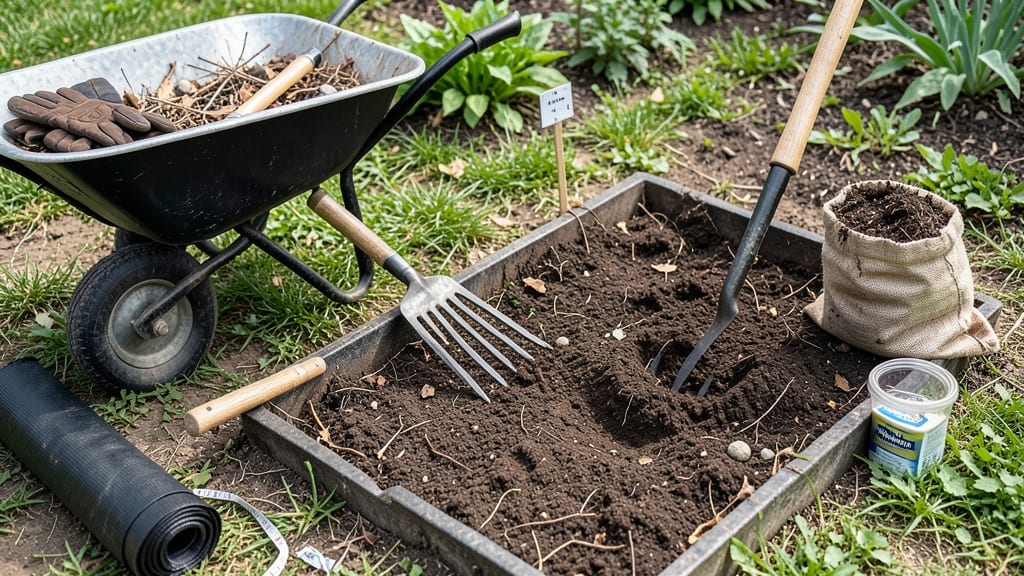
Preparing a flower bed for planting is the secret to blooms that make your neighbors green with envy. ✨ I’ve learned the hard way that skipping this step means fighting weeds, struggling with poor drainage, and plants that never quite reach their potential—no matter how much you water them.
The right prep turns your garden into a thriving ecosystem where flowers grow strong from day one.
Start by clearing the area of weeds and debris, then loosen the soil to a depth of 6-12 inches with a garden fork or tiller. If your soil is heavy clay, mix in 2-3 inches of compost to improve drainage and fertility.
Sandy soil? Add 1-2 inches of organic matter like peat moss or aged manure to help retain moisture. The goal is fluffy, crumbly soil that roots can easily grow into—no more compacted dirt that strangles your plants.
Next, test your soil’s pH (most flowers prefer 6.0-7.0) and adjust if needed with lime (to raise pH) or sulfur (to lower it). Mark planting spots with stakes or string for even spacing—crowded flowers compete for nutrients and air, leading to weak stems and fewer blooms.
A little planning now means stronger plants, bigger flowers, and less work later when your garden is in full swing.
Finish with a 2-3 inch layer of mulch (straw, shredded bark, or pine needles) to lock in moisture, suppress weeds, and regulate soil temperature. This step alone cuts down on watering by 30-50% and keeps your bed looking neat.
Whether you’re planting annuals for summer color or perennials for years of blooms, this foundation ensures your flowers start off on the right foot.
📚 In This Guide
- What you need
- Instructions
- Tips and common mistakes
- Wrapping up and next steps
What you need
- ● Garden gloves – A sturdy pair (e.g., nitrile-coated or leather) to protect your hands from thorns and soil.
- ● Pruning shears or loppers – Bypass pruners (for small plants) or loppers (for thicker stems) to trim weeds and dead plants.
- ● Garden fork or tiller – A heavy-duty fork (for manual aeration) or a rototiller (for larger beds, 10–20" depth capacity).
- ● Shovel or spade – A flat-edged spade (for digging) and a round-point shovel (for moving soil).
- ● Rake – A bow rake (for leveling) and a leaf rake (for debris removal).
- ● Wheelbarrow or large bucket – A 5–7 cubic foot wheelbarrow to haul soil, compost, or weeds.
- ● Soil testing kit – A DIY test kit (e.g., Luster Leaf) or send a sample to a local extension office for pH and nutrient analysis.
- ● Compost or organic matter – 2–4 inches of aged compost, leaf mold, or well-rotted manure (avoid fresh manure—it can burn plants!).
- ● Garden lime or sulfur – If your soil test shows pH imbalances (e.g., pelletized lime to raise pH or elemental sulfur to lower it).
- ● Slow-release fertilizer – A balanced 10-10-10 or organic fertilizer (e.g., fish emulsion or bone meal) based on your soil test.
- ● Mulch – 2–3 inches of pine straw, shredded bark, or straw to retain moisture and suppress weeds.
- ● Soil conditioners – Perlite or vermiculite (for sandy soil) or peat moss (for clay soil) to improve drainage.
- ● Ground cover fabric – Biodegradable landscape fabric to block weeds before planting annuals.
- ● Edging tools – A plastic or metal edger to define clean borders (great for formal gardens!).
- ● Knee pads or cushion – Because gardening is love, but your knees will thank you! 😉
- ● Watering can or hose with nozzle – A gentle spray nozzle to avoid disturbing freshly amended soil.
Step-by-Step instructions for preparing a flower bed
Here's the method I've used for years—tested in clay soil, sandy loam, and everything in between.
🪴 Step 1: Mark and Clear the Flower Bed
Use a garden hose or spray paint to outline your bed shape—this keeps you from wandering off course. I like to mark a 4-inch wide border around the edges to account for any slight missteps. Once outlined, remove all existing vegetation, including weeds, grass, and debris. Dig out or pull weeds by the roots to prevent regrowth.
For stubborn weeds or grass, I use a flat shovel to slice through the roots just below the soil surface. This prevents them from pushing back up later. If your bed has rocks or large debris, gather them into a pile to remove from the area entirely. The goal is a clean slate where you can see the raw soil underneath.
💧 Step 2: Loosen and Test the Soil
Use a garden fork or tiller to loosen the soil to a depth of at least 12 inches. This breaks up compacted layers and encourages root growth. I work in small sections, about 2 feet by 2 feet, to avoid overworking the soil. If the soil feels dense or clumpy, add a 2-inch layer of compost and mix it in thoroughly.
Here's the thing—don't skip the soil test. Grab a handful of soil and squeeze it. If it crumbles easily, it's loose and ready. If it forms a tight ball that doesn't break apart, it's too compacted. Amend with organic matter like compost or peat moss until it reaches a crumbly, slightly moist texture. This ensures your plants won't struggle to establish roots.
✂️ Step 3: Level and Smooth the Soil
Rake the soil surface until it's level and smooth. You want a flat plane so water doesn't pool in low spots or run off high areas. I use a bow rake for larger beds and a hand rake for finer details. Pay special attention to the edges—slightly sloping the soil outward helps with drainage and prevents erosion during watering.
Walk over the bed to check for any dips or bumps. If you feel uneven spots, add or remove soil as needed. This step might seem tedious, but it's critical for even water distribution and healthy root development. Once satisfied, give the soil a final light raking to create a fine, even texture ready for planting.
☀️ Step 4: Add Mulch and Protect the Bed
Spread a 2-3 inch layer of mulch over the entire bed, leaving a small gap around the edges to prevent pests from nesting. I prefer organic mulches like shredded bark, straw, or pine needles because they break down over time, adding nutrients to the soil. Avoid piling mulch directly against plant stems—keep it 2 inches away to prevent rot.
This layer does more than just look pretty. Mulch conserves moisture, suppresses weeds, and regulates soil temperature. Water the bed lightly after applying mulch to help settle it in place. Now your flower bed is ready for planting—roots will thrive in this nutrient-rich, well-prepared foundation.
Tips & tricks for perfect flower bed preparation
Real talk: The difference between a thriving flower bed and one that struggles comes down to these small but mighty details. Here's what nobody tells you about creating that ideal foundation.
Edge Precision: When marking your 4-inch border in Step 1, use a garden hose to create a gentle curve rather than sharp angles. Curves follow natural water flow and look more organic in the landscape. I've found that even a slight inward slope along the edges helps water drain toward the center during heavy rains—something straight lines can't do.
The Soil Test Secret: In Step 2, if your soil forms a ball that holds together but crumbles when poked, it's perfect. If it stays in a solid ball when dropped, you need more compost. Pro tip: Mix in 2 inches of compost and test again—this is how you build that ideal crumbly texture without over-amending. Trust me on this: Skipping this test is why so many flower beds fail.
Leveling Like a Pro: For Step 3, walk over your bed after raking—your goal is to feel no more than a 1/4-inch difference in elevation anywhere. I use a 2-foot level (the kind carpenters use) to check critical spots, especially after adding soil to low areas. This ensures water distributes evenly rather than pooling in one corner.
Mulch Placement Matters: When applying your 2-3 inch mulch layer in Step 4, create a slight depression around plant stems before adding mulch. This prevents water from pooling against the stems, which can cause rot. I like to use a small hand trowel to create these shallow divots—it takes 30 seconds but saves your plants from future problems.
Pro Tips for Prepare A Flower Bed For Planting
- Real talk: The difference between a thriving flower bed and one that struggles comes down to these small but mighty d...
- Edge Precision: When marking your 4-inch border in Step 1, use a garden hose to create a gentle curve rather than sha...
- The Soil Test Secret: In Step 2, if your soil forms a ball that holds together but crumbles when poked, it's perfect....
Frequently asked questions
Got questions about prepping your flower bed? You’re not alone! Here are answers to the most common queries to help you get started with confidence.
When is the best time to prepare a flower bed?
The ideal time to prep your flower bed is in early spring or fall—when the soil is workable but not frozen or waterlogged. Early spring gives plants a head start, while fall allows the ground to settle before winter. Avoid preparing beds in extreme heat or heavy rain, as this can compact the soil or wash away nutrients.
Do I need to remove all the grass before planting?
Yes, but don’t stress—you don’t need to dig it out by hand! Use a sod cutter or glyphosate herbicide (applied carefully) to kill grass roots before tilling. For smaller areas, smothering grass with cardboard or thick mulch for 4–6 weeks also works. Just ensure the grass is fully decomposed before planting.
Is compost necessary, or can I just use regular soil?
Compost is highly recommended! Regular soil often lacks the nutrients and organic matter flowers crave. Mix in 2–3 inches of compost (or well-rotted manure) to improve drainage, retain moisture, and feed beneficial microbes. For poor soil, consider a soil amendment blend with peat moss or coconut coir for extra fluffiness.
What if my soil is rocky or clay-heavy? Can I still plant flowers?
Rocky soil? Amend with sand or perlite to improve drainage. Clay-heavy? Add compost and gypsum to break up compaction. Raised beds are a great solution for both—fill them with a 50/50 mix of topsoil and compost for ideal growing conditions. Just avoid heavy tilling, which can worsen clay soil.
How often should I water after preparing the bed?
Water lightly every 2–3 days for the first 2 weeks to help roots establish, then taper to 1–2 times per week (deep watering is key!). Avoid overwatering—soggy soil can suffocate roots. Mulch with 2–3 inches of straw or wood chips to retain moisture and suppress weeds. Adjust based on your climate!
Wrapping up and next steps
Preparing your flower bed is the secret ingredient for a stunning, long-lasting garden—and you’ve got all the tools to make it happen! 🌸 From clearing weeds to amending soil and choosing the perfect mulch, each step ensures your plants thrive from day one.
Now that your bed is ready, the real magic begins: planting your flowers!
Take that first step with confidence—whether you’re adding vibrant annuals, hardy perennials, or fragrant shrubs. Happy planting, and enjoy the blooms you’ve earned! 🌱✨