
Planting
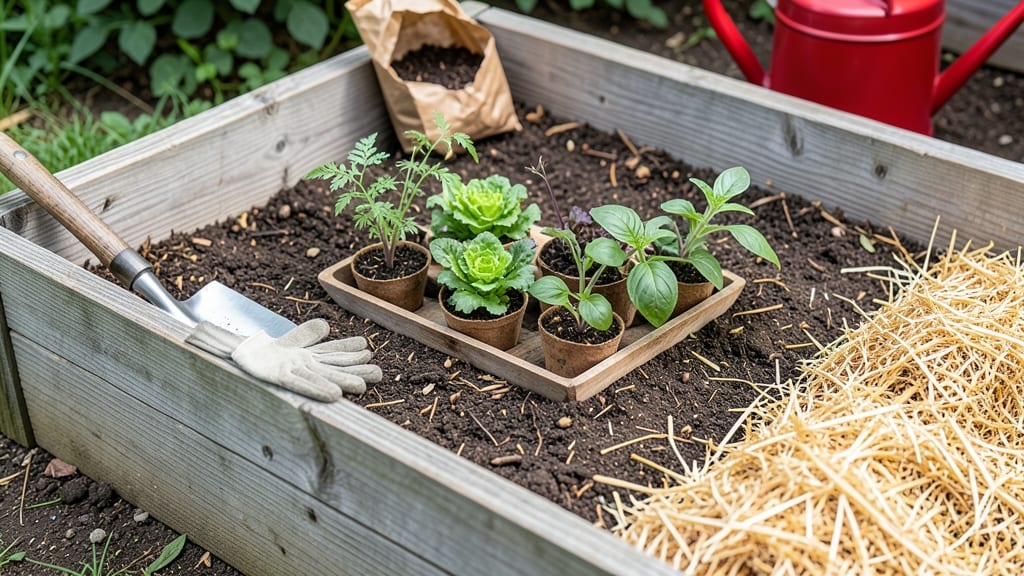
Planting a raised bed vegetable garden transforms even the smallest yard into a productive powerhouse. 🌱 The secret isn't just the plants—it's the layered soil mix that creates ideal growing conditions from day one.
My first raised bed produced tomatoes twice as large as my in-ground garden, and the difference came down to soil depth, drainage, and nutrient layers.
You'll need 4-6 inches of cardboard (for weed suppression), 12-18 inches of soil mix (a blend of compost, peat moss, and native soil), and 2x4 lumber or cedar boards for framing.
The key is building the bed 12-18 inches high—this gives roots room to grow while keeping weeds and pests at bay. Most vegetables thrive in this setup, from leafy greens to heavy feeders like peppers and eggplants.
Once planted, you'll see faster germination, stronger stems, and bigger yields because the soil stays loose and fertile. The layered approach also means you can customize for your climate—add more compost in cooler areas or extra sand for drainage in wet regions.
My zucchini plants went from struggling to producing three pounds of squash per plant in just one season. This method works for 4x8-foot beds or even small 2x4-foot plots on patios.
The real magic happens when you let the soil do the heavy lifting—so skip the tilling and focus on building that perfect growing layer.
📚 In This Guide
- What you need
- Instructions
- Tips and common mistakes
- Wrapping up and next steps
What you need
- ● Raised bed frame: Untreated cedar, redwood, or composite lumber (2x6 or 2x8, 4–8 ft long). Quantity: 4–8 pieces (depends on bed size).
- ● Corrugated metal or heavy-duty landscape fabric: 1 roll (to block weeds and pests).
- ● Soil mix: Topsoil (20–30%)
- ● Compost (30–40%)
- ● Coconut coir or peat moss (20%)
- ● Perlite or vermiculite (10%) for aeration
- ● Hardware: Galvanized screws (2.5–3 inches) or decking screws (1 box).
- ● Basic tools: Tape measure, level, drill/driver, shovel, wheelbarrow, and garden gloves.
- ● Drip irrigation kit or soaker hoses for easy watering.
- ● Wooden or metal edging to keep soil in place.
- ● Plant markers (stakes or labels) for organization.
- ● Mulch (straw or shredded leaves) to retain moisture.
- ● Fertilizer (balanced organic, like 10-10-10) for a nutrient boost.
Step-by-Step instructions for planting a raised bed vegetable garden
Here's how to build a thriving raised bed using layered soil techniques that boost root growth and yield.
🪴 Step 1: Choose and Prepare the Raised Bed Location
Select a spot with 6+ hours of sunlight daily—most vegetables need full sun for optimal growth. Avoid low-lying areas where water pools, as raised beds should drain freely. I like to place mine near a water source to simplify irrigation, but not under trees where falling leaves and roots can compete.
Measure your bed dimensions and mark the area with stakes and string. For a 4-foot wide bed (the ideal width for easy reach from both sides), I typically go 8 feet long to maximize space while keeping it manageable. Clear any grass or weeds within the marked area—roots will eventually penetrate the bed and compete with your vegetables.
🌱 Step 2: Build or Assemble the Raised Bed Frame
Use untreated wood (like cedar or redwood) or composite materials to construct your frame, ensuring it's at least 6 inches high for better drainage and easier maintenance. I prefer cedar because it naturally resists rot and pests. Cut and assemble the frame according to your measurements, securing corners with screws or corner brackets for stability.
Line the bottom with landscape fabric to prevent weeds from growing up through the soil. This isn't mandatory, but it saves time later. Place the frame in your marked location and check for level using a carpenter's level or even a long board across the top. Adjust the legs or supports as needed—an uneven bed will cause water to pool in low spots.
💧 Step 3: Layer the Soil for Optimal Drainage and Nutrition
Start with a 2-inch layer of coarse material like gravel or broken bricks at the bottom to improve drainage. This prevents waterlogging, which can suffocate roots. Next, add a 4-inch layer of compost or well-rotted manure—this feeds the soil microbes and provides essential nutrients for your plants.
Fill the remaining space with a mix of topsoil and compost, aiming for a ratio of 60% topsoil to 40% compost. I like to fluff the soil with a garden fork to aerate it before planting. Avoid garden soil from your yard, as it often compacts and contains weeds or pests. The layered approach ensures your vegetables have access to both nutrients and oxygen-rich soil.
☀️ Step 4: Plan and Plant Your Vegetables Strategically
Group plants with similar water and sunlight needs together. For example, leafy greens like lettuce and spinach thrive in partial shade, while tomatoes and peppers need full sun. I use a simple sketch to map out my bed, placing taller plants like corn or sunflowers at the north end to avoid shading shorter crops.
Plant seeds or transplants according to their spacing requirements—check the back of seed packets for guidance. For example, tomatoes need 18-24 inches apart, while carrots can be sown 2 inches apart in rows spaced 12 inches apart. Water gently after planting to settle the soil around roots, but avoid overwatering, which can wash seeds or seedlings away.
✂️ Step 5: Maintain and Mulch for Long-Term Success
Water the bed deeply 1-2 inches per week, ensuring the soil stays consistently moist but not soggy. A drip irrigation system works best for even moisture distribution. Mulch with 2-3 inches of straw or wood chips to retain soil moisture, suppress weeds, and regulate soil temperature—this is especially important in hot climates.
Monitor your plants regularly for pests or diseases. I check the undersides of leaves for aphids or signs of fungal growth every few days. If you notice issues early, address them with organic solutions like neem oil or companion planting (e.g., marigolds to deter pests). Rotate crops annually to prevent soil-borne diseases and maintain soil fertility.
Tips & tricks for perfect raised bed vegetable gardens
These practical insights will help you avoid common pitfalls and maximize your garden's potential from the very first layer.
Location Intelligence: That 6+ hours of sunlight is non-negotiable—use a solar calculator app to track your yard's light patterns throughout the day. I've seen gardens fail spectacularly when planted in spots that seem sunny in summer but get shaded in winter by nearby trees or buildings. Also, consider future growth: place your bed where it won't be blocked by mature plants in 2-3 years.
Frame Stability Secret: When checking for level in Step 2, don't just eyeball it—use a 4-foot level across the diagonal corners. I've seen beds that looked level from the sides but had one corner noticeably lower, causing water pooling. For extra stability, add corner braces to your cedar frame, especially if you're building a bed wider than 4 feet. This prevents the frame from bowing under soil weight.
Soil Layering Pro Tip: The 60/40 topsoil-to-compost ratio is perfect, but here's what nobody tells you: pre-mix your topsoil and compost in a wheelbarrow before adding to the bed. This ensures even distribution and prevents pockets of pure compost that can burn tender roots. Also, consider adding a handful of perlite or vermiculite to your topsoil mix—it improves drainage without compromising moisture retention.
Planting Strategy: For the 18-24 inch spacing of tomatoes, I recommend using a string line with evenly spaced knots as a guide when marking planting spots. This creates perfectly straight rows that make harvesting and maintenance much easier. And for those 2-inch carrot spacing requirements, consider using a simple DIY spacing tool: a wooden dowel with notches cut every 2 inches—just drag it through the soil to create uniform furrows.
Pro Tips for Plant A Raised Bed Vegetable Garden
- These practical insights will help you avoid common pitfalls and maximize your garden's potential from the very first...
- Location Intelligence: That 6+ hours of sunlight is non-negotiable—use a solar calculator app to track your yard's li...
- Frame Stability Secret: When checking for level in Step 2, don't just eyeball it—use a 4-foot level across the diagon...
Frequently asked questions
Got questions about starting your raised bed garden? You're not alone! Here are answers to the most common concerns—plus a few pro tips to set you up for success.
What’s the best time of year to plant a raised bed garden?
The ideal time depends on your climate, but most gardeners start in early spring (after the last frost) or late summer (6-8 weeks before the first frost). For year-round harvests, stagger planting with cool-season crops (like lettuce) in spring/fall and warm-season crops (tomatoes, peppers) in summer.
How much does a raised bed garden cost to start?
Costs vary, but budget $100–$500 for materials like lumber, soil, compost, and tools. DIY kits (cedar or untreated wood) are cheaper, while pre-built beds or premium soil blends (like mel’s mix) can bump up the price. Pro tip: Skip expensive soil—layer with free/cheap alternatives (cardboard, leaves, grass clippings) to cut costs!
How do I keep pests out of my raised bed?
Prevention is key! Use row covers for early planting, interplant flowers (marigolds repel pests), and avoid overwatering. For stubborn critters, try neem oil or diatomaceous earth. Bonus: Healthy soil = strong plants that resist pests naturally!
Do raised beds stay warm longer than in-ground gardens?
Yes! Raised beds warm up 2–3 weeks earlier in spring and stay warmer in fall because they’re insulated by the surrounding soil. For extra warmth, add black plastic mulch or plant heat-loving crops (like basil or peppers) closer to the bed’s edges.
Can I use old wood or pallets for my raised bed?
Use untreated lumber only—pressure-treated wood contains chemicals harmful to plants. Pallets are risky (often treated with pesticides). Safe alternatives: Cedar (naturally rot-resistant), recycled plastic lumber, or composite materials. Pro tip: Line the bottom with landscape fabric to block weeds and critters!
How long does it take to see results?
Fast growers like radishes or lettuce sprout in 2–4 weeks, while tomatoes or peppers take 60–90 days. Soil prep (especially composting) can take 1–3 months to mature. Patience pays off! Track progress with a simple harvest journal.
Wrapping up and next steps
You’ve got everything you need to grow a thriving raised bed vegetable garden! 🌱 From selecting the right materials to mastering soil layers and plant placement, these steps will set you up for a bountiful, low-maintenance harvest.
Remember, the key is patience—your garden will reward you with fresh, homegrown veggies in no time.
Now that you’re ready to plant, take the next step: sketch a simple layout of your raised bed, map out your crops, and mark your calendar for planting and maintenance tasks. Happy gardening—your future meals (and your green thumb) will thank you! 🥕✨