
Landscaping
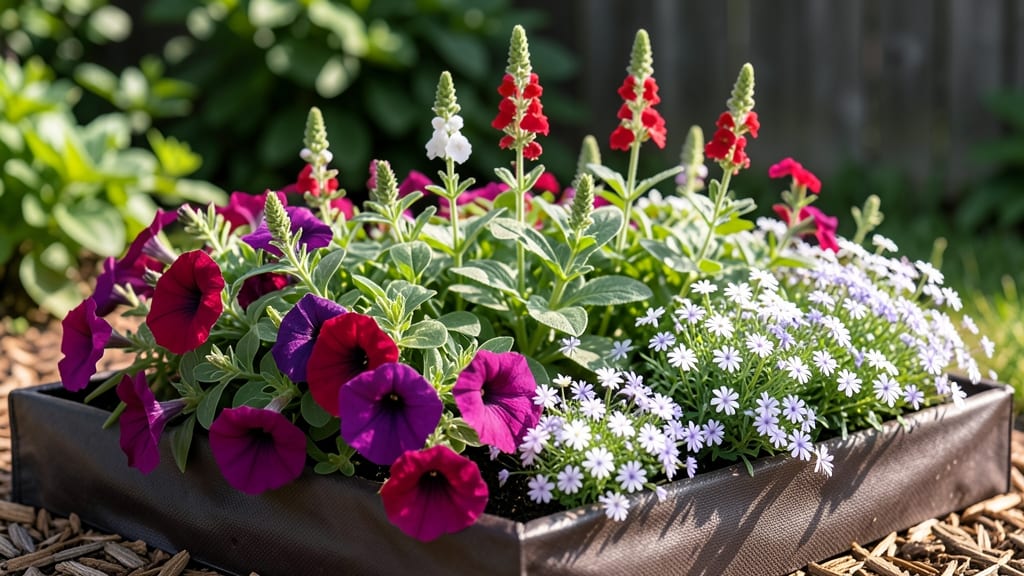
A garden bed against your fence transforms that awkward space into a lush, private retreat. 🌿 I've turned fence lines into thriving plant oases that block nosy neighbors while adding seasonal color—no more sacrificing beauty for boundary lines.
The key is choosing the right plants, prepping the soil properly, and working with (not against) the fence's limitations.
Start with a raised bed if your fence is solid—it prevents root competition and improves drainage. Use 4x8-foot cedar frames (rot-resistant and pest-proof) filled with a mix of compost and native soil.
For privacy, layer evergreen shrubs like boxwood or dwarf arborvitae with climbing roses or clematis to soften the line. Compact perennials like lavender or ornamental grasses add texture without crowding.
By summer, you'll have a year-round screen that blooms in spring, thrives in summer, and stays green through winter. The bed will also suppress weeds naturally, reduce erosion, and even muffle neighborhood noise. Plus, you'll finally have a spot to grow those cut flowers or herbs you've been dreaming of.
Works for any fence type—wood, chain-link, or vinyl—just adjust plant spacing and support structures. Here's how to make it happen without the usual headaches.
📚 In This Guide
- What you need
- Instructions
- Tips and common mistakes
- Wrapping up and next steps
What you need
- ● Pressure-treated lumber (2x6 or 2x8) – 4 pieces (2 for sides, 2 for ends), cut to your desired bed length and depth (e.g., 8 ft long x 12 in deep).
- ● Galvanized screws or decking nails – 1 lb box (2.5–3 in length) for securing wood.
- ● Landscape fabric – 1 roll (3 ft wide) to block weeds and retain moisture.
- ● Mulch or gravel – 2–3 bags (for drainage and weed suppression).
- ● Soil mix – 2–3 cubic feet (depending on bed size; opt for native soil + compost or a pre-mixed garden blend).
- ● Staple gun – For securing landscape fabric.
- ● Level & measuring tape – To ensure your bed is straight and even.
- ● Drill or hammer – For assembling the frame.
- ○ Fence-friendly hardware (optional but recommended) – L-brackets or fence anchors if your fence isn’t sturdy enough to support the bed.
- ● Decorative trim or lattice – For a polished look (e.g., cedar shakes or metal panels).
- ● Drip irrigation system – To automate watering and save time.
- ● Lighting (solar-powered) – For evening ambiance.
- ● Privacy plants – Fast-growing shrubs (e.g., bamboo, arborvitae) or climbing vines (e.g., clematis, jasmine).
- ● Wood stain or paint – To protect and customize the look.
How to build a privacy-secure garden bed against a fence
Transform that underutilized fence space into a lush, private oasis with this structured approach.
🪴 Step 1: Assess and Prepare the Fence Line
Start by examining the fence for any gaps, nails, or uneven sections that could interfere with your garden bed. Measure the length and mark a 4-foot-wide area (standard for easy maintenance) using wooden stakes and string. This width gives you room for tall plants at the back and shorter ones in front, creating natural privacy layers.
If your fence is made of wood or chain link, you'll want to lay down landscape fabric to prevent weeds from creeping up through the soil. Cut it to size and secure it with U-shaped landscape staples, overlapping edges by 6 inches to block weed growth completely. I've found that skipping this step leads to a battle with weeds that outcompetes your plants for nutrients.
🌱 Step 2: Build or Define the Bed Edges
For a clean, permanent look, install 2x6-inch pressure-treated lumber as edging along the fence line. Cut the boards to fit your measured length, then dig a 4-inch-deep trench along the string line. Set each board on edge in the trench, backfilled with soil, and secure with galvanized screws every 12 inches. This creates a raised bed that prevents soil erosion and keeps plants contained.
If you prefer a softer edge, use cedar mulch logs instead. These break down naturally over time while maintaining the bed's shape. For extra privacy height, add a second row of edging 18 inches in front of the fence line to create a tiered effect. This two-tier design works beautifully with climbing plants like clematis or morning glories.
☀️ Step 3: Layer Soil for Optimal Plant Growth
Remove any existing grass or debris from the bed area, then add a 4-inch layer of coarse gravel for drainage. This is especially important if your fence area tends to stay damp. Next, spread 2 inches of compost over the gravel—this improves soil structure and provides essential nutrients for your plants. I like to mix in a slow-release organic fertilizer at this stage to give plants a strong start.
Fill the remaining space with a high-quality garden soil mixed with 20% perlite for aeration. The perlite prevents soil compaction, which is crucial in raised beds where roots have limited space to expand. Water the soil thoroughly until it's evenly moist but not soggy. You'll know it's ready when water drains through within 15-20 minutes—no puddles should remain.
🌿 Step 4: Plant for Privacy and Seasonal Interest
Begin with tall, fast-growing plants along the fence line to create an immediate privacy screen. Options like arborvitae shrubs (planted 3 feet apart) or bamboo (if you want a dramatic effect) will reach 8-10 feet within a few years. For quicker results, interplant with sunflowers or tall grasses like Miscanthus, which add height and texture immediately.
In the middle tier, add medium-height plants like hydrangeas, holly bushes, or boxwood for structure and year-round interest. These should be spaced 2-3 feet apart to allow for growth. Finally, fill the front edge with low-growing perennials such as heuchera, ajuga, or creeping thyme to soften the bed's appearance and prevent weeds from taking over.
💧 Step 5: Mulch and Maintain for Long-Term Privacy
Spread a 3-inch layer of organic mulch, like shredded bark or wood chips, over the soil surface. This retains moisture, suppresses weeds, and regulates soil temperature. I always choose dark brown mulch because it absorbs heat during the day and releases it slowly at night, which is especially helpful in cooler climates. Avoid fresh wood chips, as they can draw nitrogen from the soil and stunt plant growth.
Water deeply twice a week during the first growing season to establish roots, then taper to once a week once plants are established. Check soil moisture by sticking your finger 2 inches into the ground—if it feels dry, it's time to water. Prune plants in early spring to encourage bushier growth and remove any dead or diseased foliage. With this setup, you'll enjoy a private, beautiful garden space within 2-3 seasons.
Tips & tricks for perfect privacy garden beds
Here's what nobody tells you about creating a fence-friendly garden that actually works long-term.
Weed Prevention Strategy: In Step 1, when you lay down the landscape fabric, extend it 6 inches beyond the bed edges on all sides. This creates a physical barrier that prevents weeds from migrating into your garden from surrounding areas. I've seen many gardeners skip this extra step, only to deal with weeds creeping in from the sides months later. For extra protection, consider adding a 1-inch border of landscape fabric around the perimeter before installing your edging.
Edging Installation Tip: When digging the 4-inch-deep trench for your pressure-treated lumber in Step 2, use a leveling tool to ensure the trench runs perfectly straight. Uneven trenches will result in crooked edging that looks unprofessional. For the 12-inch screw spacing, I recommend pre-drilling holes to prevent wood splitting, especially if you're working with pressure-treated lumber that can be more brittle. A cordless drill with a 1/8-inch bit works perfectly for this task.
Soil Layering Secret: In Step 3, when adding your 20% perlite mixture, don't just sprinkle it on top—mix it thoroughly with the garden soil before filling the bed. This ensures even aeration throughout the entire root zone. For the 15-20 minute drainage test, I recommend using a perforated drainage tube inserted into the soil. This gives you a more accurate reading of how water moves through different layers of your soil mix.
Plant Spacing Hack: For Step 4's 3-foot spacing for arborvitae, consider creating a grid pattern using wooden stakes before planting. This ensures consistent spacing that looks intentional rather than haphazard. When planting sunflowers for quick privacy, space them 12-18 inches apart—closer than the 3-foot rule for shrubs—to create a dense, immediate screen. Remember that sunflowers will reach 6-8 feet tall, so they'll provide quick coverage while your permanent plants establish.
Pro Tips for Garden Bed Against Fence
- Here's what nobody tells you about creating a fence-friendly garden that actually works long-term.
- Weed Prevention Strategy: In Step 1, when you lay down the landscape fabric, extend it 6 inches beyond the bed edges ...
- Edging Installation Tip: When digging the 4-inch-deep trench for your pressure-treated lumber in Step 2, use a leveli...
Frequently asked questions
Got questions about creating a garden bed against a fence? You’re not alone! Here are some of the most common concerns—and their practical solutions—to help you plan with confidence.
What’s the best way to prevent soil erosion or spillage when building against a fence?
Line the back of your bed with landscape fabric or a hard barrier (like plywood or corrugated metal) to block soil from seeping into fence gaps. Add a 3–4 inch layer of gravel behind the fabric for drainage and stability. For extra security, use edging materials (like bricks or plastic) to contain the soil.
When is the ideal time to plant a garden bed against a fence?
The best time depends on your climate! In mild zones, plant in early spring (after the last frost) or fall (6–8 weeks before frost). In hotter areas, opt for late summer/early fall to avoid scorching. If using perennials or shrubs, plant in spring for established root growth before summer heat.
Can I use this design if my fence is made of chain link or metal?
Metal or chain-link fences work great for raised beds—just ensure the bed has sturdy supports (like pressure-treated lumber or metal brackets) to bear weight. For in-ground beds, add a root barrier (like hardware cloth) to prevent invasive roots from damaging the fence. Avoid heavy materials (like concrete blocks) that could warp the fence over time.
How do I keep plants from shading out my fence or neighbors’ property?
Choose compact or dwarf varieties of plants (e.g., bush beans, compact roses, or low-growing perennials) to minimize overgrowth. Prune aggressively in late winter and regularly during the growing season. If privacy is the goal, opt for fast-growing climbers (like clematis or ivy) on a trellis or lattice instead of letting vines sprawl directly onto the fence.
What if pests or weeds keep invading my garden bed?
Start with a clean fence line—remove weeds and debris before planting. Use mulch (straw, wood chips) to suppress weeds and deter pests. For bug control, introduce beneficial insects (like ladybugs) or use organic sprays (neem oil, insecticidal soap). If rodents are a problem, secure the bed edges with hardware cloth buried 12 inches deep.
Wrapping up and next steps
Creating a garden bed against your fence is a fantastic way to add privacy, beauty, and functionality to your outdoor space—without sacrificing precious yard room. Whether you opt for lush evergreens, vibrant flowers, or a mix of both, this design maximizes your garden’s potential while keeping maintenance simple.
Now that you’re armed with the right materials, tips, and answers to common questions, it’s time to roll up your sleeves and get planting!
Start small if you’re new to gardening, or go bold with a full border for instant impact. Your fence-side oasis is just a shovel’s throw away—happy gardening! 🌿✨