
Flowers
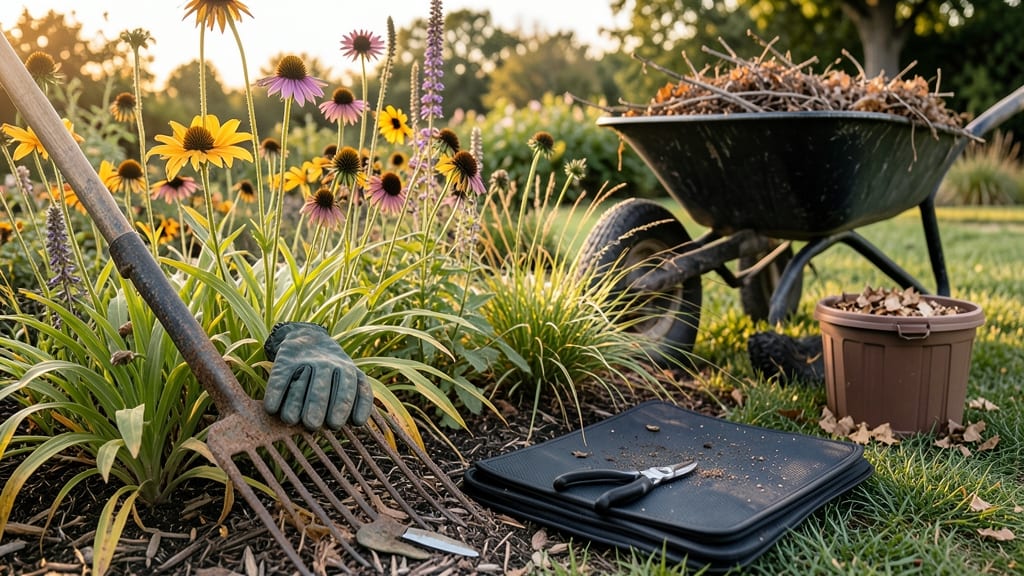
Spring revival starts with a flower bed clean out that feels like a fresh start. 🌿 I’ve seen how last year’s clutter—dead stems, stubborn weeds, and compacted soil—can smother even the hardiest perennials, so I’ve perfected a 4-step method that turns chaos into a thriving canvas by early May.
The key? Removing everything without overworking the soil, so you’re not left with bare dirt waiting for weeds to move in.
You’ll need basic tools—a sturdy shovel, pruning shears, and a wheelbarrow for debris (or just a big trash bag if space is tight). A soil test kit helps too, but even without one, you can still improve drainage with a quick fork-tilling session.
The real secret? Working in dry weather—wet soil sticks to everything and turns cleanup into a muddy mess. I’ve learned that the hard way after wrestling with clay in April showers.
By the end, your bed will look like a blank slate ready for fresh mulch and new plants. The soil will breathe better, weeds will have fewer hiding spots, and your perennials will reward you with lush, vigorous growth all season.
Plus, you’ll avoid the dreaded mid-summer slump when neglected beds turn into a tangle of brown stems and leaf litter.
This method works for any flower bed—small borders, large perennial gardens, or even that tricky corner where weeds seem to grow overnight. The only rule? Don’t rush it. A thorough cleanout now means fewer headaches (and fewer hours spent weeding) later. Let’s get that bed ready for its comeback!
📚 In This Guide
- What you need
- Instructions
- Tips and common mistakes
- Wrapping up and next steps
What you need
- ● Garden gloves (1 pair, nitrile-coated for durability)
- ● Pruning shears (1 pair, bypass blades for clean cuts)
- ● Garden fork (1, heavy-duty for aerating soil)
- ● Garden rake (1, bend-resistant for debris removal)
- ● Garden hose (with adjustable nozzle for rinsing)
- ● Wheelbarrow or large trash bags (for hauling debris)
- ● Compost bin or bag (for organic waste)
- ○ Knee pads (optional but highly recommended for comfort)
- ● Soil tester kit (to check pH/nutrients before replanting)
- ● Mulch or compost (for enriching soil post-cleanup)
- ● Hand trowel (for small adjustments or planting)
- ● Safety glasses (if dealing with thorny plants or debris)
- ● Portable leaf blower (for quick debris clearing in large beds)
Step-by-step instructions for cleaning out a flower bed
Here's how to refresh your garden space without the overwhelm—just tools, elbow grease, and a clear plan.
🪴 Step 1: Gather Your Tools and Clear the Area
Start by collecting the essentials: a sturdy pair of gardening gloves, a sharp pruning shears, a wheelbarrow or large trash bags, and a sturdy rake. I like to work in sections, so I clear a 3-foot radius around my workspace first—this keeps tools organized and prevents tripping over debris. Lay down a tarp or old blanket to catch fallen leaves, twigs, and spent plants as you go.
Remove any remaining winter mulch or debris from the bed's surface. This is your chance to spot hidden problems like last year's weeds or pests lurking under the surface. I always take a quick walk around the perimeter to note any overgrown vines or invasive plants that might need special attention. Pro tip: Wear closed-toe shoes—this isn't a job for sandals.
✂️ Step 2: Prune Dead and Diseased Plants
Examine each plant stem by stem. Cut back anything that looks brown, mushy, or hollow—these are signs of disease or winter damage. I use my pruning shears to make clean cuts about ¼ inch above healthy growth. For perennials, I avoid cutting into the green parts unless absolutely necessary, as this is where new growth will emerge.
Don't toss everything in the trash yet. Healthy-looking stems can often be composted, while diseased plants should go in the trash to prevent spreading pathogens. I keep a small bucket nearby for compost-worthy clippings. Real talk: If you see black spots or powdery residue on stems, those plants are better off in the trash—don't risk reinfecting your bed.
🌱 Step 3: Remove Weeds and Loosen Soil
Pull weeds by their roots—this prevents them from growing back. I use a dandelion weeder for deep-rooted invaders and my fingers for smaller weeds. Work the soil gently with a rake or cultivator to break up compacted areas. You'll know you're doing it right when the soil crumbles easily and you can see earthworms at work—these are your allies!
For stubborn weeds like bindweed or creeping Charlie, I dig deeper with a hand fork. The goal is to expose as much of the root system as possible. If your soil feels rock-hard, take a break and water it first—dry soil is nearly impossible to loosen by hand. I like to work in 12-inch sections to avoid exhaustion, especially on larger beds.
💧 Step 4: Refresh the Soil and Prep for Planting
Spread a 2-3 inch layer of compost over the bed, working it into the top 6 inches of soil with your hands or a broadfork. This improves drainage and adds nutrients for new plants. I like to mix in a handful of bone meal or slow-release fertilizer if I'm planting bulbs or heavy feeders like roses.
Rake the surface smooth and add a fresh layer of mulch—2-3 inches of shredded bark or straw works best. This keeps moisture in and weeds out. Here's the thing—don't overdo it with mulch. Too much can suffocate plant roots and create a breeding ground for pests. I always leave a 1-inch gap between the mulch and plant stems for airflow.
Tips & tricks for perfect flower bed clean out
Here's what I've learned after tackling this project year after year—these tricks make all the difference between a frustrating afternoon and a satisfying spring revival.
Work in Sections: I can't stress this enough—clearing a 3-foot radius at a time keeps your workspace organized and prevents you from getting overwhelmed. Think of it like cleaning a closet: tackle one shelf at a time. This also helps you spot problems like invasive plants before they spread across the entire bed.
Compost Smarter: Don't just toss everything into your compost bin. Healthy stems and leaves are perfect for compost, but diseased plants should go in the trash. I keep a small bucket nearby to separate compost-worthy materials from the trash pile. This prevents spreading pathogens back into your garden.
Soil Prep Secret: When loosening soil in Step 3, take a moment to check for earthworms—they're your best indicator of healthy soil. If you don't see many, it might be time to add some organic matter. I like to work in 12-inch sections to avoid exhaustion, especially on larger beds. This also helps you focus on one area at a time.
Mulch Like a Pro: That 2-3 inch layer of mulch is crucial, but don't forget to leave a 1-inch gap between mulch and plant stems. Too much mulch can suffocate plants, while too little won't protect against weeds. I find shredded bark works best—it breaks down slowly and improves soil structure over time.
Pro Tips for Flower Bed Clean Out
- Here's what I've learned after tackling this project year after year—these tricks make all the difference between a f...
- Work in Sections: I can't stress this enough—clearing a 3-foot radius at a time keeps your workspace organized and pr...
- Compost Smarter: Don't just toss everything into your compost bin. Healthy stems and leaves are perfect for compost, ...
Frequently asked questions
Got questions about giving your flower bed a fresh start? Here are some of the most common concerns—plus quick, practical answers to keep your gardening game strong!
When is the best time to clean out a flower bed?
The ideal time is early spring (before new growth starts) or late fall (after frost). This gives plants time to recover and lets you spot weeds or pests before they spread. Avoid mid-summer—your bed will need extra care to bounce back!
Should I remove ALL the old plants and debris?
Not always! If plants are healthy but dormant (like perennials), trim them back but leave roots intact. Remove only dead, diseased, or invasive growth. Mulch leftover debris to enrich soil naturally—just don’t smother new shoots!
What’s a good alternative if I don’t want to dig everything out?
Try the sheet mulching (or "lasagna gardening") method! Layer cardboard (blocking weeds), compost, and mulch over the bed. Over time, it breaks down, improving soil without heavy digging. Perfect for low-maintenance gardeners!
My flower bed looks messy after cleaning—how do I fix it?
Start with a thin layer of compost (1–2 inches) to refresh soil, then add fresh mulch (3–4 inches) to suppress weeds and retain moisture. Replant perennials or annuals in clusters for a polished, natural look. A quick rake smooths edges!
Will cleaning out my flower bed attract pests?
Only if you leave decaying plant matter untreated. Remove debris promptly, and aerate soil to deter grubs or slugs. Add beneficial nematodes or diatomaceous earth if pests linger. A clean bed = fewer hiding spots for critters!
Still stumped? Drop your question in the comments—we’re happy to help your flower bed thrive!
Wrapping up and next steps
A fresh, vibrant flower bed starts with a clean slate—and you’ve got all the tools to make it happen! 🌸 By removing debris, refreshing the soil, and prepping for new plantings, you’re not just tidying up; you’re setting the stage for a stunning spring and summer display.
Your hard work will pay off in blooms that steal the show and a garden that feels like a true sanctuary.
Ready to transform your space? Grab your gloves, gather your supplies, and take that first step—your future flowers will thank you! 🌱 For extra inspiration, browse seasonal planting guides to plan your next masterpiece.