
Landscaping
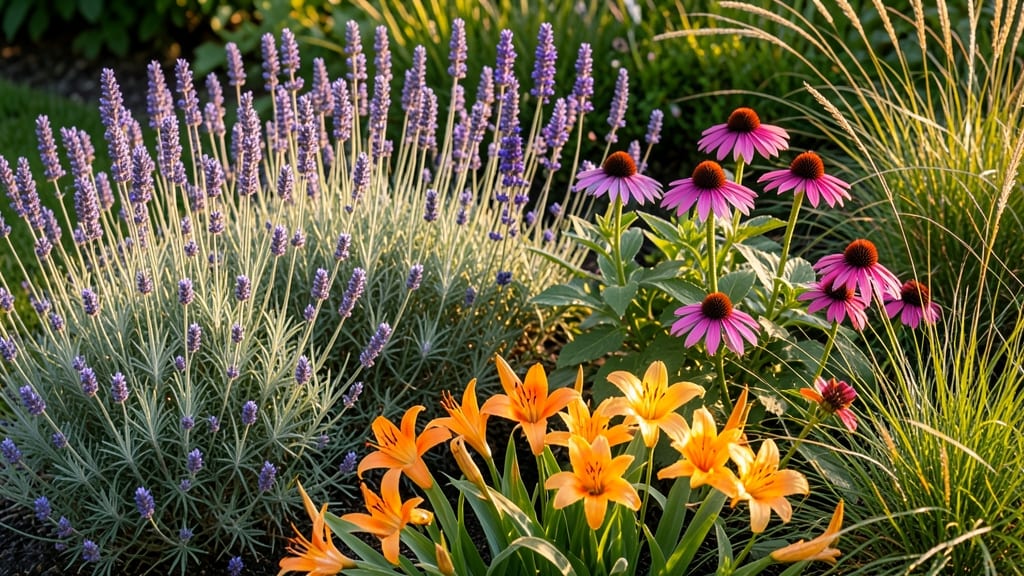
A flower bed against your house foundation doesn't just look good—it protects your home too. ✨ The right plants and design keep moisture away from your foundation while adding curb appeal that makes neighbors take notice.
I've learned that the best beds combine drought-tolerant perennials with strategic mulching to prevent soil erosion and water pooling.
Start with well-draining soil—amend compacted foundation soil with compost and sand if needed. Choose plants that thrive in partial shade, like hostas, ferns, or ornamental grasses, and group them by water needs.
A 3-inch layer of mulch keeps roots cool and prevents weeds from competing for space near your home's base.
You'll end up with a lush, low-maintenance border that looks intentional, not accidental. The right spacing keeps plants healthy while creating visual flow, and integrating hardscaping like stepping stones or pavers adds structure without overwhelming the space. This isn't just landscaping—it's a protective, beautiful investment.
Works for any home style, from modern minimalist to cozy cottage. The key is balancing aesthetics with function—so your garden enhances your house, not just its surroundings. Let's get started with the right plants and placement!
📚 In This Guide
- What you need
- Instructions
- Tips and common mistakes
- Wrapping up and next steps
What you need
- ● Topsoil or garden soil: 1–2 cubic yards (depending on bed size and depth). Opt for well-draining soil amended with compost for healthier plants.
- ● Mulch: 2–3 bags (cypress, pine straw, or shredded bark). Helps retain moisture and suppress weeds.
- ● Landscape fabric: 1 roll (4’ x 50’). Prevents weeds while allowing water and roots to pass through.
- ● Edging material: Flexible metal, plastic, or stone (e.g., 10–15 linear feet). Keeps mulch and soil in place.
- ● Perennials/annuals: 12–24 plants (mix of heights/colors). Choose foundation-friendly varieties like hostas, heucheras, or ornamental grasses.
- ○ Gravel or crushed stone: 1–2 bags (for drainage layer, if needed). Optional but ideal for clay-heavy soils.
- ● Garden shovel or spade
- ● Wheelbarrow (for hauling soil/mulch)
- ● Rake (for leveling soil)
- ● Measuring tape
- ● Gloves (to protect your hands!)
- ○ Knee pads (optional but comfy!)
- ● Drip irrigation kit: For low-maintenance watering.
- ● Solar-powered lights: To highlight your bed at night.
- ● Decorative stones or pavers: For a polished, modern look.
- ● Slow-release fertilizer: Boosts plant health early on.
Step-by-Step guide to creating a stunning foundation flower bed
Here's how to design a functional, architecturally cohesive flower bed that enhances your home's curb appeal while protecting your foundation.
🪴 Step 1: Assess and Prepare the Foundation Area
Start by measuring the space along your foundation where you plan to install the flower bed. I always mark the boundaries with landscape paint or stakes to visualize the design. The bed should be at least 12 inches wide to accommodate plants and mulch properly while allowing easy maintenance access. For a professional look, keep the width proportional to your home's architectural features—narrower beds work well under windows, while wider ones complement longer foundation walls.
Remove any existing vegetation within the marked area using a garden spade or edging tool. Be careful not to damage the foundation itself or any utility lines. I like to use a 1-inch border edging tool to create clean, defined edges that will guide your planting design. This prevents soil from eroding back toward the house and keeps the bed looking crisp over time.
🌱 Step 2: Improve Soil and Install Drainage Solutions
Foundation flower beds need excellent drainage to prevent water from pooling against your home's base. I recommend installing a 4-inch wide French drain along the foundation edge before adding soil. This involves digging a shallow trench, filling it with gravel, and placing a perforated drain pipe before covering it with landscape fabric. The drain should slope slightly away from the house to direct water efficiently.
Once drainage is in place, amend the existing soil with 2-3 inches of compost and 1-2 inches of coarse sand to improve texture and drainage. For clay-heavy soils, I add a 50/50 mix of topsoil and perlite to create a looser growing medium. Test the soil's moisture level by squeezing a handful—it should hold together but not be sticky. This preparation ensures your plants won't suffer from poor drainage or compacted roots.
☀️ Step 3: Design Layers for Architectural Harmony
Begin with evergreen shrubs or ornamental grasses as your foundation layer, positioned 12-18 inches from the house. These plants provide year-round structure and prevent soil erosion. For a mid-height layer, I recommend perennials like hostas, heucheras, or daylilies, planted 18-24 inches apart to create visual interest. Choose varieties that complement your home's color palette—darker foliage plants work beautifully against brick or stone foundations.
Top the design with annuals or seasonal bloomers like petunias, geraniums, or salvia for pops of color. I always select plants with varying heights and bloom times to ensure continuous interest. For example, a 12-inch tall salvia behind a 6-inch impatiens creates natural tiering that draws the eye upward toward your home's architectural details. Group plants in odd-numbered clusters (3, 5, or 7) for a more organic, balanced look.
💧 Step 4: Mulch and Add Finishing Touches
Apply 3-4 inches of organic mulch, such as shredded bark or cypress mulch, keeping it 2 inches away from plant stems to prevent rot. I prefer mulch in earthy tones that complement the home's exterior—light gray mulch against a modern house, or dark brown against brick. This layer suppresses weeds, retains moisture, and regulates soil temperature, which is especially important for foundation plantings that may dry out faster due to reflected heat from the house.
Add final architectural elements like stepping stones or low edging to define the bed's perimeter. For a contemporary look, I use smooth river rocks or metal edging strips that align with the home's design aesthetic. Install a drip irrigation system on a timer to automate watering—foundation beds often require more frequent watering due to their exposed position. Test the system by running it for 15 minutes and checking that water reaches all plant zones without pooling.
✂️ Step 5: Maintain for Long-Term Structural Appeal
Water newly installed plants deeply every other day for the first two weeks, then taper to once weekly during dry spells. I check soil moisture by inserting my finger 2 inches deep—if it feels dry, it's time to water. Foundation beds often dry out faster due to reflected heat, so don't rely solely on rainfall. Fertilize with a slow-release granular fertilizer in early spring and mid-summer to support vigorous growth.
Prune plants as needed to maintain their shape and prevent overgrowth that could obstruct windows or vents. I schedule a spring cleanup to remove dead foliage and a fall division for perennials that may have spread too aggressively. Monitor for pests like aphids or spider mites, which are more common in foundation plantings due to their sheltered position. A strong spray of water or insecticidal soap usually resolves minor infestations before they become problematic.
Tips & tricks for perfect foundation flower beds
Between us, these small details make the difference between a functional foundation bed and one that truly enhances your home's architectural beauty.
Drainage is Non-Negotiable: That 4-inch wide French drain isn't just recommended—it's essential for preventing moisture damage to your foundation. I've seen too many beds fail because homeowners skipped this step. Use a level to ensure the trench slopes at least 1/4 inch per foot away from the house. For clay-heavy soils, consider extending the drain another 2-3 feet beyond the bed's edge to handle heavy rainfall properly.
Soil Preparation Pays Off: The 2-3 inches of compost and 1-2 inches of coarse sand in Step 2 create a growing medium that mimics natural conditions. I always mix in a handful of mycorrhizal fungi granules with the compost—this helps plant roots establish faster and absorb nutrients more efficiently. For sandy soils, add an extra inch of compost to help retain moisture without becoming waterlogged.
Layering Creates Depth: When arranging your plants in Step 3, think vertically as well as horizontally. Place taller plants like 12-inch salvia behind shorter ones to create visual layers that draw the eye upward toward architectural features. I like to use the "thirds rule"—divide your bed into three vertical sections and fill each with plants of similar height ranges. This creates natural transitions that feel intentional rather than random.
Mulch Color Matters: The 3-4 inches of mulch in Step 4 isn't just functional—it's part of your design palette. Dark brown mulch against brick creates contrast, while light gray mulch against modern siding enhances clean lines. I've found that cypress mulch lasts longer than shredded bark and resists clumping, making it ideal for foundation beds where appearance matters year-round.
Pro Tips for Flower Bed Against House Foundation
- Between us, these small details make the difference between a functional foundation bed and one that truly enhances y...
- Drainage is Non-Negotiable: That 4-inch wide French drain isn't just recommended—it's essential for preventing moistu...
- Soil Preparation Pays Off: The 2-3 inches of compost and 1-2 inches of coarse sand in Step 2 create a growing medium ...
Frequently asked questions
Got questions about creating a flower bed against your house foundation? You’re not alone! Here are some of the most common concerns—and their solutions—to help you plan with confidence.
How close can a flower bed be to a house foundation without causing damage?
Aim to keep the flower bed at least 12–18 inches away from the foundation to prevent moisture buildup or root intrusion. If your soil drains poorly, increase the distance to 24 inches and use a French drain or gravel border to redirect water. Always check your local building codes, as some areas require setback rules for landscaping near structures.
When is the best time of year to plant a flower bed against a foundation?
For perennials and shrubs, plant in early spring or fall when temperatures are mild and rain is plentiful. Annuals can go in late spring after the last frost. Avoid planting in summer heat or winter frost, as young roots struggle to establish. If you’re using mulch, apply it after planting to retain moisture and suppress weeds.
What are some low-maintenance alternatives to traditional flower beds near a foundation?
If you want elegance without the upkeep, consider:
- Ground cover plants (e.g., creeping thyme, sedum, or ajuga) to reduce weeds and erosion.
- Native grasses or ornamental grasses (like fountain grass or switchgrass) for texture and drought resistance.
- Rock gardens with succulents or alpine plants for a modern, water-wise look.
- Hedges or shrubs (e.g., boxwood or dwarf lilac) for year-round structure and privacy.
Why is my flower bed near the foundation getting soggy or developing mold?
Soggy soil or mold near your foundation usually means poor drainage or excessive irrigation. Fix it by:
- Adding a gravel layer (4–6 inches) beneath the soil in the bed to improve drainage.
- Installing a French drain or perforated pipe to redirect water away from the house.
- Using well-draining soil mixes (like a blend of topsoil, compost, and perlite).
- Avoiding overhead watering—opt for drip irrigation or soaker hoses instead.
Will a flower bed against my foundation affect my home’s resale value?
Absolutely—but in a good way! A well-designed flower bed can boost curb appeal and make your home more attractive to buyers. Focus on:
- Neat, structured plantings that complement your home’s architecture.
- Native or drought-tolerant plants to reduce maintenance costs for future owners.
- Proper spacing and mulching to show you’ve invested in long-term care.
Wrapping up and next steps
A flower bed against your house foundation isn’t just a decorative choice—it’s a smart way to enhance curb appeal while protecting your home’s structural integrity. 🌸 By selecting the right plants, materials, and drainage solutions, you create a harmonious blend of beauty and function that lasts for years.
Ready to transform your space? Start by sketching your design, gathering supplies, and taking it step by step. With a little planning and effort, you’ll enjoy a stunning, low-maintenance garden that complements your home’s architecture and keeps it safe! 🌿