
Tools
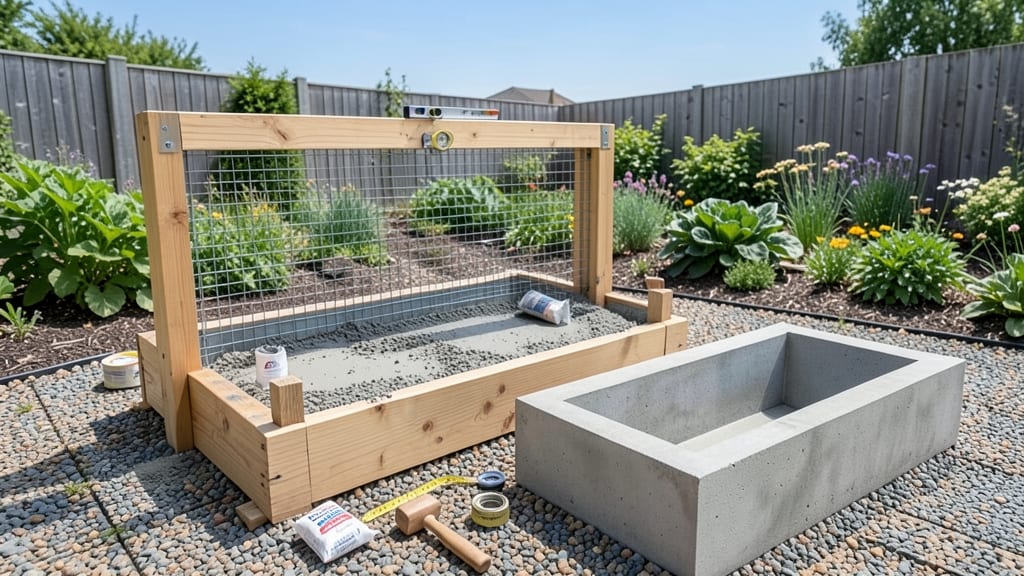
Creating concrete raised garden bed molds lets you build custom-shaped beds that last decades. 🌱 I started with simple plywood forms and now have durable, weatherproof beds that define my garden’s layout—no more generic rectangular boxes.
The beauty of concrete molds is their endless versatility: curves, angles, and even built-in seating. You’ll need basic tools (plywood, screws, and release agent), but the process is beginner-friendly. My first attempt had a few rough edges, but now I design beds that fit my space perfectly.
Once cured, these beds stay cool in summer and drain well, ideal for vegetables or flowers. The reinforcement bars keep them sturdy, and the smooth finish makes weeding a breeze. You’ll end up with a garden feature that’s both functional and stunning.
Works for any yard size—from small urban plots to large backyard projects. Ready to shape your garden’s future?
📚 In This Guide
- What you need
- Instructions
- Tips and common mistakes
- Wrapping up and next steps
What you need
- ● Concrete mix: 60 lbs (for a small bed) to 100+ lbs (for larger projects). Use a pre-mixed 4000-psi concrete for durability.
- ● Plywood: ½” thick, cut to your mold dimensions (e.g., 4’ x 2’ for a standard bed). Sand the edges to prevent rough seams.
- ● Screws or nails: 1½” deck screws (50–100 pieces) or galvanized nails for securing plywood corners.
- ● Release agent: Petroleum jelly, wax paper, or commercial mold release (spray or liquid) to prevent concrete from sticking.
- ○ Reinforcement: Optional but recommended: Wire mesh (½” x ½” grid) or fiber mesh (for extra strength).
- ● Measuring tape & pencil (for precise mold dimensions).
- ● Circular saw or jigsaw (to cut plywood to shape).
- ● Drill/driver (for assembling screws).
- ● Level (to ensure your mold sits flat).
- ● Wheelbarrow or mixing tub (for concrete prep).
- ● Concrete vibrator or tamping rod (to remove air bubbles).
- ● Safety gear: Gloves, goggles, and a dust mask (concrete is heavy—handle with care!).
- ● Flat, stable ground: Clear debris and level the area where your mold will sit.
- ● Weather check: Work on a dry, mild-day (50–75°F)—avoid extreme heat or rain.
- ○ Helper (optional but helpful!): Concrete is heavy; two hands make setup easier.
Step-by-Step guide to building DIY concrete raised garden bed molds
Here's how to create sturdy, reusable forms for perfectly shaped concrete beds that last seasons.
🪴 Step 1: Design Your Garden Bed Shape and Dimensions
Sketch your design on graph paper first—most DIY gardeners start with 4-foot-wide by 8-foot-long rectangular beds for easy access. Mark 12-inch deep sides for root space and 2-inch thick walls to prevent cracking. I always add 45-degree beveled corners for a cleaner look and easier assembly.
Measure twice, cut once. Use 2x4 lumber as your guide for straight edges—press it against your sketch and trace the perimeter onto plywood sheets. This ensures your final mold matches your design exactly. Pro tip: Add 1-inch overhangs to your plywood template to account for concrete spread.
📏 Step 2: Build the Mold Frame with Plywood and Bracing
Cut ½-inch plywood to your traced dimensions—this will form the sides of your mold. For a 4x8-foot bed, you'll need four 4-foot-wide panels and two 8-foot-long panels. Sand all edges smooth to prevent concrete from sticking later. I reinforce the corners with 2-inch wood screws and corner braces for extra stability.
Assemble the frame by attaching the side panels to the end panels using 2x4 stakes as temporary supports. Space the stakes every 2 feet along the length. Check for square by measuring diagonals—they should be equal. For deeper beds, add horizontal plywood strips every 2 feet up the sides to prevent bowing under wet concrete weight.
💧 Step 3: Line the Mold with Release Agent and Reinforcement
Apply concrete release agent (or vegetable oil) to all plywood surfaces—this prevents the concrete from bonding to your mold. Use a paint roller for even coverage, especially on corners where concrete often sticks. Let it dry completely before proceeding. I also line the bottom with heavy-duty plastic sheeting to contain any spillover.
Install wire mesh or rebar at the bottom for structural integrity. For a 4x8-foot bed, use ½-inch mesh cut to fit inside the mold, leaving 2-inch gaps at the edges. Secure it with zip ties to prevent shifting during pouring. This reinforcement prevents cracking as the concrete cures and handles seasonal soil pressure.
☀️ Step 4: Pour and Cure the Concrete Mixture
Mix 4 parts gravel, 2 parts sand, and 1 part Portland cement (by volume) with enough water to create a peanut butter consistency. Pour the mixture into the mold in 2-inch layers, screeding each layer level with a 2x4. Tap the sides gently with a rubber mallet to eliminate air pockets. Cover with plastic sheeting for 48 hours to retain moisture during curing.
Keep the concrete moist for 7 days by misting daily—this prevents surface cracking. After 24 hours, remove the plywood sides carefully with a pry bar, leaving the base intact. For a 4x8-foot bed, I reinforce the corners with concrete anchors before removing the mold to ensure structural stability. Let the bed cure fully for 28 days before planting.
✂️ Step 5: Finish and Prepare for Planting
Once fully cured, remove any rough edges with a hand trowel and smooth the interior surfaces. I apply a waterproof sealant to the interior to prevent moisture absorption from the soil. For drainage, drill ¼-inch holes in the bottom corners of the bed to allow excess water to escape.
Fill with 6 inches of gravel at the bottom for drainage, then add 12 inches of quality garden soil. Plant your chosen vegetables or flowers, keeping in mind the 4-foot width allows easy reach to the center. Water thoroughly and mulch to retain moisture—your concrete bed is now ready for a 5+ year lifespan with proper care.
Tips & tricks for building sturdy concrete raised garden bed molds
Building concrete garden bed molds that last requires precision—and I've learned these tricks after seeing too many DIY projects collapse under wet concrete weight. Here's how to avoid common pitfalls while creating forms that hold up for years.
Precision Cutting Pays Off: When tracing your design onto plywood in Step 1, use a sharp utility knife and a straightedge for clean cuts. I mark my cutting lines with a pencil and a 45-degree angle guide for those beveled corners—this creates a professional finish and prevents concrete from pooling in sharp edges. Pro tip: Clamp your plywood to a workbench before cutting to eliminate warping during assembly.
Corner Reinforcement is Non-Negotiable: In Step 2, don't just rely on screws for corner stability. After attaching your 2-inch wood screws, add L-brackets at each corner—these distribute weight evenly and prevent the frame from bowing outward when you pour concrete. For extra-large molds (like 6x12 feet), consider adding diagonal bracing between opposite corners to create a rigid triangle structure that resists pressure.
Release Agent Application Technique: When applying release agent in Step 3, focus on corners and edges first—they're where concrete most often sticks. Use a paint roller for large flat surfaces, but a small brush for tight corners. I find that a light coat followed by a second coat after 10 minutes creates the most reliable barrier. For stubborn areas, apply a thin layer of petroleum jelly after the release agent dries completely.
Curing Schedule Matters More Than You Think: The 48-hour plastic sheeting and 7-day misting in Step 4 aren't just suggestions—they're critical for preventing surface cracks. I've seen concrete beds develop hairline fractures when cured too quickly. For hot climates, mist every 4 hours during the first 3 days to maintain consistent moisture. After removing the sides at 24 hours, prop them up slightly to create a 1-inch gap between the base and sides—this allows air circulation while still protecting the concrete.
Pro Tips for Concrete Raised Garden Bed Molds
- Building concrete garden bed molds that last requires precision—and I've learned these tricks after seeing too many D...
- Precision Cutting Pays Off: When tracing your design onto plywood in Step 1, use a sharp utility knife and a straight...
- Corner Reinforcement is Non-Negotiable: In Step 2, don't just rely on screws for corner stability. After attaching yo...
Frequently asked questions
Got questions about using concrete raised garden bed molds?
You’re not alone! Here are answers to the most common concerns—from setup to troubleshooting—so you can build with confidence.
What’s the best material for DIY concrete molds?
For durability and ease, plywood (½-inch thick) or metal (like steel) are top choices. Plywood is budget-friendly and works well for simple shapes, while metal lasts longer and resists warping. Avoid particleboard—it absorbs moisture and can ruin your mold.
How long does concrete take to cure in a raised bed mold?
Concrete typically needs 7–14 days to fully cure, but it’s strong enough to remove molds after 3–5 days. Check for moisture with a damp cloth—if it doesn’t stick, you’re good to go! Pro tip: Keep the bed moist (but not soggy) for the first 3 days to prevent cracking.
Are there affordable alternatives to pre-made molds?
Use cardboard boxes (for temporary beds), plastic lumber (like T1-11 panels), or even old bathtubs lined with plastic sheeting. Just ensure sides are sturdy enough to hold wet concrete. For custom shapes, foam board (like XPS insulation) is lightweight and reusable.
Why is my concrete cracking after removing the mold?
Cracking often happens from uneven drying or too much water in the mix. To fix it:
- Use a mix with 6–8% cement (e.g., 1 part cement to 4 parts aggregate).
- Vibrate the mold gently to remove air bubbles.
- Cure properly: Cover with plastic and mist daily for the first week.
Can I line the mold with plastic to make cleanup easier?
Yes! Line the mold with heavy-duty plastic sheeting (like 6-mil painter’s plastic) to prevent concrete from sticking. Just secure it tightly—no gaps! Remove the plastic before the concrete fully cures (after 24–48 hours) to avoid peeling. Bonus: Reuse the plastic for future projects!
Wrapping up and next steps
Building your own concrete raised garden bed molds opens up a world of creativity and customization for your gardening space! 🌱 Whether you’re crafting sleek modern designs or rustic, organic shapes, these DIY forms are a game-changer for durability and style.
With the right materials and a little patience, you’ll have a sturdy, long-lasting garden bed that elevates your gardening game.
Ready to get started? Gather your supplies, follow the steps, and let your imagination run wild. Your perfect garden bed awaits—just pour in the concrete and watch your vision take shape! 🛠️✨