
Tools
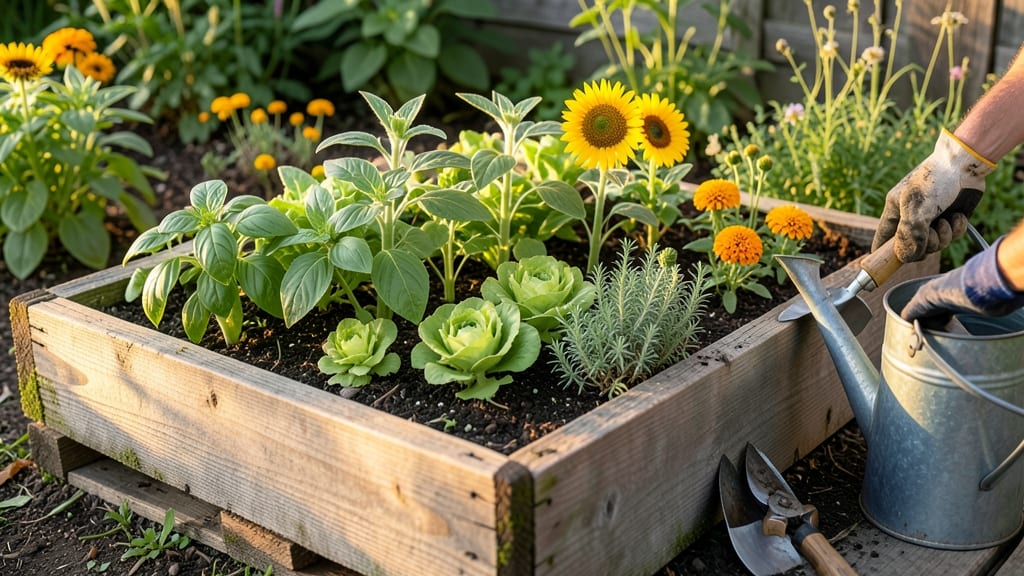
Building a garden bed out of pallets turns free wood into a lock-tight planter that lasts for years—no fancy tools or expensive lumber required. 🌱 I started with a single pallet after seeing how sturdy and versatile they are, and now my backyard has three custom beds that cost almost nothing to create.
The best part? You can customize the shape, size, and even stack them vertically for small spaces.
First, you'll need 4-6 pallets (depending on bed size), some screws or nails, and a drill. Look for heat-treated pallets marked "HT"—they're safe for gardening and won't rot as quickly.
Cut pallets to your desired length (standard 40-inch width works great), then stack them like books and secure the corners with screws. For extra stability, add a base layer of landscape fabric to prevent weeds from creeping up through the gaps.
Once your frame is built, fill it with a 3:1 mix of topsoil and compost—this gives roots room to grow while keeping moisture balanced. Top with mulch to lock in moisture and suppress weeds, then plant your favorites.
My go-to starts with herbs along the edges (they love the contained space) and deep-rooted veggies like tomatoes in the center. The beds stay warmer in spring and cooler in summer, which means healthier plants all season long.
For creative twists, try a two-tiered design by stacking pallets at different heights or add a decorative border with pebbles or mosaic tiles. If space is tight, lean pallets vertically against a fence or wall for a living green screen.
The possibilities are endless—and every bed tells a story of sustainability and creativity. Ready to get started?
📚 In This Guide
- What you need
- Instructions
- Tips and common mistakes
- Wrapping up and next steps
What you need
- ● 2-4 wooden pallets – Choose heat-treated or chemically untreated pallets (look for the HT stamp to avoid toxic chemicals). Standard sizes (40"x48" or 48"x40") work best.
- ● Staple gun + staples – Heavy-duty staples (1/4"–3/8") to secure fabric or liner.
- ● Landscape fabric or pond liner – A 10’x20’ sheet (heavyweight, 6mil+) to prevent soil leakage and weeds.
- ● Outdoor-rated screws or nails – 2.5"–3" deck screws (galvanized or stainless steel) for assembly.
- ○ Wood glue (optional but recommended) – Adds extra reinforcement to joints.
- ● Sandpaper (80–120 grit) – Smooths rough edges and splinters for safety.
- ● Drill/driver – For screwing pallets together.
- ● Hammer or mallet – For driving nails (if using).
- ● Measuring tape – Ensures precise cuts and fits.
- ● Safety gloves + goggles – Protects hands and eyes from splinters/dust.
- ● Staple gun (if not already listed) – For securing the liner.
- ● Level – Keeps your garden bed perfectly even.
- ● Wood stain or paint – For a polished, weather-resistant finish.
- ● Corner braces or metal strapping – Adds extra stability for taller beds.
- ● Drainage holes cover – Mesh or hardware cloth to keep critters out while allowing water flow.
- ● Compost or soil mix – Pre-mixed garden soil saves time!
Step-by-Step instructions for building a pallet garden bed
Here's how to transform sturdy pallets into a lock-tight, long-lasting garden bed that requires zero special tools.
🪴 Step 1: Select and Prepare Your Pallets
Choose heat-treated or weather-resistant pallets (avoid chemically treated ones—look for "HT" stamps). Four standard pallets create a 4-foot by 8-foot bed with 10-inch-high walls. Remove any protruding nails or staples with a hammer and pry bar—smooth edges prevent splinters and make planting easier.
Lay the pallets flat on the ground and arrange them in a rectangle. The deck boards should face outward to create the planting surface. If your pallets have uneven wear, place the most intact boards on the outside edges—these will bear the most stress from soil and plants. Tap them gently together until they form a snug rectangle.
✂️ Step 2: Reinforce the Corners for Lock-Tight Stability
This is where most DIY pallet gardens fail—weak corners lead to collapsing walls. Cut two 1×2-inch lumber pieces (about 2 feet long each) to reinforce the corners. Slide one piece diagonally into each corner, securing it with deck screws (2 inches long) driven through the pallet boards and into the lumber.
For extra strength, add a horizontal 2×4 brace about 6 inches from the top of each long side. Screw it into the pallet boards and the corner braces. Test the stability by gently pressing down on the walls—they should hold firm without wobbling. If they flex, add more screws or additional braces.
💧 Step 3: Line the Bed for Weed Control and Moisture Retention
Lay a thick layer of landscape fabric (at least 3 feet wide) over the pallet base to block weeds and grass. Secure it with staple guns along the edges, tucking it under the pallet boards to prevent slipping. For a drip irrigation-ready bed, add 1/2-inch tubing along the center of the long sides before adding soil.
Cut a cardboard barrier to fit the inner dimensions of the pallet (this prevents soil from falling through the gaps). Place it over the fabric, then add a 2-inch layer of cardboard egg cartons or wood shavings on top. This breaks down slowly, improving soil structure as it decomposes. Water the bed lightly to settle everything before adding soil.
🌱 Step 4: Fill With Soil and Plant
Use a high-quality garden soil mix (avoid pure topsoil—it compacts in raised beds). Fill the pallet to 1 inch below the top edge to prevent spillage when watering. For a 4-foot by 8-foot bed, you’ll need about 1 cubic yard of soil (roughly 27 1-cubic-foot bags). Mix in a slow-release fertilizer (like 10-10-10) at a rate of 1 pound per 100 square feet for balanced nutrition.
Plant your chosen vegetables or flowers, spacing them according to their mature size. Water deeply after planting to encourage root growth. The pallet’s height helps warm the soil faster in spring and protect roots from late-frost dips. Mulch the surface with 2 inches of straw to retain moisture and suppress weeds.
☀️ Step 5: Maintain and Extend the Bed’s Lifespan
Check the pallet’s stability after the first heavy rain—soil weight can cause shifting. If corners loosen, add additional screws or corner braces before the soil dries out. To prevent wood rot, apply a wood sealant to the inner and outer edges of the pallets every 2-3 years, focusing on areas exposed to moisture.
Rotate crops annually to prevent soil depletion and disease buildup. If the pallet bed starts to sag after 3-5 years, reinforce the base with additional 2×4 supports screwed into the ground beneath the corners. With proper care, these beds last 5-7 years—longer than many store-bought planters.
Tips & tricks for building lock-tight pallet garden beds
These practical insights will help you avoid common pitfalls and create a garden bed that stays sturdy through seasons.
Pallet Selection Secret: Look for pallets with the "HT" stamp (heat-treated) rather than "MB" (methyl bromide-treated), which can harm plants. The "HT" stamp indicates they're safe for gardening. I've found that slightly weathered pallets actually work better—they're less likely to warp as quickly as brand-new ones. Pro tip: Arrange the pallets with the most intact boards on the outside edges, where they'll bear the most weight from soil and plants.
Corner Reinforcement Hack: In Step 2, when adding those diagonal 1×2-inch corner braces, pre-drill holes in the pallet boards to prevent splitting. This is especially important for pallets with knots or weak spots. I also recommend using deck screws that are slightly longer than the pallet thickness—this gives you extra bite into the corner braces. Test stability by pressing down firmly on each corner; if it wobbles, add another screw or brace immediately.
Soil Preparation Strategy: For Step 4, don't just use any garden soil—look for a mix specifically formulated for raised beds that includes compost and perlite. The 1-inch gap at the top is critical: it prevents soil from spilling out during watering while still allowing for proper drainage. I've found that adding a 1-inch layer of coarse sand at the bottom (over the landscape fabric) improves drainage even further, especially in clay-heavy soils.
Long-Term Maintenance Insight: That 2-3 year wood sealant application in Step 5 is non-negotiable for longevity. Focus on sealing the inner edges where moisture collects and the bottom boards that sit directly on the ground. I've seen pallet beds last 10+ years with this simple maintenance—just don't skip the sealing! For extra protection, consider adding a layer of roofing felt under the pallets before assembling to prevent moisture wicking from the ground.
Pro Tips for Garden Bed Out Of Pallets
- These practical insights will help you avoid common pitfalls and create a garden bed that stays sturdy through seasons.
- Pallet Selection Secret: Look for pallets with the "HT" stamp (heat-treated) rather than "MB" (methyl bromide-treated...
- Corner Reinforcement Hack: In Step 2, when adding those diagonal 1×2-inch corner braces, pre-drill holes in the palle...
Frequently asked questions
Got questions about building your own pallet garden bed?
You’re not alone! Here are some of the most common concerns—and their easy, practical answers—to help you get started with confidence.
Do I need to treat pallets before using them for a garden bed?
Yes! Untreated pallets (especially those stamped _HT_ for heat-treated) are safe, but chemically treated pallets (marked _MB_ or _CH_) should be avoided for edible gardens. Sand or stain the wood first to remove splinters and prevent soil contamination. If you’re unsure, opt for cedar or redwood pallets—they’re naturally rot-resistant and pesticide-free!
How long does a pallet garden bed last before needing replacement?
With proper care, a well-built pallet bed can last 3–5 years. To extend its life, elevate it slightly off the ground (use cinder blocks or bricks), replace rotted wood annually, and avoid waterlogging. If pallets start sagging or mold appears, it’s time to refresh with new materials—especially in high-moisture areas.
Can I use pallets for raised beds in cold climates?
Pallet beds work great in cold weather, but take extra steps to protect your plants. Bury the bottom layer of pallets partially in the ground for insulation, or add a thick layer of straw or mulch on top. For extreme cold, consider a cloche or row cover during frost. Just ensure proper drainage—no one likes soggy roots in winter!
Are there cheaper alternatives to pallet garden beds?
If pallets aren’t available, try these budget-friendly options:
- Cinder blocks: Stack and fill with soil (add landscape fabric to prevent leaks).
- Bricks or pavers: Build low walls for a sturdy, long-lasting bed.
- Recycled lumber: Check local Habitat for Humanity ReStores for discounted wood.
- Straw bales: Temporary and biodegradable—great for short-term planting!
Why are my plants wilting or dying in a pallet bed?
Wilting often signals drainage issues or nutrient depletion. First, check if water pools at the bottom—add drainage holes if needed. Next, amend the soil with compost or aged manure. If pests (like slugs or ants) are the culprit, surround the bed with diatomaceous earth or copper tape. Overwatering? Let the soil dry slightly between waterings!
Can I reuse pallets for multiple garden beds?
Yes, but with a few precautions. Clean pallets thoroughly between uses (scrub with soapy water and disinfect with a 10% bleach solution). If the wood shows signs of rot or mold, replace those sections. For long-term reuse, reinforce with screws or corner braces to maintain stability. Just don’t reuse pallets for edible gardens if they’ve held chemicals or pesticides!
Wrapping up and next steps
Creating a garden bed out of pallets is a fantastic way to upcycle, save money, and grow your own plants—without breaking the bank or harming the planet! 🌱 With just a few tools and some creativity, you’ve got a sturdy, customizable planter that’s ready for your favorite flowers, veggies, or herbs.
Whether you’re a seasoned gardener or just starting out, this project proves that great things come from repurposing.
Now that you’re equipped with the know-how, roll up your sleeves and start building! 🛠️ Need inspiration? Sketch your dream garden layout, pick your plants, and let your green thumb shine. Happy gardening!