
Flowers
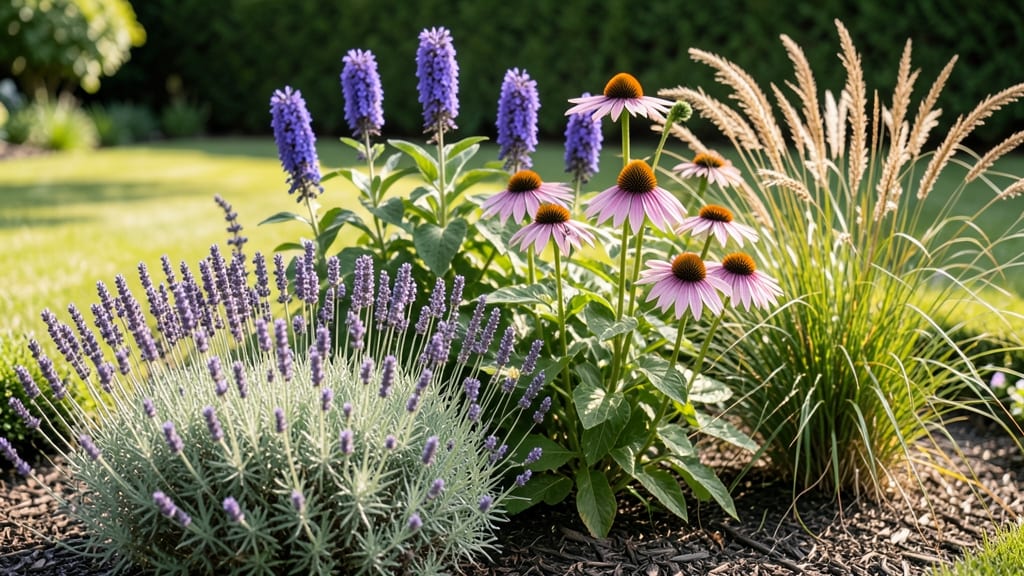
Creating a flower bed border isn't just about framing your plants—it's about crafting the first impression of your garden. 🌿 The right border defines your space, keeps soil contained, and transforms a simple bed into a showstopping feature that feels intentional, not accidental.
I once turned a messy, overgrown edge into a crisp, defined border in just one weekend, and the difference in curb appeal was immediate.
You don’t need fancy materials to make it happen—think bricks, stones, or even low-growing plants like creeping thyme or ornamental grasses. These options are budget-friendly, easy to install, and require minimal upkeep.
The key is matching your border to your garden’s style: rustic stone for a cottage look, sleek pavers for modern spaces, or a natural edge with native plants for a wild, organic feel.
What you’ll end up with is a garden that looks polished and inviting year-round, with borders that protect your plants from erosion and weeds. The right pairing—like lavender alongside slate tiles—creates harmony that makes your flower bed feel like a curated masterpiece, not just a patch of dirt with flowers.
Whether you’re working with a small city plot or a sprawling backyard, these borders adapt to any space. Let’s get started—your garden’s edges deserve this kind of attention!
📚 In This Guide
- What you need
- Instructions
- Tips and common mistakes
- Wrapping up and next steps
What you need
- ● Border edging: Metal or plastic landscape edging (10–20 ft, depending on bed size) – choose flexible or rigid based on design
- ● Concrete edging blocks (perimeter length) – great for durability and clean lines
- ● Soil & amendments: Topsoil (1–2 cubic yards) – for filling gaps and leveling
- ● Compost or organic mulch (1 bag) – boosts soil health and retains moisture
- ● Low-maintenance plants: Perennial ground covers (e.g., creeping thyme, sedum) – 3–5 plants per foot of border
- ● Ornamental grasses (e.g., fountain grass, carex) – 1–2 per 2 sq ft
- ● Dwarf shrubs (e.g., boxwood, lavender) – spaced 12–18 inches apart
- ● Tools: Garden shovel & trowel
- ● Measuring tape & stakes
- ● Wheelbarrow (for soil transport)
- ● Gloves & knee pads (because comfort matters!)
- ● Gravel or decorative stones (for a rustic look)
- ● Mulch fabric (to suppress weeds)
- ● Solar-powered garden lights (for evening ambiance)
- ● Plant markers (to track varieties)
How to create a low-maintenance flower bed border
Here's how to design a border that frames your garden with beauty and resilience.
🌿 Step 1: Define the Border Shape and Size
Measure your existing flower bed and sketch the border shape on graph paper. I like to use a 12-18 inch wide border for visual impact without overwhelming the central plants. Mark the outer edge with wooden stakes or spray paint for accuracy. This width creates a defined transition between lawn and garden while allowing room for smaller border plants to thrive.
Consider the mature size of your border plants—dwarf varieties like creeping thyme or ajuga need only 6-12 inches of space, while larger shrubs like boxwood require 2-3 feet. If your bed has curves, use flexible garden hose to outline the shape before staking. Here's the thing—border edges should feel intentional, not haphazard.
☀️ Step 2: Select Low-Maintenance Border Plants
Choose plants that tolerate your climate's USDA hardiness zone and require minimal water once established. I recommend evergreen options like boxwood (Buxus) or dwarf yew (Taxus) for structure, combined with flowering perennials like lavender (Lavandula) or catmint (Nepeta) for seasonal color. For shadier borders, heuchera (coral bells) or hostas add texture with less upkeep.
Group plants by water needs—place drought-tolerant varieties like sedum on the outer edge where evaporation is highest. Avoid planting anything taller than 2 feet in a narrow border; it'll create a wall effect that blocks views of your flower bed. Watch for plants with spreading habits (like creeping phlox) and give them extra space to prevent crowding.
🪴 Step 3: Prepare the Soil and Plant Correctly
Dig out a 6-inch deep trench along your marked border line, removing turf or weeds. Amend the soil with 2-3 inches of compost mixed into the native soil—this improves drainage and provides nutrients without encouraging weeds. For clay-heavy soil, add sand or perlite to prevent compaction.
Plant evergreens first, spacing them 12-18 inches apart depending on mature size. Dig holes twice as wide as the root ball but only as deep—planting too deep suffocates roots. Backfill with native soil mixed with compost, then water deeply to settle. For perennials, follow the spacing on the plant tag and water immediately after planting to reduce transplant shock.
✂️ Step 4: Mulch and Maintain for Long-Term Beauty
Apply 2-3 inches of organic mulch (like shredded bark or pine needles) to suppress weeds and retain moisture. Keep mulch 2 inches away from plant stems to prevent rot. I schedule a monthly check in the first growing season to remove weeds by hand—this prevents them from establishing roots. Once plants fill in after 1-2 years, maintenance drops to just seasonal pruning.
Prune flowering perennials in late winter or early spring before new growth begins. For evergreens, trim in early spring to shape and remove any dead branches. Here's the trick—prune just enough to maintain the border's clean lines without over-thinning. A well-maintained border should look intentional, not overworked.
⏰ Step 5: Seasonal Care for Year-Round Appeal
In early spring, fertilize border plants with a balanced 10-10-10 formula to encourage lush growth. Water deeply once a week during the first growing season, then taper to every 2 weeks once established. In fall, add a 2-inch layer of fresh mulch to protect roots from winter temperature swings.
Watch for pests like spider mites on evergreens or powdery mildew on perennials—address issues immediately with neem oil or horticultural soap. The goal is to create a border that thrives with minimal intervention. With the right plant pairings, your border will frame your garden elegantly for years with almost no effort.
Tips & tricks for perfect flower bed bordering
Creating a beautiful, low-maintenance border takes more than just planting—it's about thoughtful design and smart plant selection.
Design for Visual Flow: When sketching your border shape in Step 1, consider how it will frame your flower bed. I like to use a 12-18 inch width because it creates a satisfying transition between lawn and garden without overwhelming the central plants. For curved borders, use a flexible garden hose to outline the shape before staking—this helps you visualize the final look before committing to wooden stakes or spray paint.
Plant Pairing Strategy: In Step 2, think about height progression as much as color. Place taller plants like boxwood or dwarf yew toward the back of the border and shorter varieties like creeping thyme or lavender toward the front. This creates natural layers that draw the eye into your garden. I also recommend grouping plants with similar water needs together—this makes irrigation much simpler once established.
Soil Preparation Secret: The 6-inch deep trench in Step 3 isn't just about removing weeds—it's about creating a dedicated space for your border plants. When amending with 2-3 inches of compost, mix it thoroughly with native soil to prevent pockets of rich soil that can encourage weeds. For clay-heavy soils, I've found that adding sand or perlite improves drainage dramatically, preventing root rot in evergreens.
Long-Term Maintenance Hack: The monthly weed checks in Step 4 during the first growing season might seem tedious, but they're worth it. Once your plants fill in after 1-2 years, you'll be glad you took this time to establish a weed-free foundation. I've seen borders that looked perfect for years just from this single investment of time early on—it's the difference between a border that thrives and one that constantly needs attention.
Pro Tips for Flower Bed Bordering
- Creating a beautiful, low-maintenance border takes more than just planting—it's about thoughtful design and smart pla...
- Design for Visual Flow: When sketching your border shape in Step 1, consider how it will frame your flower bed. I lik...
- Plant Pairing Strategy: In Step 2, think about height progression as much as color. Place taller plants like boxwood ...
Frequently asked questions
Got questions about creating a stunning flower bed bordering? You’re not alone! Here are some of the most common queries—and their straightforward answers—to help you design with confidence.
What’s the best time of year to plant flower bed borders?
The ideal time depends on your climate, but spring (after the last frost) and early fall are the most popular. These seasons give plants time to establish roots before extreme weather. For perennials, fall planting is especially beneficial—they’ll settle in before winter. If you’re in a warm zone, winter can also work, but avoid planting when temps are too hot or cold.
Can I use mulch in my flower bed border? If so, how much?
Mulch helps retain moisture, suppress weeds, and regulate soil temperature. For borders, apply a 2–3 inch layer of organic mulch (like shredded bark or straw) around plants, keeping it a few inches away from stems to prevent rot. Replenish annually—it breaks down over time. Avoid piling mulch too high, or it can suffocate roots.
What are some low-maintenance plants for beginners?
Start with hardy, drought-tolerant options like lavender, sedum, or ornamental grasses—they thrive with minimal fuss. For color, try black-eyed Susans, coneflowers, or Russian sage. These plants resist pests, spread slowly, and often bloom for months. Pair them with native species for even less upkeep!
My border plants keep dying—what am I doing wrong?
Common culprits include overwatering, poor drainage, or planting too deep. Check soil moisture (most borders need water only when the top inch is dry), ensure your bed has drainage holes, and plant so the root crown sits just above soil level. If pests or disease strike, isolate affected plants and treat with neem oil or fungicide. Often, the fix is as simple as adjusting sunlight or spacing!
How can I add height and texture to my flower bed border?
Layer plants by height: tall grasses or shrubs (like butterfly bush) in the back, mid-height perennials (e.g., catmint or salvia) in the middle, and low-growing annuals (like sweet alyssum) at the front. Add foliage contrast with variegated plants (e.g., hostas or heuchera) or spiky leaves (like dusty miller). Mixing textures keeps borders dynamic and visually rich!
Wrapping up and next steps
Creating a stunning flower bed bordering doesn’t have to be complicated—just a little planning and the right plant pairings go a long way! 🌸 With low-maintenance options like lavender, boxwood, or ornamental grasses, you can achieve timeless elegance without the hassle.
Whether you’re a seasoned gardener or just starting out, these pairings will bring beauty and harmony to your outdoor space.
Now that you’re inspired, why not take the next step? Sketch out your design, gather your materials, and start transforming your garden into a breathtaking retreat. Your future self (and your neighbors!) will thank you. 🌿