
Size
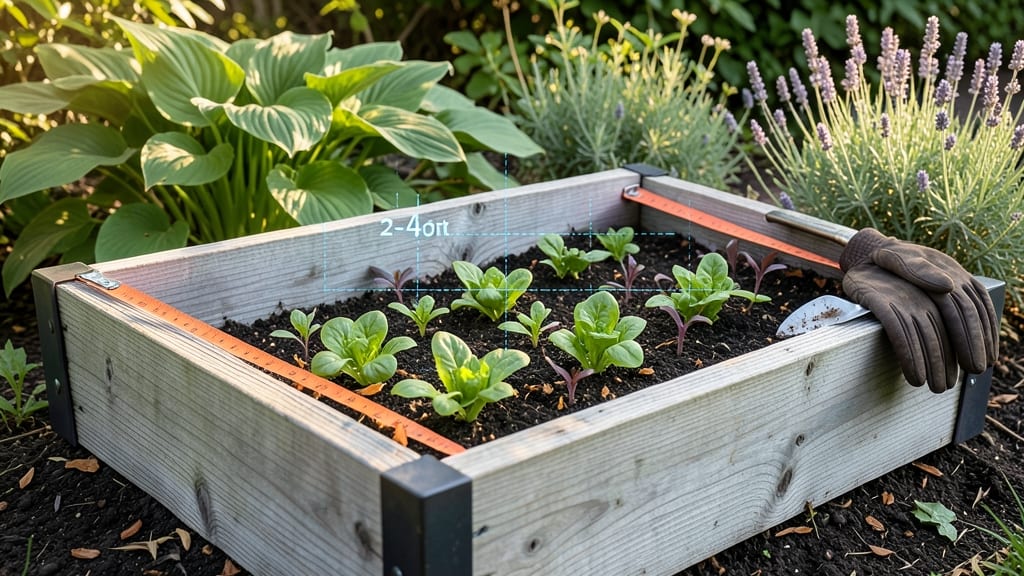
A 4-foot-wide raised bed is the sweet spot for effortless planting and harvesting—no more stretching or kneeling awkwardly. 🌱 I learned this the hard way after wrestling with a 6-foot bed that left me reaching like a contortionist. The right width makes gardening foolproof for everyone, from kids to grandparents.
This magic number comes from ergonomics: you can comfortably reach the center from either side without stepping inside. Add 12-18 inches of depth for healthy root systems, and you’ve got a bed that grows as well as it grows you.
Materials like cedar or composite lumber resist rot while keeping costs reasonable. You’ll plant two rows of most vegetables side-by-side, maximizing space without crowding. Leafy greens and shallow-rooted plants thrive here, while tomatoes and peppers get their own dedicated spots. The soil stays loose and warm, and weeds?
Almost nonexistent. For larger gardens, repeat the 4-foot modules with 3-foot walkways between them. This keeps the garden accessible year-round and lets you rotate crops easily. Now, let’s talk materials—cedar lasts longest, but untreated wood works too if you’re on a budget.
📚 In This Guide
- What you need
- Instructions
- Tips and common mistakes
- Wrapping up and next steps
What you need
- ● Lumber or Raised Bed Framing: Untreated cedar, redwood, or composite lumber (rot-resistant, 2x6 or 2x8 boards, 8–10 ft long).
- ● Quantity: 4–6 boards (depending on bed length and corner design).
- ● Hardware: Galvanized or stainless steel screws (2.5–3 inches long, 12–20 per bed).
- ● Corner braces or L-brackets (4–6, for stability).
- ● Landscape Fabric: 1 roll (to block weeds and retain soil).
- ● Soil Mix: 1–2 cubic yards of high-quality garden soil (or a blend of topsoil, compost, and perlite).
- ● Measuring Tape & Level: For precision in dimensions and alignment.
- ● Drill & Screwdriver: For assembling the frame.
- ○ Staple Gun (optional but handy):** For securing landscape fabric.
- ● Wood stain or sealant (if using untreated wood for longevity).
- ● Drainage holes (pre-drill if using a bottom frame).
- ● Edging stones or pavers (for a polished look).
- ● Post-hole digger (if anchoring the bed to the ground).
Step-by-Step guide to determining raised bed width for optimal gardening
Here's how to design your raised bed for maximum accessibility and plant health.
📏 Step 1: Understand the 4-Foot Rule for Accessibility
The 4-foot width is the gold standard for raised beds because it allows you to reach the center from either side without stepping into the planting area. This prevents soil compaction from foot traffic and makes weeding, harvesting, and maintenance far easier. I always design my beds at 3-4 feet wide—any narrower wastes space, while wider forces me to step inside and damage the soil structure.
If you're working solo, stick to 4 feet max. For shared garden beds, 3 feet gives two people comfortable reach without crowding. Measure from the inside edge of the bed frame to ensure accuracy—most people misjudge by 6-12 inches when eyeballing from the outside.
🪴 Step 2: Calculate Bed Length Based on Your Space
Length is where you gain flexibility, but there are practical limits. A 4-foot wide × 8-foot long bed is ideal because it fits most garden spaces while maximizing growing area. For smaller patios, 4×4 feet works perfectly for herbs and salad greens. The key is avoiding overly long beds—anything over 12 feet becomes difficult to manage alone and risks uneven watering.
I like to orient long beds north-south to ensure even sun exposure across all plants. If your space is limited, consider two 4×4-foot beds instead of one long 4×8-foot bed—you'll have better control over soil conditions and can rotate crops more easily between seasons.
🌱 Step 3: Plan for Plant Spacing Within the Bed
With your dimensions set, arrange plants based on their mature size. Leafy greens (like lettuce or spinach) can be planted 6-8 inches apart, while larger plants (tomatoes, peppers) need 12-18 inches of space. The 4-foot width ensures you can comfortably reach the center to harvest or prune without disturbing neighboring plants.
Here's where many gardeners go wrong: they pack plants too tightly to fit more in the bed. Instead, think vertically—add trellises for vining plants (like cucumbers or beans) to maximize space. I always sketch a simple layout before planting to visualize how the bed will look at maturity.
✂️ Step 4: Adjust for Specialty Plants or Unusual Layouts
Some plants break the 4-foot rule—asparagus crowns, for example, need 18-24 inches apart, while rhubarb spreads aggressively and should have its own dedicated space. In these cases, I create narrower strips (2-3 feet wide) alongside the main bed for these heavy feeders. The same goes for berry bushes—they need ample room but don't require the full 4-foot width.
For container gardening within raised beds, use 1-gallon pots for herbs or small veggies and place them along the edges. This keeps the center open for row crops while giving you the flexibility to move plants if needed. Just ensure the containers have drainage holes to prevent waterlogging.
💧 Step 5: Test Your Design Before Building
Before committing to materials, walk through your space with a 4-foot wide tape measure and visualize the bed's placement. Stand in the center and stretch your arms out—you should be able to reach all sides without leaning. If your reach feels strained, the bed is too wide. If it feels too narrow, consider expanding the length instead.
I also test watering patterns by placing a garden hose with a gentle spray nozzle at the bed's edge and running it for 10 minutes. The water should penetrate evenly to the center without pooling. If it doesn't, adjust your width or add drip irrigation lines along the bed's length for consistent moisture.
Tips & tricks for perfect raised bed dimensions
Here's what I've learned after designing dozens of raised beds—these tricks will help you avoid common mistakes and create a space that works perfectly for your needs.
Reach Test Before Building: Before committing to materials, stand in your garden space with arms outstretched and measure how far you can comfortably reach. The 4-foot width from Step 1 is ideal, but if your shoulders are tight, you might find 3 feet more comfortable. I always test this first—it saves costly adjustments later. The key is ensuring you can reach the center without stepping inside, which compacts soil.
Soil Depth Matters More Than You Think: While width gets all the attention, don't overlook depth. Aim for at least 12 inches of soil—this accommodates root systems while preventing weeds from invading from below. I've seen gardeners use just 6 inches and struggle with stunted plants. For heavy feeders like tomatoes, go deeper to 18 inches if possible. This extra depth also helps retain moisture better during dry spells.
The 12-Foot Length Limit: In Step 2, I mentioned avoiding beds longer than 12 feet, and there's good reason. Beyond this length, watering becomes inconsistent—the far end often stays wet while the near side dries out. I solved this by creating two 4×6-foot beds instead of one 4×12-foot monster. This also makes crop rotation easier between seasons. For watering consistency, consider adding drip irrigation lines along the length if you must go longer.
Container Gardening Shortcuts: The 1-gallon pots mentioned in Step 4 are perfect for herbs, but here's a pro tip: use self-watering containers if you're prone to forgetting watering. These have built-in reservoirs that keep soil moist for up to a week. I place them along the edges of my beds where they get maximum sun exposure. Just remember to empty the reservoir every few weeks to prevent mosquito breeding.
Pro Tips for How Wide Should A Raised Bed Be
- Here's what I've learned after designing dozens of raised beds—these tricks will help you avoid common mistakes and c...
- Reach Test Before Building: Before committing to materials, stand in your garden space with arms outstretched and mea...
- Soil Depth Matters More Than You Think: While width gets all the attention, don't overlook depth. Aim for at least 12...
Frequently asked questions
about raised bed width can help clarify common concerns—whether you're a first-time gardener or refining your setup. Here are the answers to the most pressing questions:Why is 4 feet the "magic number" for raised bed width?
A 4-foot width is ideal because it allows you to reach the center from either side without stepping into the bed (thanks to the average adult's arm span of ~2.5–3 feet). This prevents soil compaction and makes planting, weeding, and harvesting so much easier! Pro tip: If you’re taller or have a longer reach, you can stretch to ~4.5 feet—but avoid exceeding 5 feet to keep maintenance manageable.
Can I build a wider raised bed if I have limited space?
Yes, but with trade-offs! If space is tight, opt for a 2- to 3-foot width—just be prepared to step inside occasionally. For long beds (e.g., 8+ feet), add a 4-foot section with a narrow aisle (18–24 inches) between them. This mimics the 4-foot rule while maximizing square footage. Warning: Avoid widths over 5 feet unless you’re using a drip irrigation system and tools like long-handled weeders.
What if my yard isn’t perfectly level? Can I still use a 4-foot bed?
Uneven ground is no match for a raised bed’s adaptability. Level the base by removing rocks, roots, or debris, then add a layer of landscape fabric or cardboard to suppress weeds. For steep slopes, consider terracing or building beds in staggered rows to follow the contour. Hot tip: Use a rubber mallet to gently tap corners into place if the ground is rocky.
How do I adjust the width for different plants (e.g., tall vs. short)?strong>
Group plants by height and sunlight needs to optimize space:
- Tall plants (e.g., tomatoes, corn, sunflowers): Place them along the north side of the bed to avoid shading shorter crops.
- Medium-height plants (e.g., peppers, bush beans): Center them in the bed for balanced access.
- Low-growing plants (e.g., lettuce, radishes): Edge them along the south side or in front of taller varieties.
For perennial herbs or shrubs, a narrower bed (3 feet) might work better to focus on their root zones. Design hack: Use interplanting (e.g., carrots between lettuce rows) to maximize vertical space in a 4-foot width.
Are there cheaper alternatives to a 4-foot raised bed?
Yes! Skip pre-cut lumber and get creative:
- Cinder blocks or bricks: Stack them into a 4-foot-wide frame (use mortar or landscape screws for stability). Cost: ~$50–$100.
- Straw bales: Arrange 3–4 bales side by side for a temporary, low-cost bed (great for testing layouts!). Cost: ~$20–$40.
- Repurposed materials: Old pallets, corrugated metal, or even wine barrels (for round beds) can work—just ensure they’re untreated and safe for plants.
Budget bonus: Check local Facebook Marketplace or Craigslist for free/cheap wood scraps or raised beds!
Wrapping up and next steps
Choosing the right width for your raised bed—especially sticking to the 4-foot rule—makes gardening so much easier! 🌱 With this size, you’ll avoid overreaching, maximize space, and create a thriving garden that’s both productive and low-maintenance.
Now that you’re armed with the best practices, grab your tools and start building—your future harvest (and back-friendly gardening!) will thank you.
Pro tip: If you’re feeling ambitious, try adding a second bed parallel to the first—double the veggies, double the fun! 💪