
Flowers
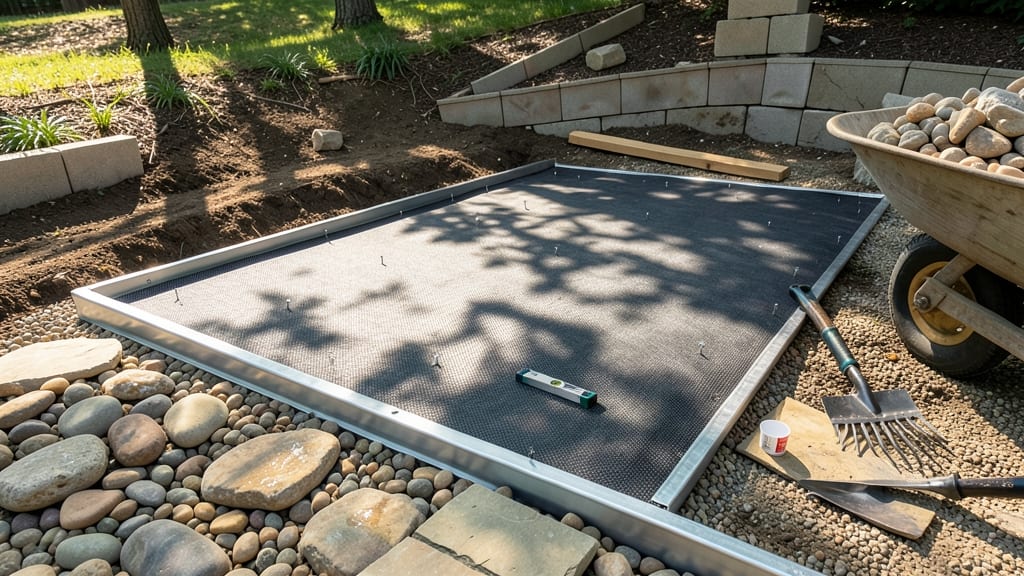
Building a stone flower bed on a slope turns problem areas into perfect showstops—no more muddy runoff or washed-out plants. 🌿 I learned the hard way that skipping proper terracing leads to erosion and lost soil, but the right stones and layers create a stable, beautiful space that actually improves drainage.
The secret lies in layered stone walls that catch soil while letting water flow through. You’ll need flat stones for the base, smaller ones for filling gaps, and landscape fabric to keep weeds out.
Start at the lowest point and work upward, creating 12-18 inch terraces to prevent erosion while giving plants room to thrive.
By the end, you’ll have a sturdy, sloped garden that stays in place through rainstorms, with pockets for moisture-loving plants at the bottom and drought-tolerant varieties on the upper tiers. The stones blend into the landscape while solving the drainage problems that make sloped gardens tricky.
Works for any yard with a grade, from gentle inclines to steep hillsides. Here’s how to make it happen without backbreaking work or costly mistakes.
📚 In This Guide
- What you need
- Instructions
- Tips and common mistakes
- Wrapping up and next steps
What you need
- ● Stone: Flat, durable stones (e.g., flagstone, slate, or river rock) – ~50-100 stones (depending on slope size and terraced height). Aim for 12"-18" in width for stability.
- ● Landscape fabric: 1 roll (10’ x 50’) to prevent weed growth and improve drainage.
- ● Gravel: 1-2 cubic yards of ¾" crushed stone for drainage layers and base stability.
- ● Topsoil: 2-4 cubic yards (depending on depth; 6-12" per terrace is ideal for plants).
- ○ Edging material (optional): Brick, pavers, or metal edging to define terraces neatly.
- ● Shovel and spade (for digging and leveling).
- ● Wheelbarrow (to transport soil, gravel, and stones).
- ● Level (to ensure terraces are even).
- ● String line and stakes (for marking terrace edges).
- ● Rubber mallet (to gently tap stones into place).
- ○ Safety gear: Work gloves, knee pads, and optional dust mask (for gravel).
- ● Measuring tape (to plan terrace widths and spacing).
- ● Retaining wall blocks (if you want a more structured look).
- ● Mulch (to retain moisture and suppress weeds).
- ● Drip irrigation kit (for easy watering on slopes).
- ● Landscape staples (to secure fabric in place).
Step-by-Step instructions for building a stone flower bed on a slope
Here's how to create a stunning terraced design that prevents erosion and ensures perfect drainage.
🪴 Step 1: Assess and Mark Your Slope for Terraces
Start by walking your slope to visualize where terraces will sit naturally. Use a 4-foot level to mark horizontal lines where each terrace will begin—these should be spaced 2-3 feet apart depending on the slope's steepness. I like to use spray paint to mark the lines directly on the ground, as it's visible even through grass.
Measure the width of each terrace at the top—aim for 3-4 feet wide at the top edge. This width gives you enough space for plants while keeping the structure stable. Use stakes and string to outline the shape before digging, so you can adjust before committing to the work.
💧 Step 2: Excavate and Build Retaining Edges
Dig along your marked lines to create a 6-inch deep trench at the top of each terrace. This trench will hold your stones securely. I use flat, irregular stones (about 12-18 inches long) for the edges—larger stones provide better stability. Place them tightly together, slightly angled inward to create a natural lip that holds back soil.
To prevent shifting, dig the trench 2-3 inches deeper than the height of your stones. Fill the trench with crushed gravel (about 2 inches deep) before setting the stones. This drainage layer keeps water from pooling behind the wall. Use a rubber mallet to tap stones into place if needed—just enough to settle them without cracking.
☀️ Step 3: Layer Soil and Drainage for Plant Health
Backfill each terrace with a 3-inch layer of coarse gravel (like #57 stone) to promote drainage. This is critical on slopes—water must flow freely to prevent root rot. Top this with 6 inches of high-quality topsoil, amended with compost (about 1 part compost to 3 parts soil) for fertility.
Smooth the soil surface gently with a rake, creating a slight 1% slope toward the front edge. This encourages water to run off rather than pool. For extra stability, I like to add landscape fabric between the gravel and soil layers—it keeps the drainage layer intact while allowing roots to grow downward.
🌿 Step 4: Plant and Stabilize the Terrace
Choose deep-rooted, erosion-resistant plants like creeping thyme, sedum, or ornamental grasses for the front edge of each terrace. These plants spread quickly and hold soil in place. Plant them 6-12 inches apart, pressing the soil firmly around each root ball to eliminate air pockets.
For the middle and back of the terrace, add perennial flowers with varied heights (like coneflowers, black-eyed Susans, or salvia) to create visual interest. Water deeply after planting, then add 2-3 inches of mulch (like shredded bark) to retain moisture and suppress weeds. Avoid thick mulch layers—they can smother small plants and prevent water from reaching roots.
⏰ Step 5: Maintain and Monitor Over Time
Check your terraces after heavy rains to ensure water is flowing through the gravel layers rather than pooling. If you notice erosion at the edges, add more stones or extend the retaining wall. I also top up the mulch layer annually in early spring to protect soil and keep weeds at bay.
Fertilize lightly in early spring with a slow-release granular fertilizer (about ½ pound per 100 square feet). Over-fertilizing on slopes can lead to nutrient runoff, so follow the package instructions carefully. Prune spent flowers in late fall to keep the bed looking tidy and encourage new growth in spring.
Tips & tricks for perfect stone flower bed terraces
Real talk: Building terraces on a slope is all about balance—between drainage, stability, and aesthetics. Here's how to nail every detail without the common pitfalls.
Terrace Spacing Matters: In Step 1, when marking your terraces, remember that the 2-3 foot spacing between them isn't just arbitrary—it's based on how water naturally flows. Steeper slopes? Go for the 2-foot spacing to create more levels. Gentler slopes can handle the full 3 feet. I've learned this the hard way after watching water carve paths through my first attempt with too-wide spacing.
Stone Selection Strategy: For Step 2's retaining edges, don't just grab any rocks from your yard. Look for stones that are 12-18 inches long with flat sides—these interlock better. I've found that slightly irregular shapes actually work better than perfectly rectangular ones because they nest together naturally. Pro tip: Collect stones during dry weather so they're easier to handle, and store them in a shaded area to prevent moss growth.
Drainage Layer Secret: The 3-inch gravel layer in Step 3 is non-negotiable for slope stability. But here's what nobody tells you—use #57 stone or similar crushed gravel, not pea gravel. The sharp edges create better drainage channels. I also recommend adding a perforated drainage pipe at the bottom of each terrace if your slope is particularly steep—it's an optional but game-changing upgrade that prevents water from backing up behind the stones.
Plant Placement Precision: When planting in Step 4, place your deep-rooted plants like creeping thyme at the very front edge of each terrace. These act as natural soil anchors. I've seen terraces fail when people put taller plants at the front—they don't spread quickly enough to hold soil. For the middle and back, arrange plants in odd-numbered groupings (3, 5, or 7 plants) to create visual interest while maintaining stability. The 6-12 inch spacing might seem wide, but trust me—it prevents overcrowding as plants mature.
Pro Tips for Build A Stone Flower Bed On A Slope
- Real talk: Building terraces on a slope is all about balance—between drainage, stability, and aesthetics. Here's how ...
- Terrace Spacing Matters: In Step 1, when marking your terraces, remember that the 2-3 foot spacing between them isn't...
- Stone Selection Strategy: For Step 2's retaining edges, don't just grab any rocks from your yard. Look for stones tha...
Frequently asked questions
Got questions about tackling a sloped stone flower bed? You’re not alone—here are some of the most common concerns and straightforward answers to help you build with confidence!
What’s the best way to stabilize a slope before building?
Start with retention walls or terracing to prevent erosion. Use stacked stones or poured concrete blocks for structure, then layer landscape fabric under the stones to block weeds and keep soil in place. For steeper slopes, consider gabion baskets filled with rocks for extra support.
When is the best time of year to build a stone flower bed on a slope?
Spring or early fall are ideal—soil is workable, and plants can establish roots before extreme weather. Avoid winter (frozen ground) and peak summer (drought stress). If you’re in a mild climate, fall planting gives roots time to settle before spring blooms!
Can I use recycled or irregularly shaped stones instead of uniform ones?
Irregular stones (like fieldstone or river rocks) add rustic charm and work great for drainage. Just ensure they’re flat on one side for stability. Recycled concrete or brick can also be repurposed—just clean them thoroughly to avoid salt or debris issues.
How do I prevent water from pooling behind the stones?
Angle the stones slightly downhill to encourage runoff, and create drainage gaps between them (about 1–2 inches). Add a gravel base (2–3 inches) under the stones to absorb excess water. For heavy rain, extend a swale (shallow trench) along the base to redirect flow.
What if my slope is too steep for terraces—what are my alternatives?
Try stepping stones or boulder gardens to break the slope into levels naturally. For extreme angles, use geotextile fabric with embedded rocks to create a reinforced slope. Another option: raised beds on stilts or metal frames to mimic terraces without digging.
Do I need heavy machinery to build on a steep slope?
Not necessarily! For small projects, manual tools (shovels, wheelbarrows, and a slope rake) work fine. Rent a skid steer or mini excavator only if moving large volumes of soil or stones. Always prioritize safety—wear gloves and sturdy footwear, and work with a partner if the slope is unstable.
Wrapping up and next steps
Building a stone flower bed on a slope doesn’t just add charm to your garden—it’s a practical way to prevent erosion and create a stunning, functional space for your plants.
With the right materials, a little planning, and some elbow grease, you’ve got a durable, beautiful terraced garden that will thrive for years. 🌿✨
Now that you’re ready to roll up your sleeves, why not take it a step further? Consider adding native plants or drought-resistant flowers to your design for low-maintenance beauty. Happy gardening!