
Tools
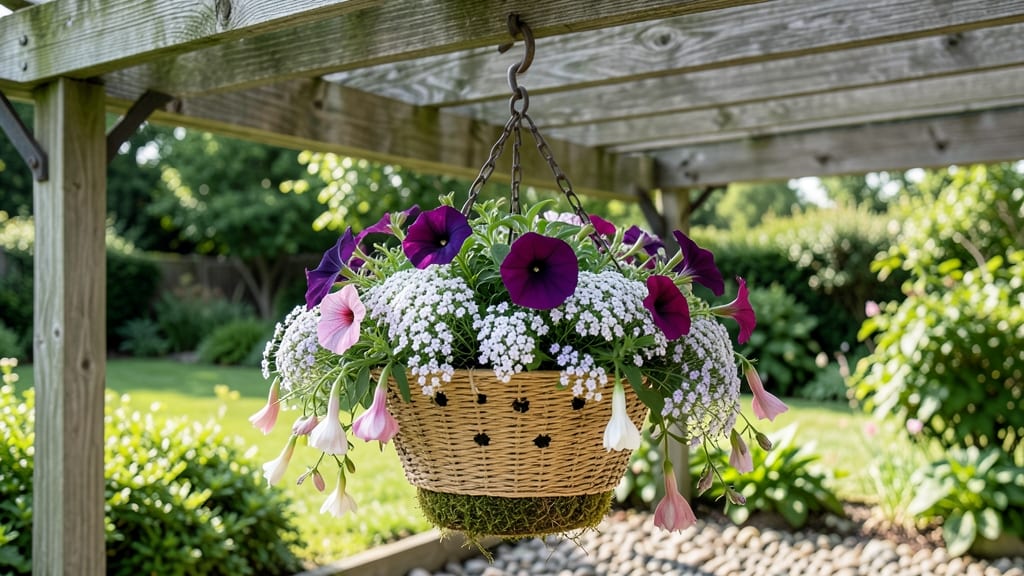
My swinging bed garden transformed my tiny patio into a lush vertical paradise—no extra square footage needed. 🌿 These movable planters let you rotate plants toward sunlight, maximize space, and create a dynamic display that changes with the seasons.
The gentle sway adds movement to any garden, while the elevated design keeps pests at bay and improves air circulation.
You’ll need sturdy hanging hardware (like galvanized chains or heavy-duty straps), weather-resistant containers (fabric grow bags or ceramic pots), and plants that thrive in containers—herbs, trailing flowers, and compact vegetables work beautifully.
The setup takes under an hour, and you can customize heights to fit your space, whether it’s a balcony, deck, or pergola.
Imagine snipping fresh basil for summer pasta or watching petunias spill over the edges like a living waterfall. The results are shockingly lush—plants grow faster in the moving air, and you can swap out seasonal displays without digging.
Even my black thumb can’t kill these setups when the drainage and sunlight are right.
For small spaces, this is the game-changer you’ve been missing. Start with one or two beds to test stability, and soon you’ll wonder how you ever gardened without them. The only challenge? Deciding which plants to grow first—herbs, flowers, or veggies?
📚 In This Guide
- What you need
- Instructions
- Tips and common mistakes
- Wrapping up and next steps
What you need
- ● Swinging bed planter: 1–2 pre-made hanging planters (12"–24" diameter, durable fabric or plastic with drainage holes)
- ● OR DIY materials: heavy-duty canvas or burlap sacks (14"–20" wide, 12"–18" deep)
- ● Mounting hardware: 1–2 sturdy hooks or S-hooks (rated for 15–30 lbs each)
- ● 1 chain or rope (3–6 ft long, weather-resistant, ½"–¾" thickness)
- ● Support structure: 1 tree branch, pergola, or balcony rail (must support 20+ lbs total)
- ● OR 1 freestanding metal stand (if no overhead support)
- ● Soil & drainage: 2–3 gallons lightweight potting mix (with perlite or coconut coir for aeration)
- ○ 1 drainage tray or saucer (optional but recommended for DIY sacks)
- ● Plants: 3–5 compact, trailing, or bushy plants (e.g., strawberries, herbs, ferns, or petunias)
- ● Check plant tags for container-friendly varieties!
- ● Decorative paint or fabric dye (for customizing your planter)
- ● Self-watering wick system (to keep soil moist)
- ● Solar-powered LED string lights (for evening ambiance)
- ● Small wind chimes or ornaments (to add charm)
How to build and plant a swinging bed garden
Here's how to create a functional, space-saving garden that grows more in less room.
🪴 Step 1: Select and Prepare the Hanging Planters
Choose planters with sturdy, rust-resistant hardware—12-18 inches deep works best for most vegetables and herbs. I prefer fabric grow bags because they're lightweight, allow roots to breathe, and won't crack in freezing temps. Make sure the hanging kit can support 20-30 pounds per planter once planted.
If using traditional plastic or ceramic containers, drill additional drainage holes if they don't already have them. Place a 1-inch layer of gravel at the bottom before adding soil to prevent root rot. The key here is proper drainage—swinging beds dry out faster than ground-level planters, so excess water needs an escape route.
☀️ Step 2: Position for Optimal Sunlight and Access
Hang your planters where they'll receive 6-8 hours of direct sunlight daily. South-facing porches or balconies work perfectly, but if you only have east or west exposure, choose sun-loving plants like basil, thyme, or peppers that tolerate partial shade. Avoid placing them where they'll swing into walls or fences when windy.
Position the beds at a comfortable working height—about 30-36 inches from the ground. This prevents back strain when harvesting and makes it easy to reach all areas. I like to space multiple beds 18 inches apart so I can move between them without bumping into plants.
🌱 Step 3: Fill with Lightweight, Well-Draining Soil
Use a high-quality potting mix designed for containers—never garden soil—because it compacts and suffocates roots. I blend mine with 20% perlite or vermiculite to improve drainage. Fill each planter ¾ full, leaving 2-3 inches at the top for watering and plant growth. Press the soil down gently to eliminate air pockets but don't pack it too tightly.
For the 4 planters you're creating, you'll need about 2-3 gallons of soil per container. Water the mix lightly before planting to settle it and remove any air bubbles. The soil should feel moist but not soggy—like a wrung-out sponge. This ensures roots can establish quickly without drowning.
🌿 Step 4: Plant with Spacing in Mind
Choose compact varieties suited for containers—bush beans, cherry tomatoes, lettuce, or herbs like oregano and chives grow beautifully in swinging beds. Space plants according to their mature size: 6 inches apart for small herbs, 12 inches for medium vegetables, and 18 inches for larger plants like tomatoes.
Dig holes twice as wide as the root ball but only as deep as the container's original soil line. Gently remove plants from their nursery pots and tease apart any circling roots. Place each plant in its hole, then backfill with soil, pressing lightly around the base. Water immediately after planting to help settle the roots into place.
💧 Step 5: Water and Maintain Consistently
Water deeply every 2-3 days until the top 2 inches of soil feel dry to the touch. Swinging beds dry out faster than ground-level planters, so check moisture daily during hot weather. I water in the early morning to reduce evaporation and prevent fungal diseases. Avoid wetting the leaves—direct the water stream at the soil instead.
Fertilize every 4-6 weeks with a balanced, water-soluble fertilizer diluted to half strength. The confined space means nutrients deplete quickly, so don't skip this step. You'll notice healthier growth and more abundant harvests if you stay consistent. Watch for signs of nutrient deficiency—yellowing leaves or stunted growth—these are your cues to feed again.
Tips & tricks for perfect swinging bed gardens
Here's what I've learned after years of growing herbs and veggies in these space-saving planters.
Planters Matter: Fabric grow bags are my top pick because they're breathable and won't crack in cold weather, but if you use plastic, add extra drainage holes—they dry out faster than ground beds. I've found that 12-18 inch depth works perfectly for most vegetables and herbs, giving roots enough room while keeping the weight manageable. The key is ensuring your hanging kit supports 20-30 pounds per planter once planted, or you'll end up with a sagging mess.
Sunlight Strategy: That 6-8 hours of sunlight requirement is non-negotiable for most vegetables, but don't stress if your space only gets partial sun. Opt for shade-tolerant herbs like mint or parsley instead of tomatoes. I've positioned my beds on a south-facing balcony where they get morning sun and afternoon shade—this balance prevents scorching while still giving enough light for healthy growth.
Soil Science: The 20% perlite or vermiculite mix in your potting soil is crucial for drainage, but don't overlook the moist but not soggy texture check. I've learned the hard way that compacted soil leads to root rot in these hanging setups. After filling your planters ¾ full, I like to give the soil a final press with my hands to eliminate air pockets—this helps roots establish faster.
Watering Wisdom: Those 2-3 days between waterings can shrink to just 1-2 days in hot weather, so check the top 2 inches of soil daily during summer months. I've found that watering in the early morning makes all the difference—it reduces evaporation and prevents fungal diseases that love damp leaves. A drip irrigation system is a game-changer for these beds, keeping water at the roots where it's needed most.
Pro Tips for Swinging Bed Garden
- Here's what I've learned after years of growing herbs and veggies in these space-saving planters.
- Planters Matter: Fabric grow bags are my top pick because they're breathable and won't crack in cold weather, but if ...
- Sunlight Strategy: That 6-8 hours of sunlight requirement is non-negotiable for most vegetables, but don't stress if ...
Frequently asked questions
Got questions about swinging bed gardens? You're not alone!
Here are the most common queries—plus quick, practical answers—to help you get started with confidence.
What’s the best time of year to hang a swinging bed garden?
For most climates, spring or early summer is ideal—when temperatures are mild, and plants can establish roots before heat stress. In colder regions, wait until after the last frost (check your local frost dates!). If using seasonal plants like pumpkins or winter squash, hang them in late spring for a fall harvest. Pro tip: Morning sunlight helps prevent overheating in summer!
How do I keep my swinging bed from swaying too much in wind?
Wind can turn a gentle swing into a wild ride—not ideal for fragile plants! Secure your bed with heavy-duty straps or chains (not just hooks) and anchor them to a sturdy post or roof beam. For extra stability, add a counterweight (like a bag of soil or rocks) inside the bed. If swaying persists, consider shorter plants or smaller containers to reduce movement.
Can I grow anything in a swinging bed garden, or are there better plants?
Most trailing, vining, or compact plants thrive in swinging beds! Top picks:
- Herbs: Basil, thyme, oregano (love the movement!)
- Vegetables: Cherry tomatoes, peppers, cucumbers, or bush beans
- Flowers: Petunias, nasturtiums, or ivy (great for pollinators!)
- Avoid: Heavy root veggies (like carrots) or sprawling squash (unless pruned).
For root-bound plants, use a soil mix with perlite to prevent compaction.
How do I protect my swinging garden from pests?
Pests love swinging beds too—here’s how to outsmart them:
- Prevention: Use neem oil or companion planting (e.g., marigolds repel aphids).
- Physical barriers: Fine mesh netting for flying insects (like cabbage moths).
- Manual checks: Inspect leaves weekly—early action beats infestations!
- Birds/squirrels: Hang reflective tape or use decoy predators (fake owls work!).
Rotate plants seasonally to disrupt pest cycles.
Can I leave a swinging bed garden out in winter?
It depends! If your bed is weatherproof (made of durable fabric or plastic) and planted with cold-hardy crops (like kale or pansies), you can leave it up. For tender plants, bring the bed indoors or store it in a dry, dark place (like a garage). Drain excess water before storing to prevent mold. In freezing temps, add a lightweight cover to protect roots.
Wrapping up and next steps
A swinging bed garden isn’t just a clever way to maximize space—it’s a playful, functional upgrade for any outdoor or indoor gardener! 🌿 Whether you’re a beginner or a green thumb, these hanging planters bring charm, accessibility, and productivity to your growing space.
Start small with herbs or flowers, then scale up with veggies or cascading vines—your creativity (and harvest) will flourish.
Ready to transform your garden? Grab your supplies, pick a spot, and let your plants swing into action! 🌱✨ Which plants will you grow first?