
How To
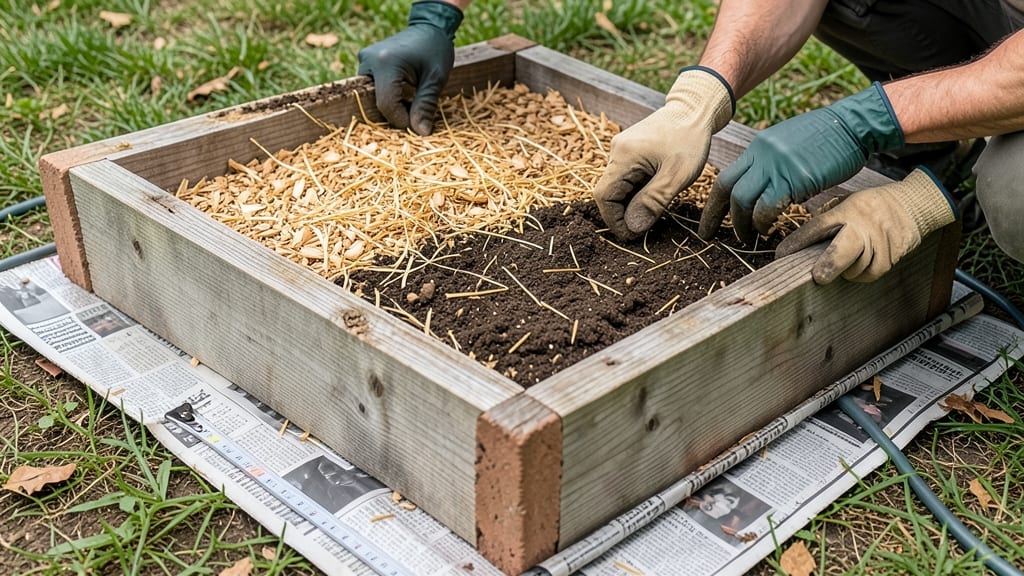
The right raised bed layers can turn your garden into a foolproof root-growing machine—no more guessing about soil quality or plant struggles. 🌱 I’ve built my own beds this way for years, and the difference in plant health is night-and-day compared to just filling a bed with topsoil.
The secret isn’t fancy; it’s science-backed layering that mimics nature’s own soil-building process.
Start with a cardboard barrier to smother weeds and keep roots contained, then add coarse material like branches or straw for drainage. Next comes your nutrient base—compost and aged manure—followed by a mix of garden soil and organic matter.
This stack ensures roots get both air and moisture while feasting on nutrients exactly when they need them.
By the time you’re done, your plants will grow twice as fast and handle drought better than ever. The layers break down over time, improving soil texture and fertility year after year.
Plus, you can tweak the mix based on what you’re growing—heavy feeders like tomatoes need more compost, while light eaters like herbs thrive with less.
This method works in any climate, from cold zones where you’ll add extra mulch to hot areas where moisture retention is key. Just avoid common pitfalls like using fresh wood chips (they steal nitrogen) or skipping the drainage layer—your roots will thank you for it.
📚 In This Guide
- What you need
- Instructions
- Tips and common mistakes
- Wrapping up and next steps
What you need
- ● Raised bed frame: Untreated wood (cedar or redwood recommended), composite lumber, or galvanized metal (minimum 2–4 feet wide for easy access, 4–8 feet long, and 6–12 inches deep). Pro tip: Avoid pressure-treated wood if growing edibles!
- ● Cardboard or landscape fabric: 1–2 sheets (for weed suppression and moisture retention at the base).
- ● Coarse wood chips or straw: 2–3 inches (to block weeds and improve drainage).
- ● Carbon-rich layer: 4–6 inches of dry leaves, straw, or wood chips (breaks down slowly, improving soil structure).
- ● Nitrogen-rich layer: 2–3 inches of well-aged manure, composted grass clippings, or coffee grounds (boosts microbial activity).
- ● Balanced compost: 4–6 inches (homemade or store-bought, rich in nutrients).
- ● Topsoil or potting mix: 4–6 inches (high-quality, organic matter-rich soil for plant roots).
- ○ Optional but helpful: Perlite or vermiculite (1–2 cups) for aeration.
- ● Worm castings (1–2 gallons) for extra microbial boost.
- ● Slow-release fertilizer (following package rates) for long-term growth.
- ● Garden gloves (to protect your hands!).
- ● Shovel or spade (for digging and layering).
- ● Rake (to smooth out layers).
- ● Wheelbarrow or large bucket (for mixing/compost transport).
- ● Measuring tape (to ensure even layers).
- ● Watering can or hose (for settling layers).
- ● A level, sunny spot (6+ hours of sunlight daily for most veggies).
- ● Access to water (raised beds dry out faster!).
- ● Time to layer and let decompose (at least 2–4 weeks before planting).
- ○ Optional: Soil test kit (to check pH/nutrient levels before planting).
Step-by-Step instructions for building a science-backed raised bed soil stack
Here's how I layer a raised bed for deep, aerated roots and nutrient-rich growth.
🪴 Step 1: Start With a Sturdy Base Layer
Begin with 2-3 inches of coarse material at the bottom of your raised bed. I use sticks, branches, or untreated lumber scraps to create airflow and prevent compaction. This layer mimics nature's forest floor, allowing roots to explore downward while keeping moisture balanced.
Break larger branches into 1-2 inch pieces—smaller pieces will decompose faster, but the structure remains intact. Avoid treated lumber or anything that might leach chemicals into your soil. This foundational layer also helps prevent gophers or burrowing pests from tunneling into your bed.
🌱 Step 2: Add Carbon-Rich "Brown" Materials
Next, layer 4-6 inches of carbon sources like cardboard, shredded newspaper, or dry leaves. These materials break down slowly, improving soil structure and adding organic matter. I always remove any glossy paper or tape—those inks won't decompose and can harm plants.
Spread this layer evenly across the bed. You'll see the cardboard flatten slightly as you add weight from above—that's good. This layer prevents weeds from growing up through your bed and creates air pockets for root development. Water it lightly after adding to help settle the materials.
💧 Step 3: Introduce Nitrogen-Rich "Green" Materials
Now add 3-4 inches of nitrogen sources like grass clippings, coffee grounds, or kitchen scraps (vegetable peels, fruit rinds). These materials feed microorganisms that break down the carbon layer below. I mix in a handful of worm castings here for extra microbial activity.
Distribute this layer evenly, avoiding clumps. You'll notice the bed starts to smell fresh and earthy as the materials begin to interact. This is your bed's "digestion" system—without nitrogen, the carbon layer would decompose too slowly, leaving you with a compacted mess.
☀️ Step 4: Top With Finished Compost and Mulch
Finish with 4-6 inches of finished compost—this is where roots will thrive. I use a mix of homemade compost and store-bought compost for balanced nutrients. Spread it evenly, then top with 1-2 inches of straw or wood chips to retain moisture and suppress weeds.
This top layer should feel crumbly and rich. Press it down lightly with your hands—it should hold together but still allow water to penetrate. The mulch layer will also protect against erosion when you water, keeping your bed's structure intact for years.
⏰ Step 5: Water and Let It Settle
Give the entire bed a deep watering until moisture reaches the bottom layer. You'll see water drain through the sides—this confirms good drainage. Let it sit for 24-48 hours before planting, as the materials will continue to break down and settle.
After this waiting period, the bed will feel more compacted and ready for planting. You'll notice the layers have blended slightly—that's perfect. This layered approach creates an ideal environment where roots can grow deep, microbes thrive, and plants access nutrients efficiently.
Tips & tricks for building the perfect raised bed layers
Building a thriving raised bed isn't just about throwing dirt in a box—it's about creating a living ecosystem. Here's what I've learned after years of trial and error to make sure your soil stack works as hard as you do.
Base Layer Structure: The 2-3 inches of coarse material in Step 1 isn't just filler—it's the foundation for everything above. I like to add a few extra larger branches (2-3 inches thick) at the corners to reinforce the bed's structure and prevent sagging over time. Think of it like building a house: the foundation determines how well everything holds up.
Carbon Layer Prep: When adding your 4-6 inches of carbon-rich materials in Step 2, tear the cardboard into 2-3 inch squares before layering. This creates more surface area for decomposition and prevents large sheets from blocking water flow. I also like to soak the cardboard in water for 10 minutes before adding—it helps flatten it and removes any potential toxins from printing inks.
Nitrogen Balance: The 3-4 inches of nitrogen sources in Step 3 is where most beginners go wrong. Too much nitrogen too soon can create anaerobic conditions (smelly, soggy mess). I recommend mixing in your nitrogen sources gradually—start with 2 inches, let it decompose for 24 hours, then add the remaining 1-2 inches. This mimics natural forest floor decomposition and prevents odor issues.
Compost Quality Check: For the final 4-6 inches of finished compost in Step 4, I always do a quick test: squeeze a handful. If it crumbles easily and smells earthy (not like rotting vegetables), it's ready. If it's too wet or sticky, mix in some dry leaves or coconut coir to improve aeration. This top layer is where your plants will spend most of their time, so don't skimp on quality here.
Pro Tips for Raised Bed Layers
- Building a thriving raised bed isn't just about throwing dirt in a box—it's about creating a living ecosystem. Here's...
- Base Layer Structure: The 2-3 inches of coarse material in Step 1 isn't just filler—it's the foundation for everythin...
- Carbon Layer Prep: When adding your 4-6 inches of carbon-rich materials in Step 2, tear the cardboard into 2-3 inch s...
Frequently asked questions
Got questions about building the perfect raised bed layers?
You’re not alone! Here are answers to the most common concerns—from timing to troubleshooting—so you can get growing with confidence.
What’s the best order for raised bed layers?
The science-backed order is: cardboard (optional weed barrier) → carbon-rich material (straw, leaves) → nitrogen-rich material (manure, compost) → topsoil → mulch. This sequence prevents compaction, retains moisture, and feeds roots as they grow. Pro tip: Never mix fresh manure directly with seeds—wait 2–3 months to avoid burning plants!
How long before I can plant after layering?
For root crops (carrots, potatoes), wait 4–6 weeks to let the layers decompose slightly. For fast growers (lettuce, radishes), 1–2 weeks is fine. Test readiness by pressing the top layer—if it feels slightly spongy (not mushy), you’re good to go! Patience pays off for deeper roots.
Can I skip expensive materials like compost?
Use free alternatives like:
- Carbon: Dry leaves, straw, or wood chips (from yard waste)
- Nitrogen: Grass clippings (fresh), coffee grounds, or even untreated wood ash (sparingly)
- Topsoil: Dig up soil from a shady spot in your yard (avoid compacted areas).
How do I prevent pests or rodents from ruining my layers?
Rodents and pests love fresh layers! Prevent them with:
- A hardware cloth barrier (¼-inch mesh) under the bed if burrowing is an issue.
- Deep layers of carbon (straw/leaves) to deter digging.
- Avoid meat scraps or pet waste—stick to plant-based materials.
Can I build raised beds in winter?
Yes! Winter layering is ideal because:
- Frozen ground won’t compact under your weight.
- Decomposition slows, so layers last until spring.
- You avoid summer pests and heat stress.
Wrapping up and next steps
Building the perfect raised bed layers isn’t just about aesthetics—it’s a science-backed way to supercharge your garden’s health and productivity! 🌱 By layering materials strategically, you create an ideal environment for roots to thrive, improve drainage, and boost nutrient retention.
Whether you’re a seasoned gardener or just starting out, this method makes growing easier and more rewarding.
Now that you’re armed with the why and how, it’s time to roll up your sleeves and get planting! Start small—even a single raised bed can make a big difference. Pro tip: Keep a journal to track your layers and plant progress. Happy growing! 🌿